Creating a Project
Unlimited Projects can be created in Hub Planner, there is no restriction. Projects can be created in a number of ways using any of the following methods.
- Hub Planner Web interface, (via Scheduler Sidebar, Scheduler and the Settings Page)
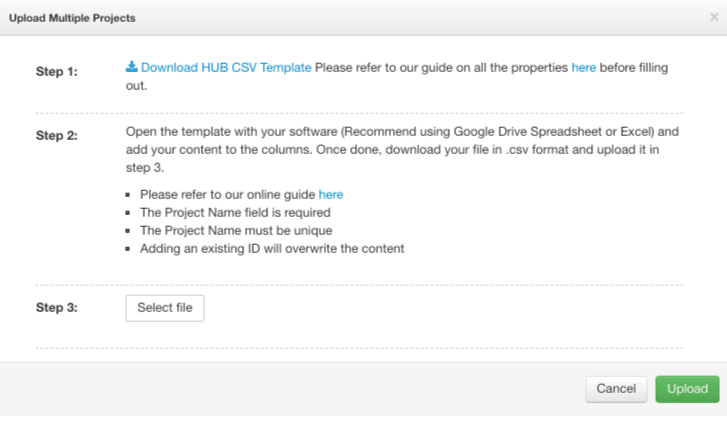
- CSV file Upload for Bulk importing (via Hub Planner Settings Page)
- API Integrations (via Hub Planner Settings Page)
Only Resources with the correct role rights can create and schedule projects. When a project is created it will be available for scheduling and it will appear in your Manage Projects page and within the Scheduler Sidebar.
-
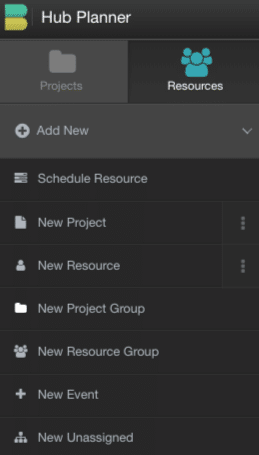
Choose Projects from the left sidebar tabs
-
Click the “Add New” Group
-
Choose “Add New Project”
-
The Project Modal (pop-up) appears where you can add the New Project information
Adding a New Project via Scheduler
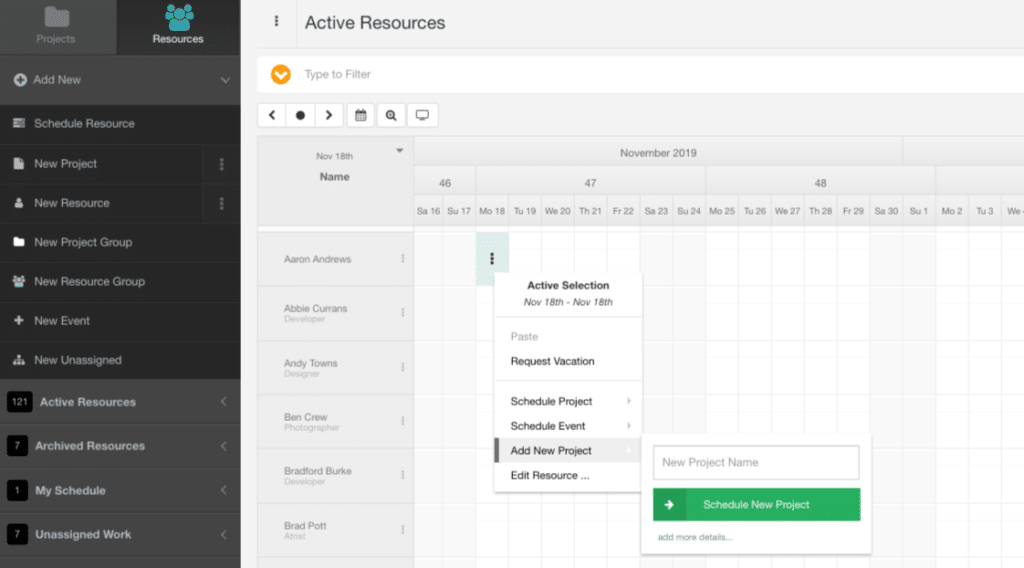
- Click a resource cell in the scheduler which will highlight three-dots
- Click the three-dots which will pop up a modal menu with options.
- Select ‘Add New Project’
- Enter the Project Name
- Click ‘Schedule New Project’
Note you have the option to open the Project Modal by clicking ‘add more details’
Adding a New Project via Settings
Follow the steps below to add a new project from the Settings Menu.
Adding a New Project via CSV file Project Upload
Follow the steps below to add a new project from the Manage Projects Page. Please refer to bulk upload section.
Adding a New Project via the API
You can use the API to create new projects in Hub Planner. Please refer to the API section within Settings.
- Navigate to Settings
- Scroll to Intergrations
- Select API


