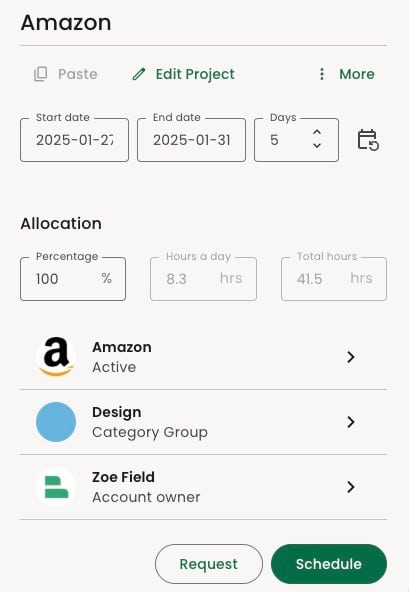
How to schedule a resource and allocation options
Effective resource allocation is critical for project success, requiring careful consideration of personnel availability, skills, and workload distribution. By understanding how to properly match tasks with appropriate resources while accounting for time constraints and dependencies, project managers can optimize productivity and ensure timely deliverables. This article explores best practices for resource allocation, including capacity planning, and schedule management techniques that help maintain balanced workloads across project teams.
Lets explore together the allocation menu and all the different options that will allow you to optimize your scheduling with Hub Planner.
Watch how to schedule a resource to a project ↓
Watch a quick video on how to schedule a resource to a project right here:
Step by step, how to schedule a resource?
Step 1 – Choose the start date.
Step 2 – Add end date or day count?
Once the start date is set you can either:
- Select an end date for the booking.
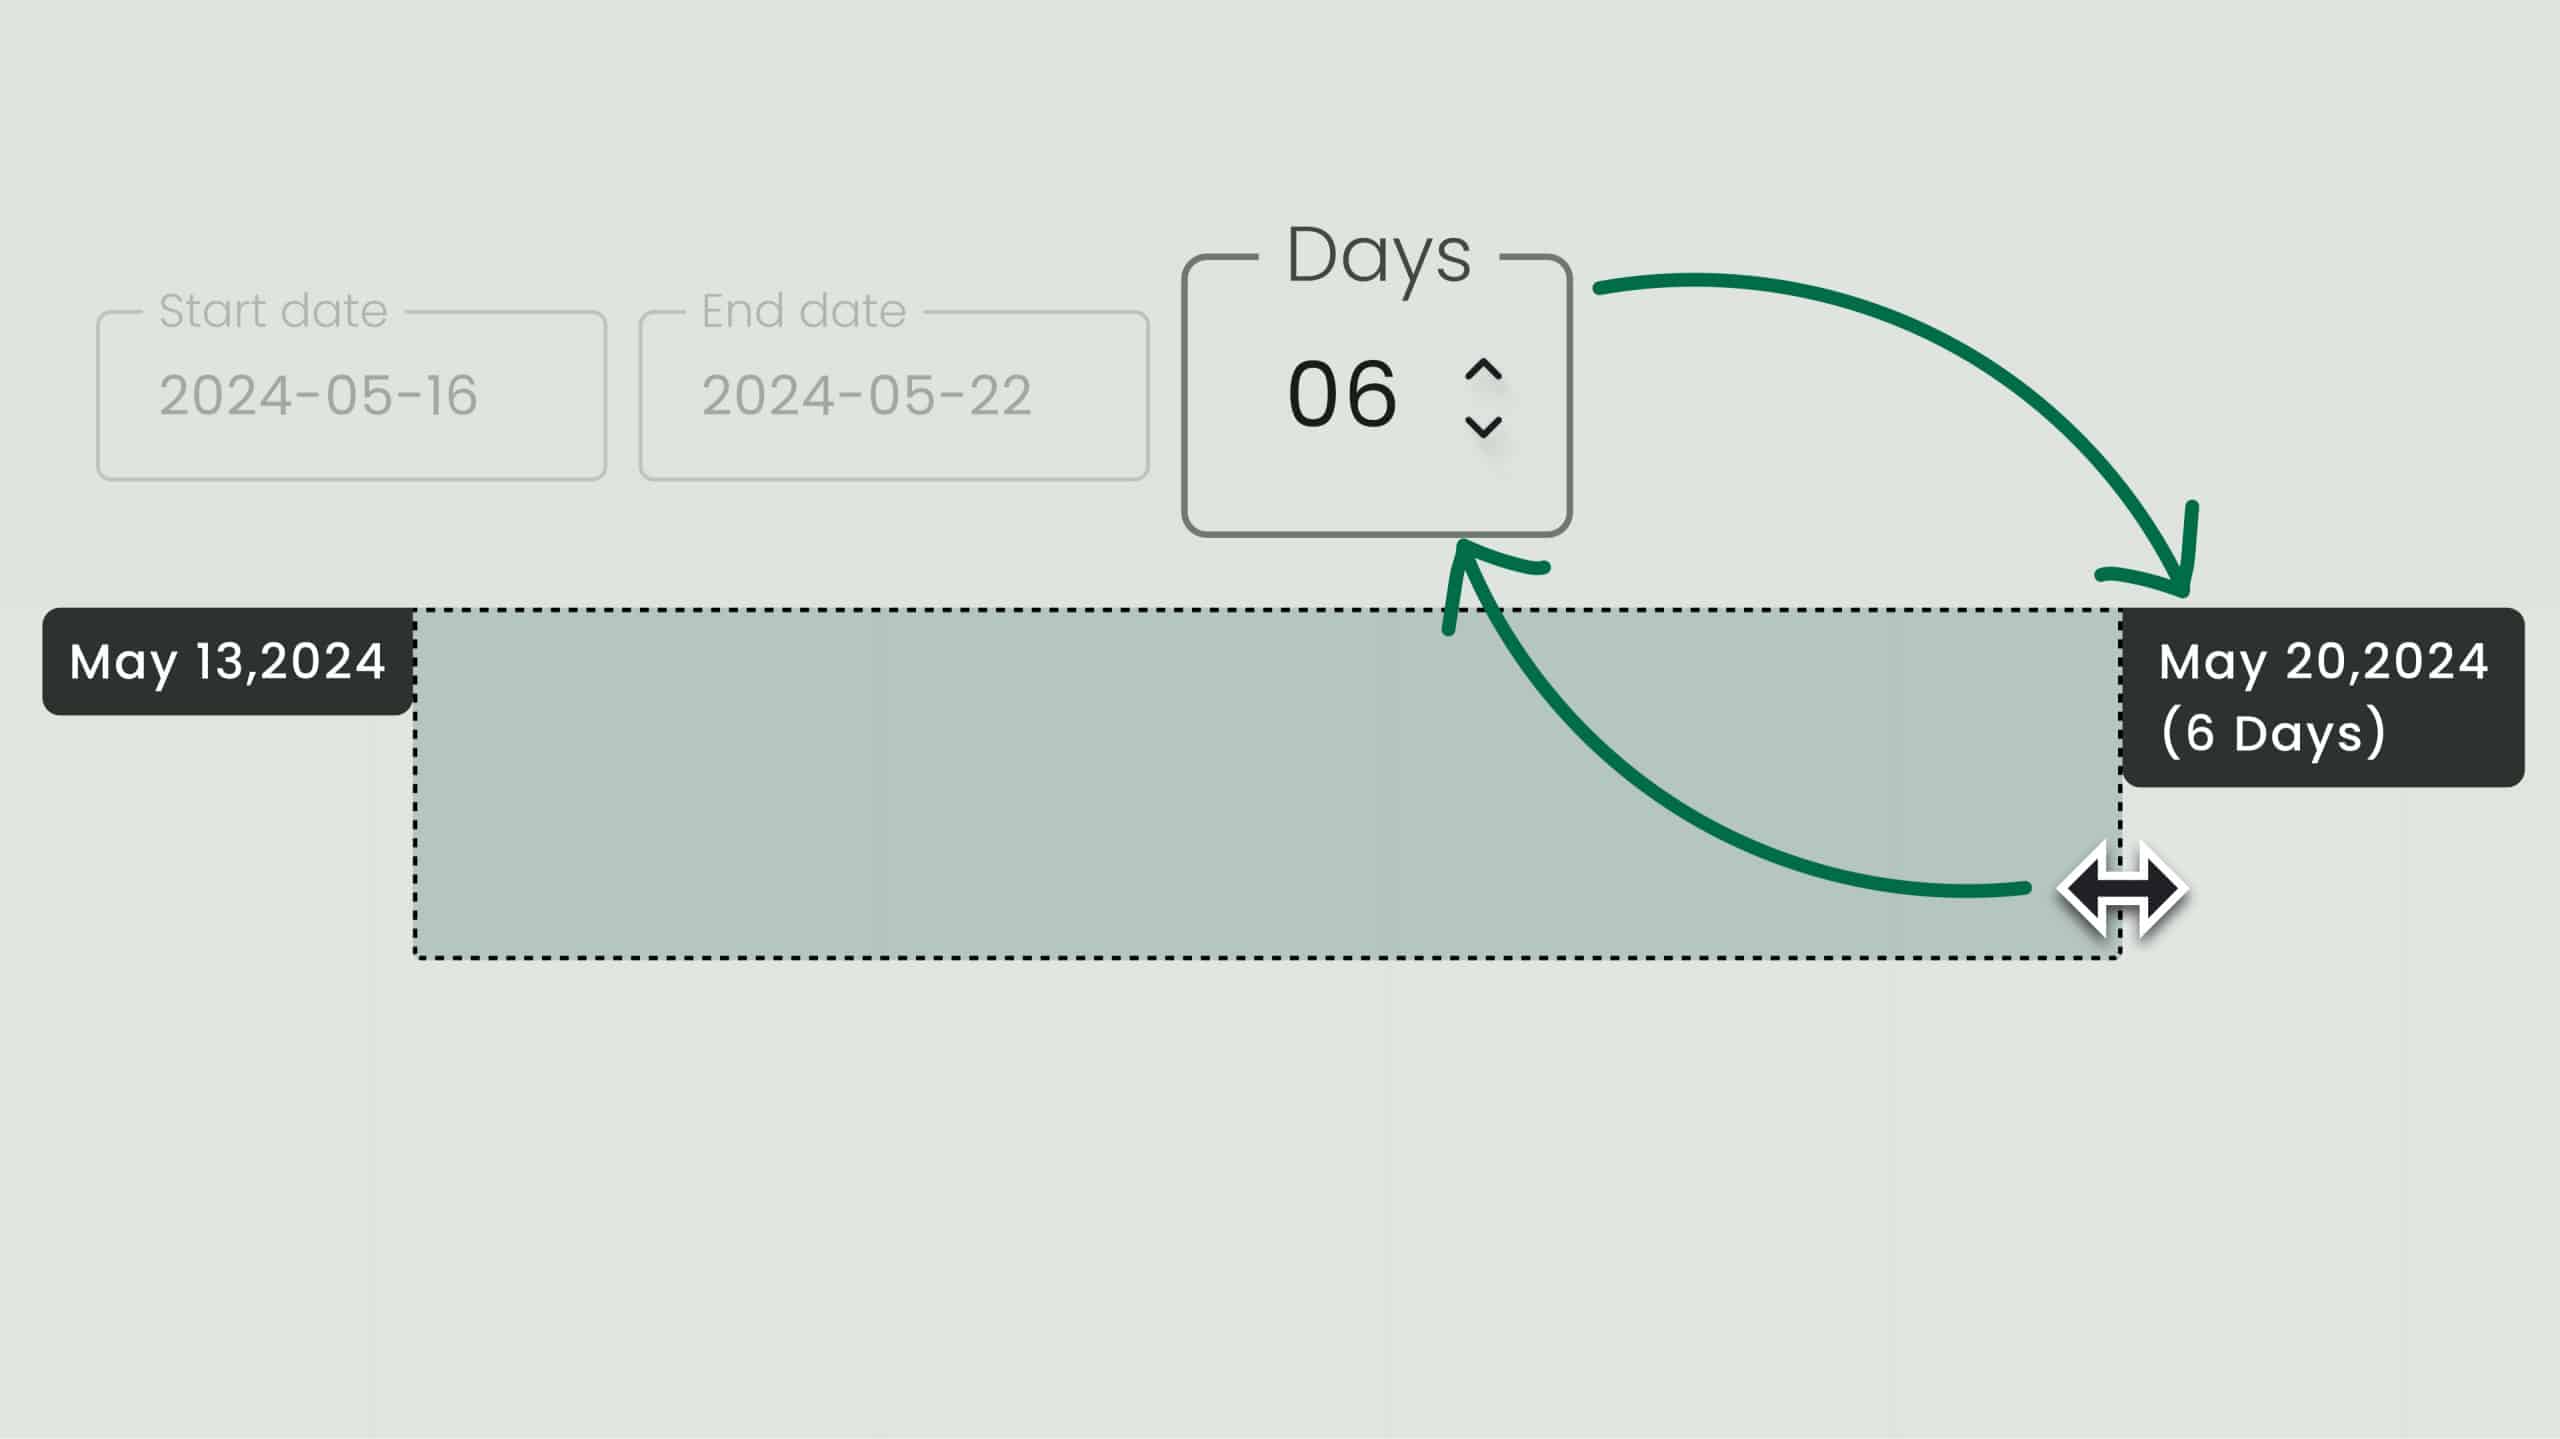
- Opt for the day counter: select the number of business days of the booking length, and the system will calculate the end date for you.
Step 3 – Assign the allocation
After selecting the length of the booking, the next step will be to assign the allocation. Choose from one of the 3 options available.
- Percentage of resource time
- Hours by day
- Total hours
Step 4 – Select project or event
Choose the project or event this booking should be associated with.
Step 5 – Option to update the booking category
Select the booking category that this booking will be related to. There will be a booking category chosen by default. Feel free to adjust from the dropdown of options.
Step 6 – Choose a resource
You may have already done so from the first step, but you can always choose or update the selected resource from the booking menu.
Tips and notes:
Day Counter
Using the day counter will will auto skip a non working day. Consider public holidays, weekends and other days marked as unavailable. Features of the day counter include;
- Create booking duration in days
- Add day count to project budgets
- Drag and drop will update the count of days
Repeat bookings
If you require this booking to be a repeated booking, you can click on the icon and select the recurrence for the booking.
- Select the iteration from predefined periods, or customize it based on your needs.
- Assign when it will end by selecting a specific date/ of a number of occurrences / or indefinite.
Best Practices Tip: This feature can be used when the resource will be working in the same project and task for a long period of time, but you would still like to have separate bookings for specific periods.
Example: Resource A will be working on Project X for 4 consecutive weeks. But instead of having one long booking, you want to have 4 separate bookings (one per week). This feature allows you to create such scenario and will allow you to update them individually if needed.
Allocation options
- Percentage – By default the resource booking is set to your companies global working hours /day which is 100%. If you would like to work in percentages you can easily adjust the resource allocation by clicking and editing the %. The calculations appear in Real Time so you can always reference what impact this has on total hours or hours/day.
- Hours / Day – Probably the most common, this option defaults to full time and you can adjust it easily to set the hours per day for the booking. Similar to the other fields the calculations will update real-time to get you contextual reference to what this means overall.
- Total Hours – Best to see this option as a bucket of hours for a booking. No matter what the start / end date is, once you use this hourly amount it will assign that as the total amount of hours required to complete that booking. The hours/day will be calculated based on this for reference. This option is useful if you need to just set a booking for a particular amount of hours and work out what the end date would be.
The time allocation is also available via the right click menu when selecting a booking from the grid. These three time allocation inputs give you maximum flexibility to book your resources accurately. At Hub Planner we understand that resource time allocation can be tricky, as each business often looks at time differently for their staff.
Booking categories
- Booking categories are powerful feature that allows you to add another layer of details within a project. Here is a related article that provides a deeper look into Booking Categories.
- You can define a default booking category by project. This will save you time and effort when allocating.


