Add, Edit or Remove a Project Phase
Let’s have a look at how to add, edit and delete project phases within Hub Planner. See how to view and access phases within the Scheduler, Modal and the Dashboard.
Add a Phase from the Scheduler
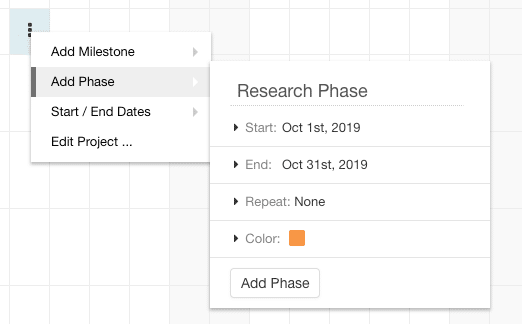
Navigate to Projects Scheduler and select the project you wish to add a phase to. Note; ensure to be in Grouped Rows view. To access Project Grouped Rows view, click on the TV icon and select Group Rows. So, from within the scheduler;
- Click 3 dots for the menu
- Add Phase
- Enter Phase Name
- Select Phase start and End Dates
- Repeat Phase option
- Alter color option
- Click Add Phase
Project Dashboard
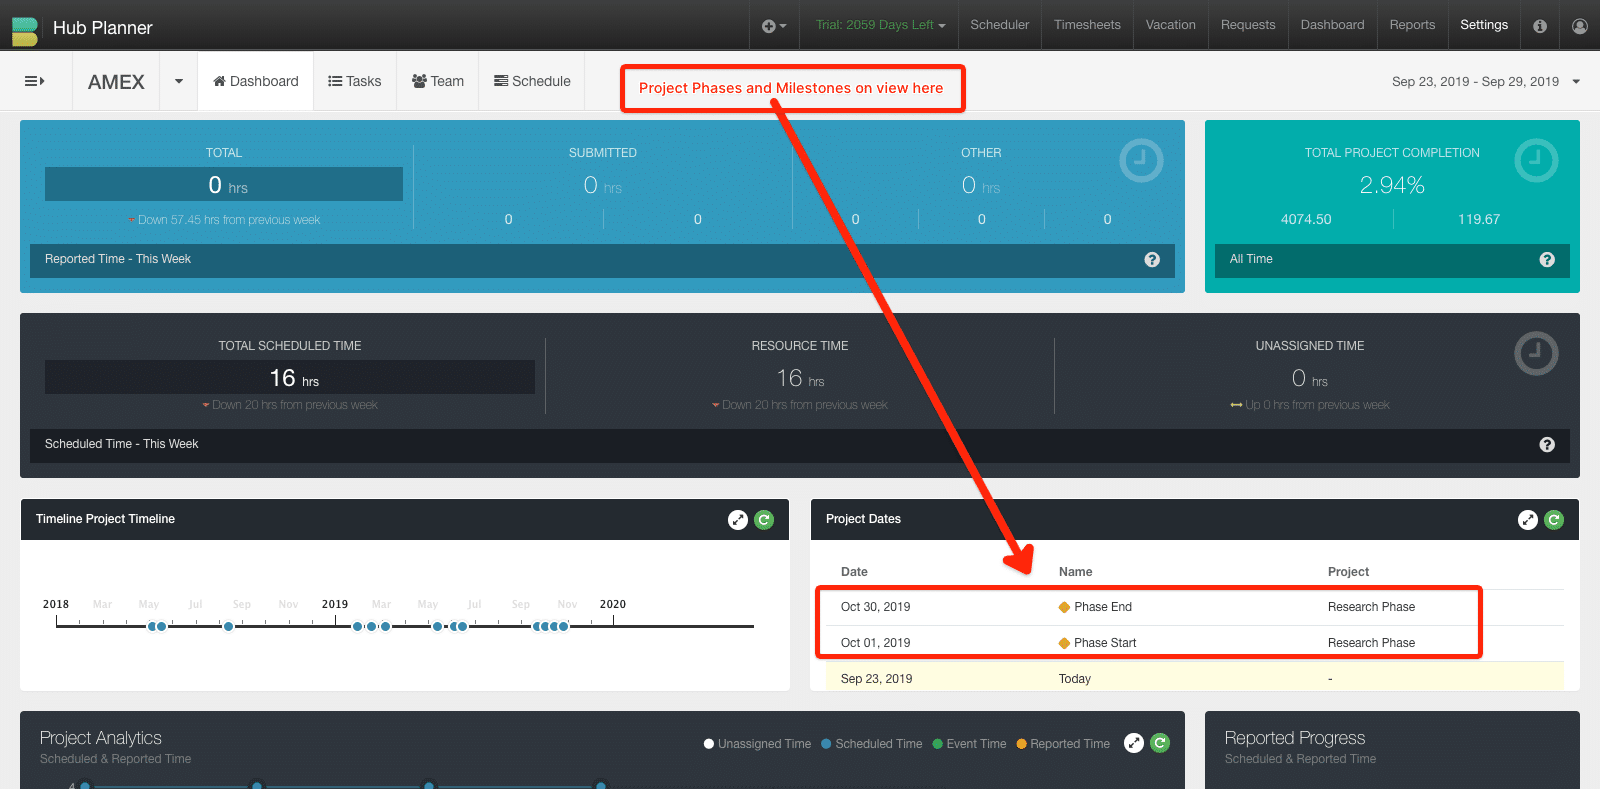
You can also view the phases in a listing format via the Dashboard. All you need to do is to navigate to project dashboard. Phases and Milestones are visible within the Project Dates widget
Adding Phases in Settings
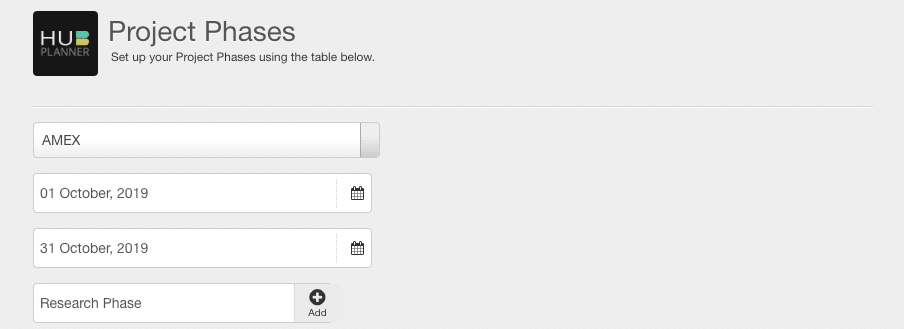
Navigate to Settings
- Account Set Up
- Project Phases
To Add a Phase
- Select Project from Drop Down list with search filter
- Apply Start Date
- Apply End Date
- Type Phase Name
- Click ‘Add’
Adding a Phase from the Project Modal
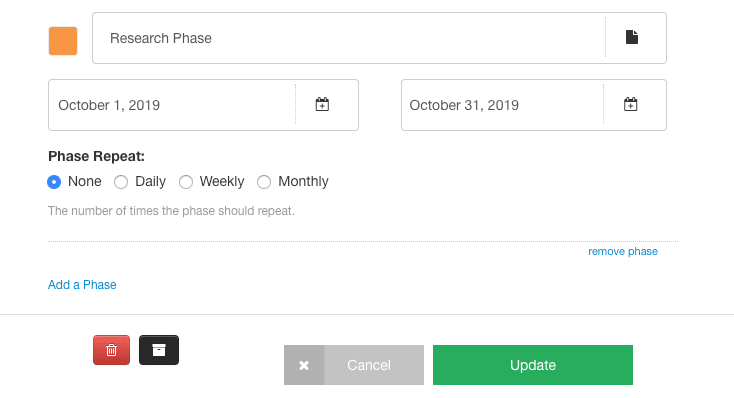
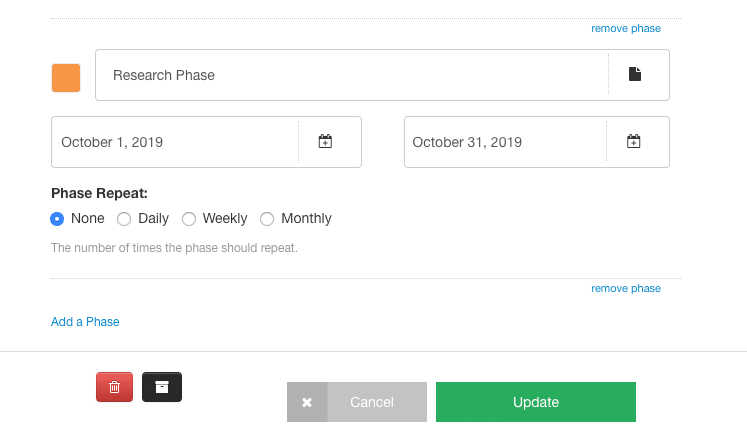
Navigate to the project modal you with to view, edit remove or add Phases. Scroll to the 7th (Seventh) tab Project Phases. Here you can view existing phases from the project
To add phases:
- Scroll towards the bottom of the screen
- Click Add Screen
- Add Phase Title
- Add Phase Dates
- Assign Phase Repeat if required
- Click “Update’
To edit phases simply click on the fields you wish to edit and click update. To remove, simply click ‘remove phase’ and click ‘Update’.
Change, Edit or Delete Phases from the Scheduler
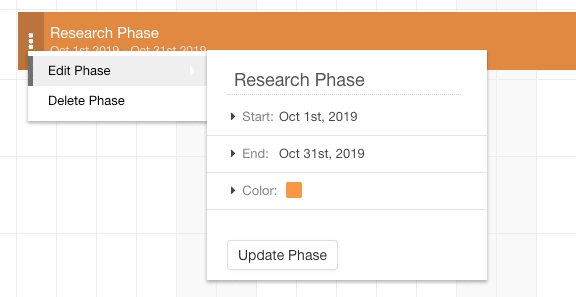
Edit phases by clicking on the 3 Dots to access the menu. You can edit the following
- Name of the Phase
- Start Date
- End Date
- Color
Click “Update Phase’ to save actions.
You can also Delete the phase from this menu too.
Change, Edit or Delete Phases from Settings
Navigate to Settings:
- Account Set Up
- Project Phases
- Navigate to the phase you wish to edit or delete
You can edit the following
- Name of the Phase
- Start Date
- End Date
- Color
To Delete the Phase. Click the ‘X’ at the end of the phase row. You will be asked to confirm deletion.
Remove or Edit Phases from the Project Modal
Navigate to the Project Phases tab (seventh tab). Select the phase you wish to edit or remove.
You can edit the following
- Name of the Phase
- Start Date
- End Date
- Repeating option
- Color
To delete a phase, simply click ‘Remove Phase’ and click ‘Update’.
Further Reading
Have a look at Booking Categories and how they may help your project workflow.
Also a good read is How to Build a Simple Project Pipeline Flow

