How to create a new resource in Hub Planner?
To add a new resource in Hub Planner is super easy. In just a few clicks, you will have your new resource set up, invited and assigned to projects and teams.
Video – how to create a new resource in Hub Planner
Step by step video of how to create a new resource in Hub Planner.
Quick – Add a new resource 
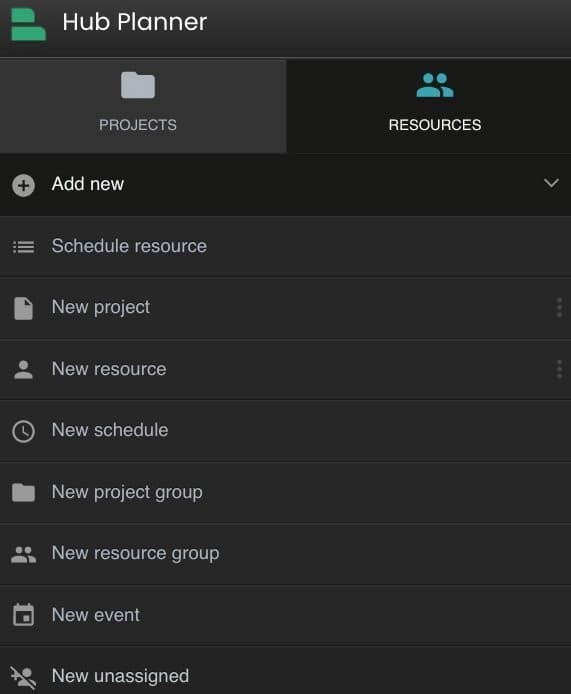
- From the schedule sidebar, click Add New.
- This will open a drop down menu.
- Select ‘Add new resource’ which will open the resource modal.
- Enter the resource name.
- Save.
+ Add a new resource
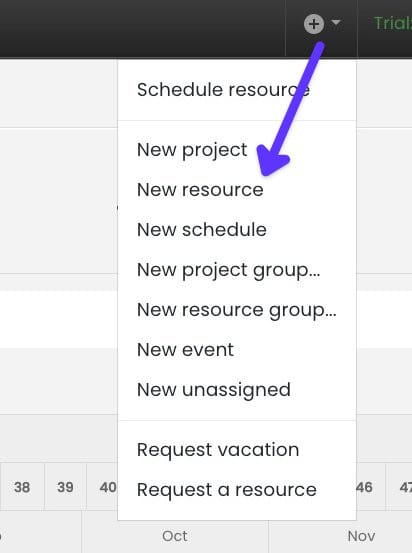
- From the top menu click the + icon.
- This will open a drop down menu.
- Select ‘Add new resource’ which will open the resource modal.
- Enter the resource name.
- Save.
From settings – add a new resource
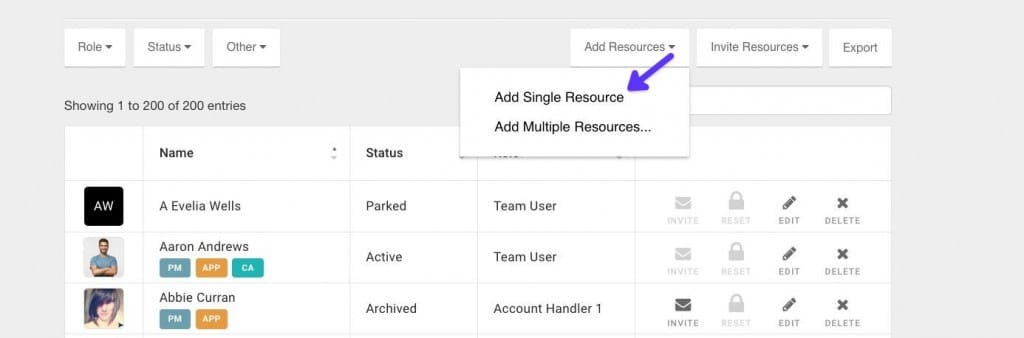
- From settings, along the sidebar navigate to manage.
- Manage resources.
- Add resources.
- This will open a drop down menu.
- Add single resource.
- Select ‘Add new resource’ which will open the resource modal.
- Enter the resource name.
- Save.
Detailed – Add a new resource
Of course we can add much more details to the setting up of a resource too. For example, you might want to set a specific resource status, apply custom fields and invite them to the team. The start process is always the same. It’s what you then put into the resource modal that can take the time.
Add a new resource from the sidebar:
- From the schedule sidebar, click Add New.
- This will open a drop down menu.
- Select ‘Add new resource’ which will open the resource modal.
Create a new resource – resource modal
Within the resource modal is where we will build and store the resource profile. What their user type and status will be, what projects they will work on etc. There are:
Create a new resource – the resource modal
Resource modal – basic information
- Name. Apply the resource name to their profile.
- Email address – option to check the box to auto invite them to your Hub Planner account.
- Role type. Set the users role type. By default it will be set to Team. You can click to change the user to an admin, contractor or account handler. Depending on the role type will determine what the user can see and do within Hub Planner.
- Status. By default, the resource status is set as active. Click to change the status to either archived, non-bookable or parked.
- Tags. Assign a number of resource tags to their profile.
Resource modal – projects and teams.
At this point, you can decide to add the projects and teams the resource should be a part of. Of course you can complete this at a later stage or within the project schedule etc.
- Projects
- Resource groups
Resource modal – rates management.
If you have the billing and budget rates extension installed, you have the opportunity to apply a resource rate to their profile. Assign an external and internal hourly rate which is fully tracked when scheduled to a project.
- External rate
- Internal rate
Resource modal – notes and links.
Here you have an opportunity to add any relevant notes and links about the resource.
- Notes
- Links
Resource modal – custom fields.
If you have Hub Planner’s most popular extension custom fields installed, you can assign your resource fields here. Set up the resource custom fields such as a skills matrix, location builder etc., within the settings. Then assign to the resource directly within their profile. Note, you can opt to make a custom fields mandatory or optional. Now, search the schedule for the resources with the skills you’re looking for or the level of seniority, location etc. Let’s help you match the right people to the right jobs.
Resource modal – availability.
Here, you can set the resource availability as default or customer. You can also assign them to their respective their public holiday calendar.
- Default or custom availability
- Public holiday calendar
Resource modal – vacation.
Have you got the Hub Planner vacation extension installed? Great, you can assign the default or custom allowance to the resource profile here.
- Default or custom vacation