Let’s look at how to Add, Edit, Manage Projects and Project groups within Hub Planner.
Add A New Project from the Scheduler Sidebar
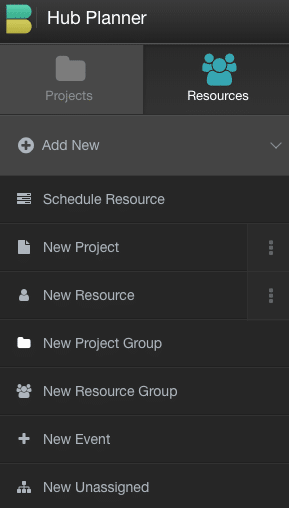
Option 1 – Click ‘New Project’ to open the project modal.
Option 2 – If you click the 3 vertical dots on the New Project tab. You have two options available to you. Bulk add projects or add a single project. Click ‘Add Single Project’ to open the project modal.
Note, you can be in either the Projects or Resources sidebar.
Add A New Project From Settings
How to add a new Project via Settings.
- Navigate to the Settings tab at the top right of the interface.
- Scroll to the second block entitled ‘Manage’.
- Click the first tab ‘Manage Projects’.
- The ‘Manage Projects’ modal appears on screen.
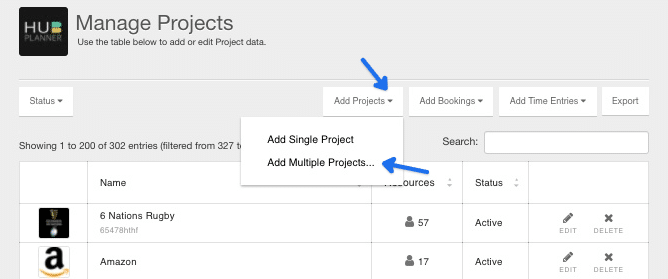
- Navigate to the ‘Add Projects’ for drop down list.
- Select ‘Add Single Project’.
- The Project modal will appear.
Add A New Project From Settings via .CSV Upload
How to add a new Project via Settings .CSV Upload.
- Navigate to the Settings tab at the top right of the interface.
- Scroll to the second block entitled ‘Manage’.
- Click the second tab ‘Manage Projects’.
- The ‘Manage Projects’ modal appears on screen.
- Navigate to the ‘Add New Projects’ drop down list a the the top right hand side of the modal.
- Select ‘Add Multiple Projects’.
- An Upload Modal (pop-up) appears where you can add New Project information via csv. Please refer to bulk upload section
The CSV template which can be downloaded here
When filling the CSV template, there are several options:
- The Project Name is required
- The Project Code is required
- All other fields are optional
- The template has some dummy data included to help
To upload the CSV:
- navigate to ‘Settings’
- choose ‘Manage Projects’ from the left side bar
- click ‘Add New Projects’ on the top right side
- from the options given, select ‘Add Multiple Projects’
- then simply upload your file from the computer
API
You can use the API to create new Projects in Hub Planner. Please refer to the API section.
Editing a Project
Similar to project creation, editing Projects are handled directly in the Projects Modals. Editing a Project can be done via the following methods.
-
Sidebar Menu
-
Scheduler “Projects” Menu
-
Settings (via “Manage Projects”)
-
CSV
-
API
Editing a Project via the Sidebar Menu
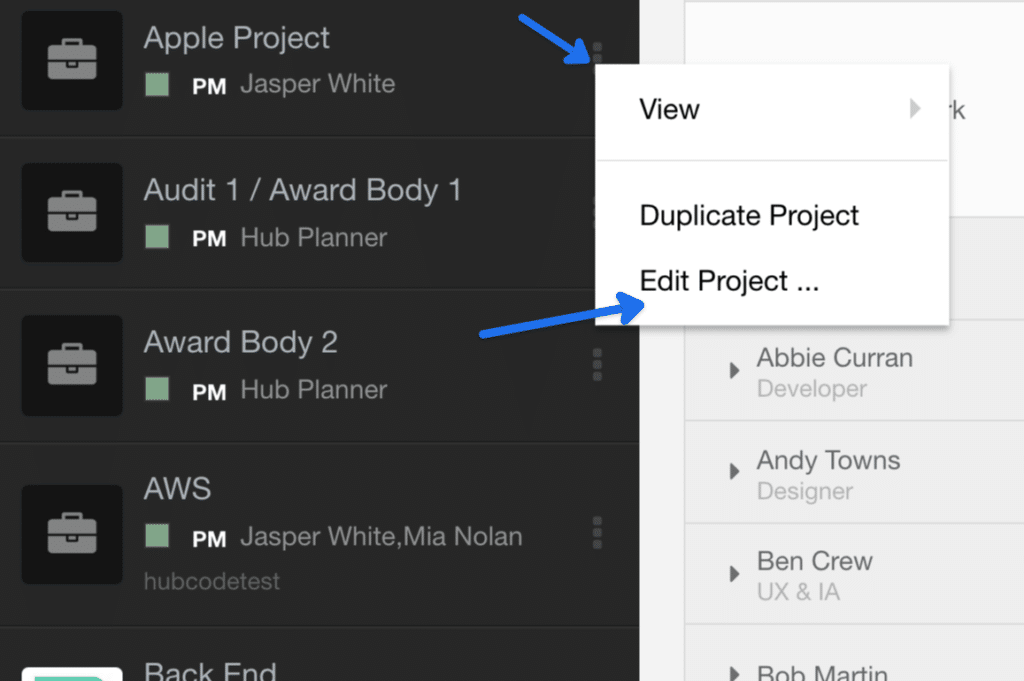
Follow the steps below to edit an existing Project from the Sidebar Menu. Each Project in the sidebar has a small arrow icon to the right of it.
- Click the right arrow button
- Choose ‘Edit Project” from menu
- The Project Modal (pop-up) appears where you can edit Project information
Editing a Projects via the Scheduler Projects Menu
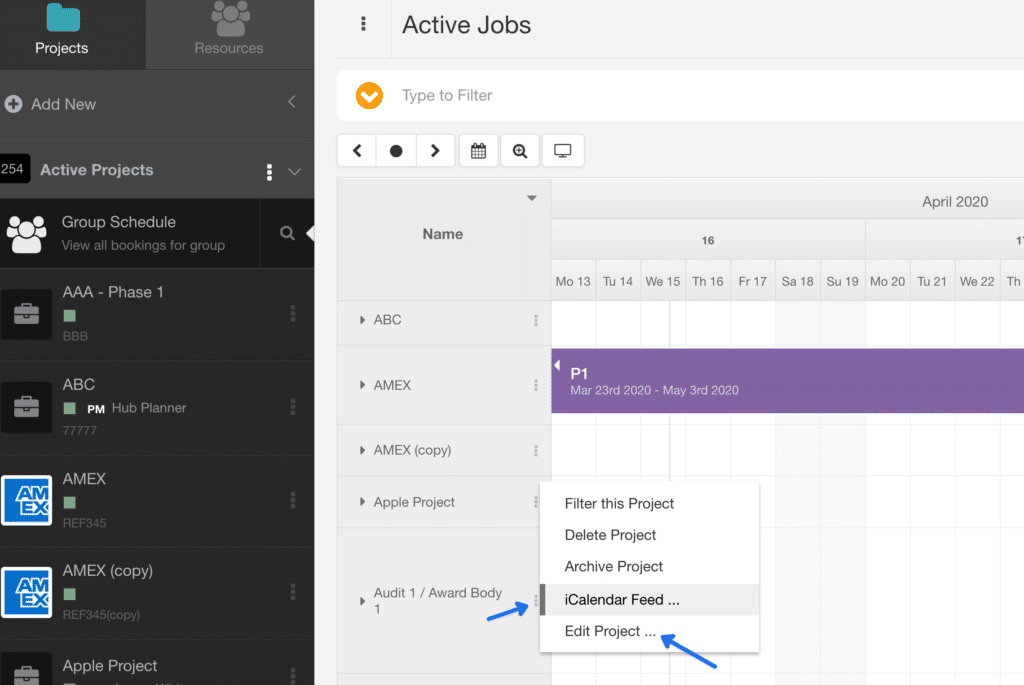
Follow the steps below to edit an existing project from the Scheduler Menu. Beside each Projects on the scheduler is a three dotted sign.
- Click on the three dotted sign next to a selected Project name
- A pop up modal window appears
- Choose ‘Edit Project” from menu
- The Project Modal (pop-up) appears where you can edit Project information
Editing a Project via the Settings (“Manage Projects”)
Follow the steps below to edit an existing Project from the Sidebar Menu.
- Navigate to “Settings” in the top right header
- Scroll along the sidebar to “Manage” section
- Choose “Manage Projects” from the left sidebar
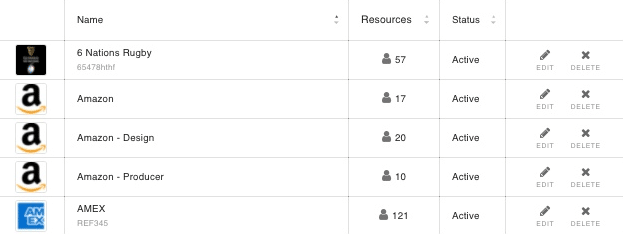
- Click “Edit” of any Projects and the project modal will appear
CSV
Use the csv file to update existing Project information. Please refer to the CSV Guide.
API
Use the API to update existing Project information. Please refer to the API Guide.
Delete Projects
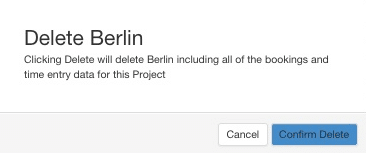
Should you wish to delete a project, you can easily do so from the project modal or within manage projects settings. When you click delete project from settings, a pop up will appear to confirm deletion. Please note, that once you delete a project, this will remove all project data from Hub Planner. Perhaps change the status to Archived in order to retain project data.
Manage Projects
Located within Settings. Manage Projects Page displays an overview of your entire teams of people.
You can access this page from your Settings located in Tools. Then just click ‘Manage Projects’ from the left sidebar.
Use this page to manage your company’s Projects. You can quickly:
- Filter the Project list
- Search by Project Name
- Sort the list
- Add New Projects
- Edit Project
- Delete Project
Clicking a Project will open the edit modal allowing to you to edit their information. Note, deleting a project will remove all data from Hub Planner. Perhaps change the status to Archived in order to retain project data.
Quick Tools
Quick tools are located in each Project menu under the black arrow button. It allows you to:
- Edit Project
- Resend Invite Email
- Send Reset Pass Email
- Delete Project
- Go to Timesheet
- Go to Bookings
Filter, Search & Sort
Located just above the manage Projects grid. Filter / Search / Sort: Use this option to narrow down the Project you are trying to find. There are options to filter the projects by status. Indeed use the search field to locate a project. Also, you can sort the columns too.
Add a New Project Group
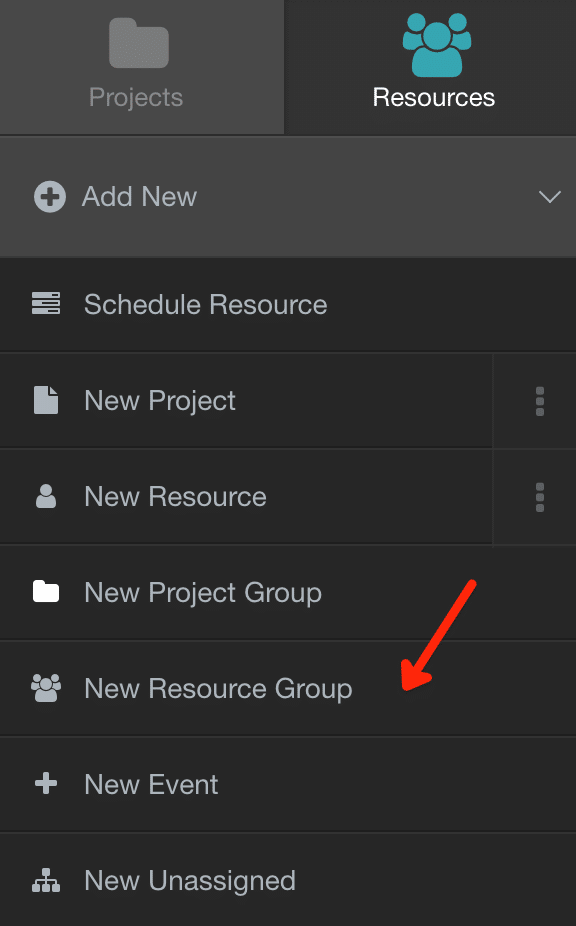
- From the sidebar, click Add New
- Select ‘New Project Group’
- The Project Group Modal appears
- Enter Project Group Name
- Click Manual Group or Smart Group
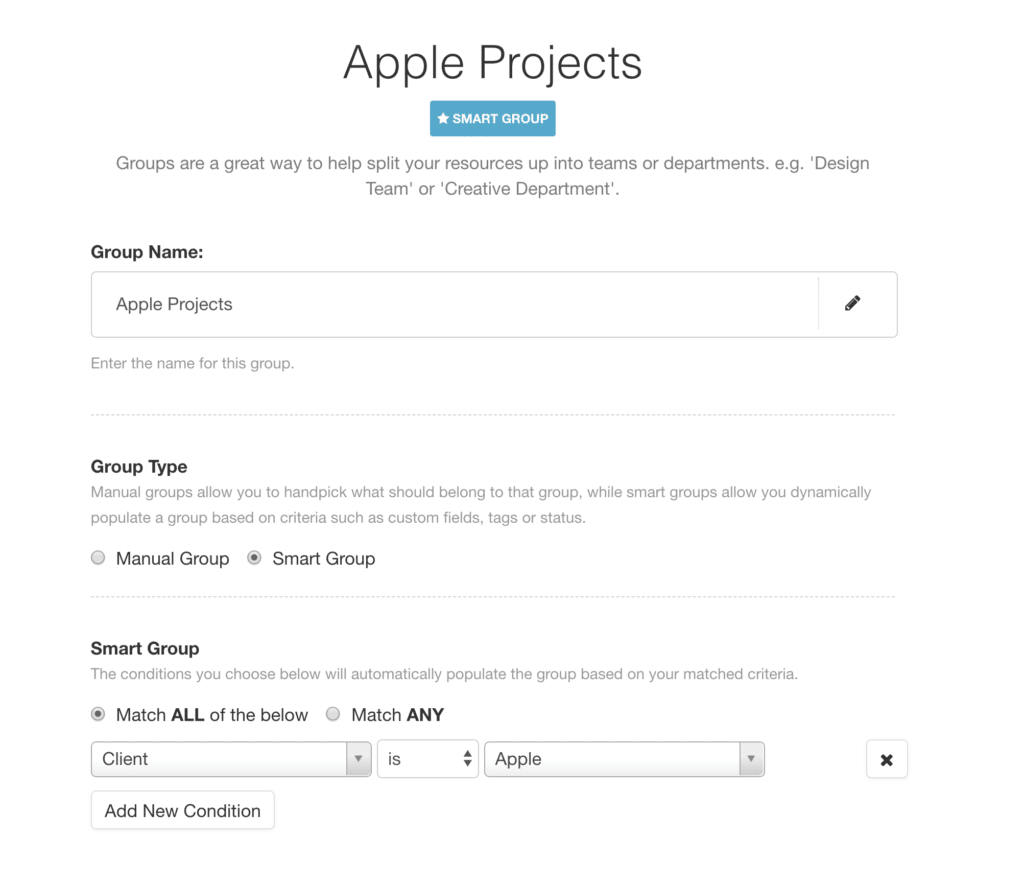
Where Smart Groups adds the Projects automatically based on the set of rules or criteria that you set out. The criteria stems from the Project tags or the Custom Fields set to the Project. So for examples, I want any Projects who have the following tags or conditions to be added to the group i will entitle “Apple Projects’.
- Client = Apple
Edit a Project Group
- To edit a Projects Group, navigate to the Projects Sidebar.
- Scroll to the Projects group in question.
- Click the 3 vertical Dots
- Choose ‘Edit Group’
- The Projects Group Modal appears.
- Edit required details
- Click Save
Delete a Project Group
- To delete a Projects Group, navigate to the Projects Sidebar.
- Scroll to the Projects group in question.
- Click the 3 vertical Dots
- Choose ‘Delete Group’
- A popup appears.
- Click Cancel or Confirm
Add a project to a Project Group
It will depend whether you have set the group up as a manual or smart group. Smart Groups meaning that the Projects are automatically added based on a set of conditions you have applied. Please refer to Smart Groups for instructions.
For a Manual Group.
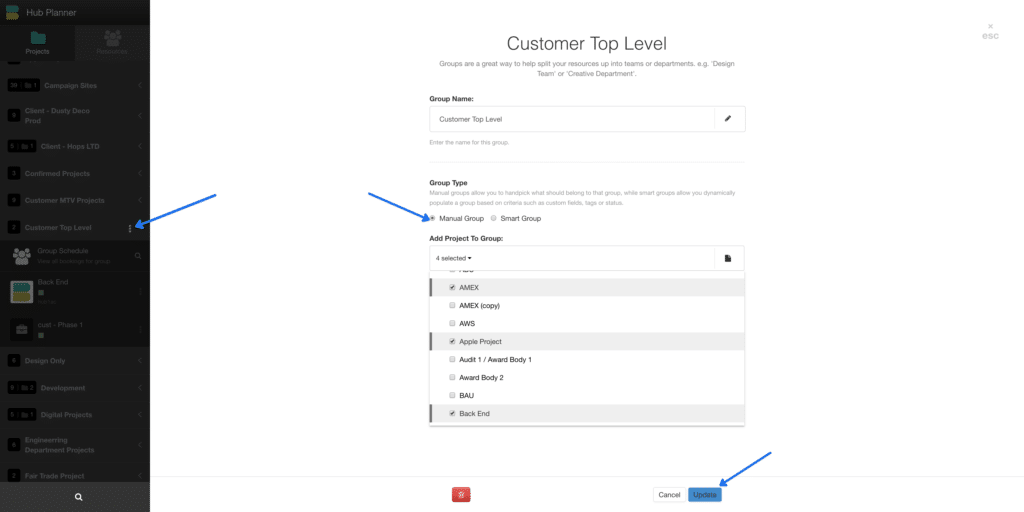
- To add a Project to a Project Group, navigate to the Project Sidebar.
- Scroll to the Project group in question.
- Click the 3 vertical Dots
- Choose ‘Edit Group’
- A popup appears.
- Click the dropdown list under the heading ‘Add Projects to Group’
- From the drop down list locate the Project you wish to add
- Tick the adjacent box to the Project name. (it is ticked blue when added)
- The last step is to click ‘Update’ at the bottom right hand corner to update the Project group.
To remove a Project from a Project Group.
To remove a Project from the group, simply follow the same steps above. Remove the Project from the drop down list.
- To add a Project to a Project Group, navigate to the Project Sidebar.
- Scroll to the Project group in question.
- Click the 3 vertical Dots
- Choose ‘Edit Group’
- A popup appears.
- Click the dropdown list under the heading ‘Add Projects to Group’
- From the drop down list locate the Project you wish to remove
- Untick the adjacent box to the Project name.
- The last step is to click ‘Update’ at the bottom right hand corner to update the Project group.

