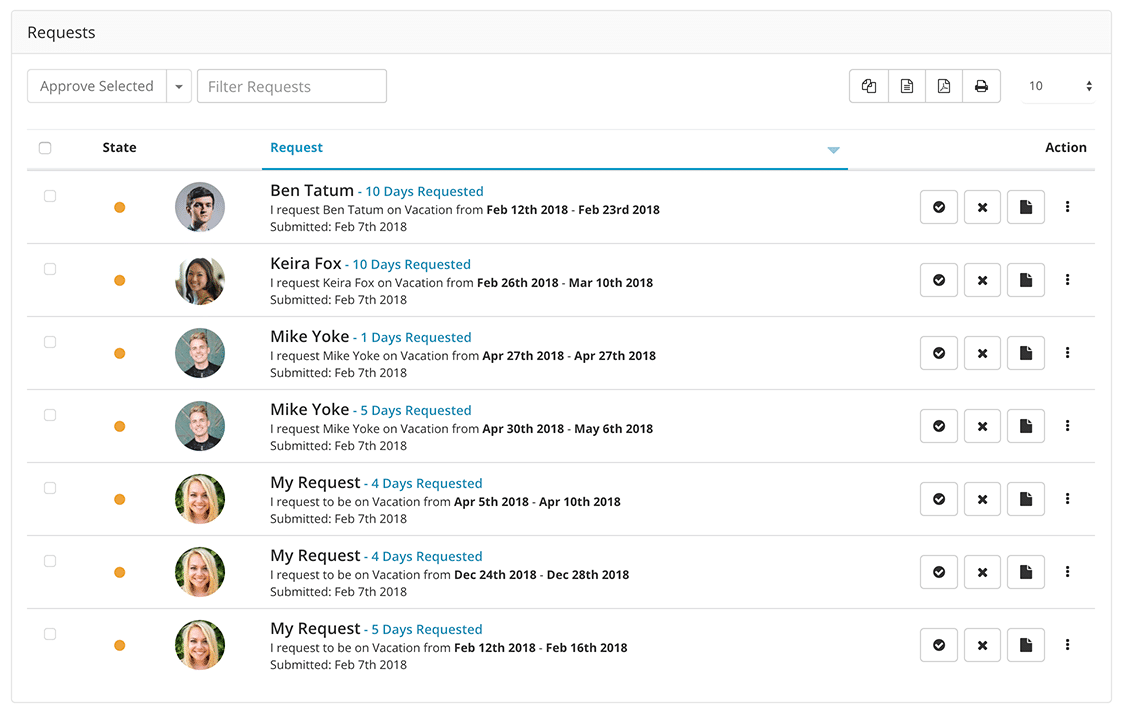
How to Approve or Reject Resource Requests?
- Navigate to the Dashboard. Scroll to the Request Table
- Locate the request you wish to approve or reject.
- Navigate to the scheduler and identify the corresponding request. Make a decision if the request is ok to Approve or Reject.
- Navigate back to the Request Table
- Click on one of the 5 options adjacent to the request.
- Approve
- Reject
- Approve with a note
- Reject with a note
- Edit request
- Delete Request.
Can I be notified for all Resource Requests?
Yes, there are three ways in which you will be notified should you have all the relevant features installed.
- Dashboard. Your Requests Dashboard will update with the new pending request.
- The Scheduler will update with the new request. The booking will be highlighted with the word REQUESTED
- Email Notification. All parties will be notified by email of the new request and of all subsequent decisions. Ie. If the request is approved or rejected.

Will I be notified if my request is approved?
Yes, there are three ways in which you will be notified should you have all the relevant features installed.
- Dashboard. Your Vacation and / or Requests Dashboard will update with the new approved request.
- The Scheduler will update with the new project booking or vacation approval.
- Email Notification. All parties will be notified by email of the new request and of all subsequent decisions. Ie. If the request is approved or rejected
Will I be notified if my request is rejected?
Yes, working the same way as the above. You will be notified in potentially three ways, should you have all the relevant features installed.
- Dashboard. Your Vacation and / or Requests Dashboard will update with the new status state of rejected.
- The Scheduler will update in so far as the requested booking will be removed from the scheduler.
- Email Notification. An email will be sent informing you that the request has been rejected.
Will I be notified if my request is edited?
Yes, working the same way as the above. You will be notified in potentially three ways, should you have all the relevant features installed.
- Email Notification. An email will be sent informing you that the request has been edited.
- Dashboard. Your Vacation and/or Requests Dashboard will still show as pending, but will reflect any changes that were made.
- Scheduler. The scheduler will update in so far as the requested booking will now reflect any changes that have been made.
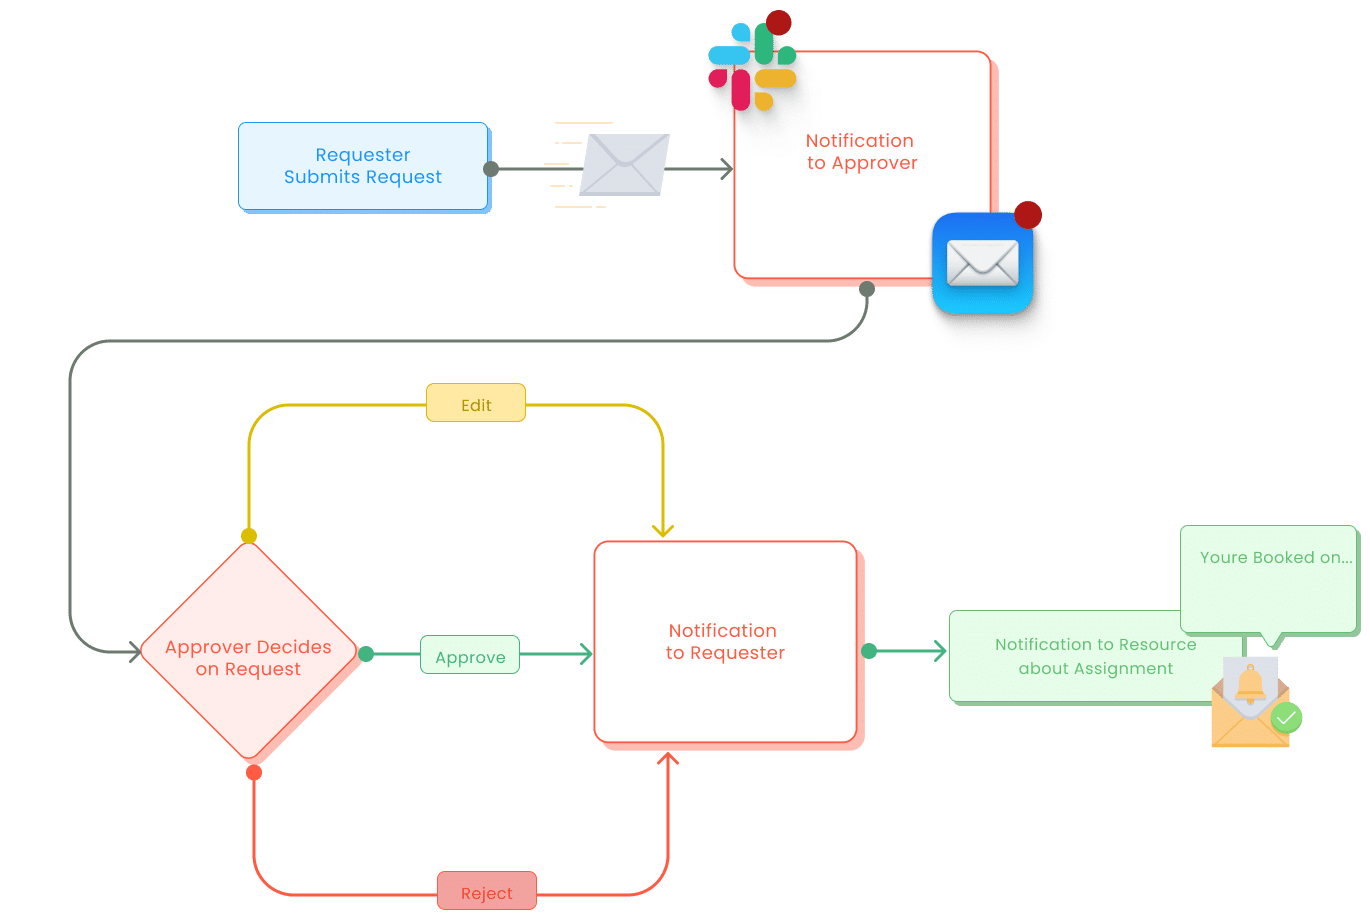
What’s the request & approval notification workflow?
See below framework of how the request and approval workflow of notifications will shape up.
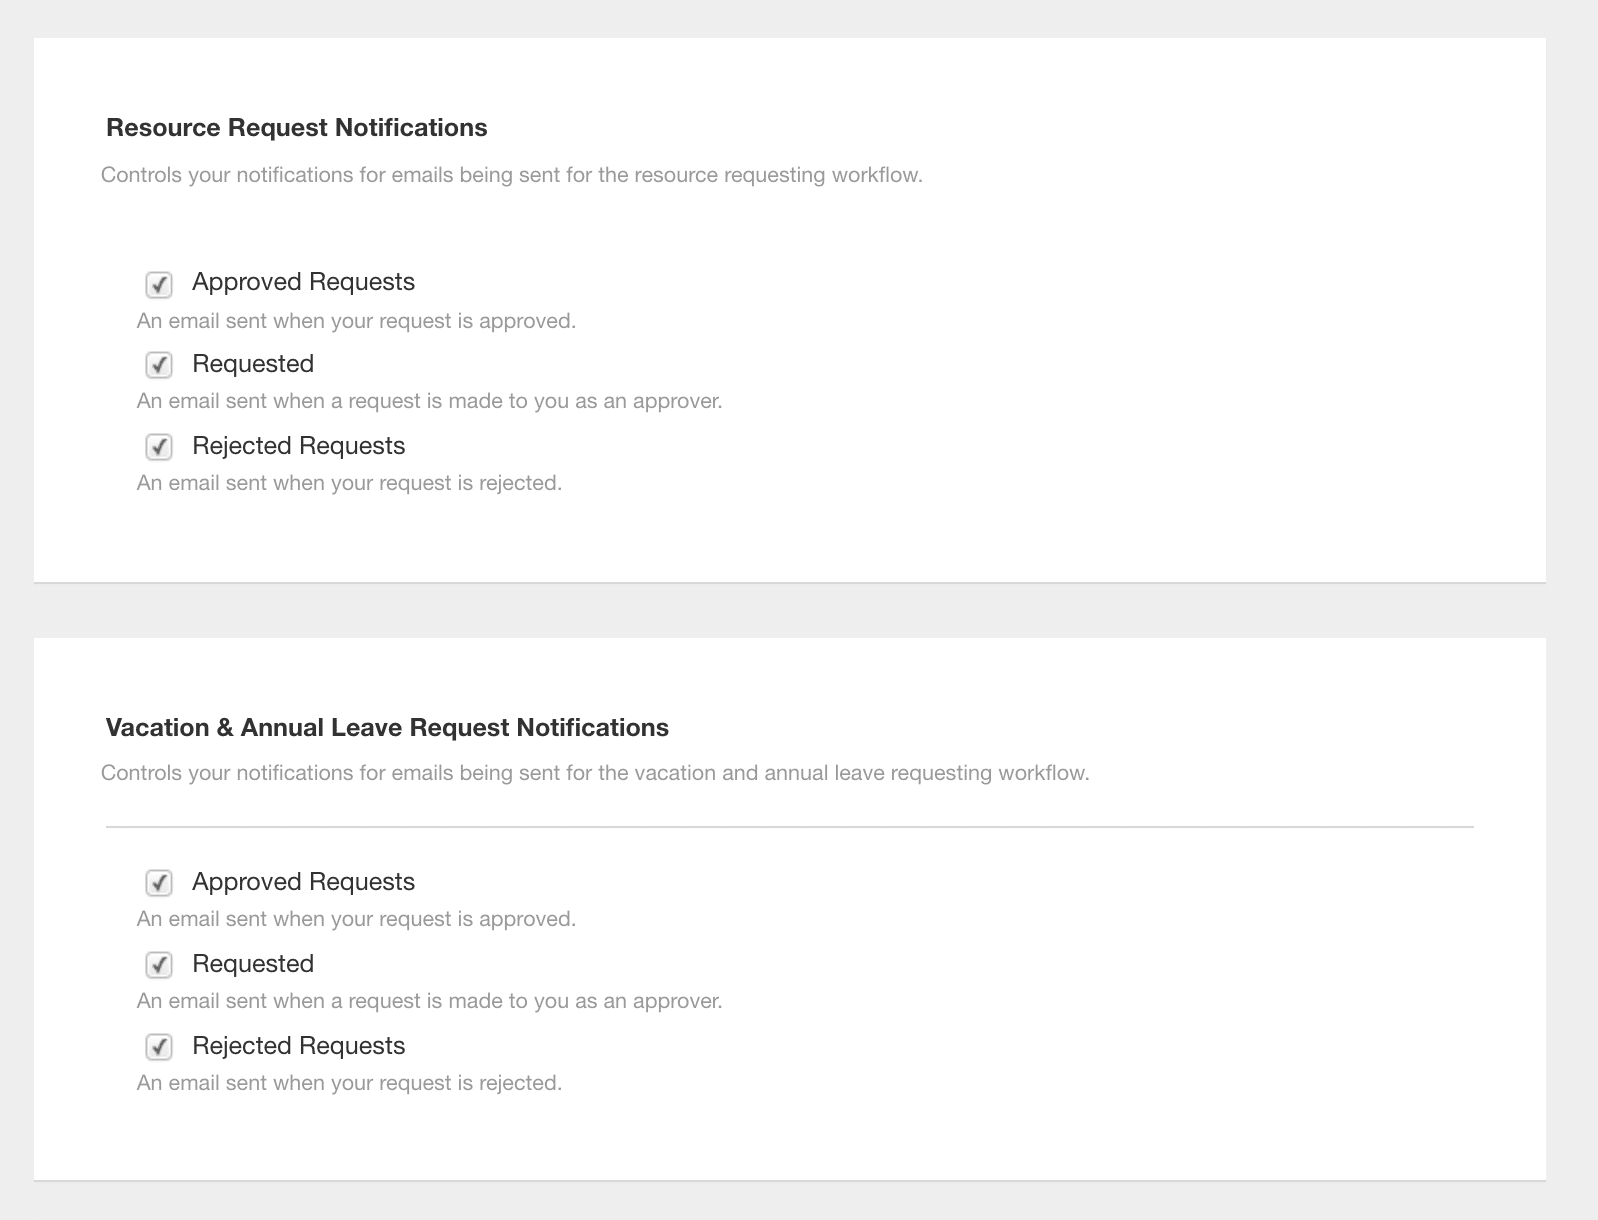
How to change my notification preferences?
- Navigate to settings.
- Scroll to Notifications
- Add / Edit the notification settings
- Click save at the bottom of the page.
- Your notifications will now have updated.
Further Reading
Blog Post on how to add notes within the Request and Approval Workflow
Another blog post on notifications updates.
Approval Workflow Feature Page in Hub Planner