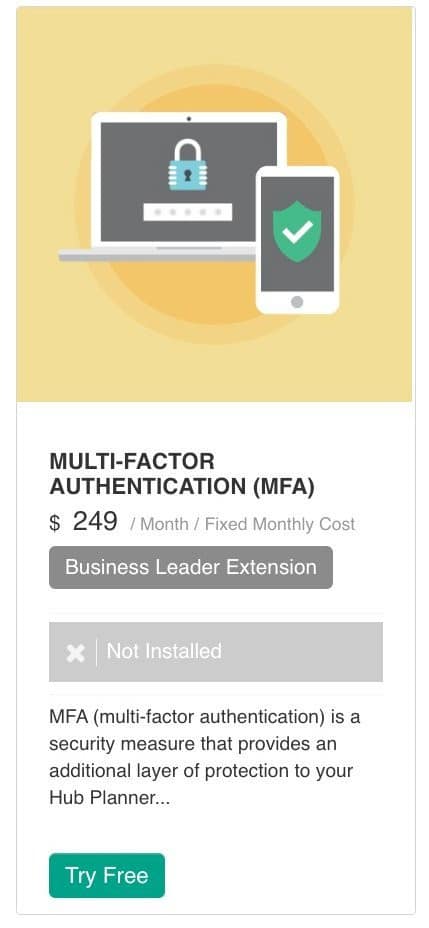
Configure MFA for Hub Planner
To get you set up with MFA, there are 2 main steps to take. Firstly, activate MFA on your Hub Planner account. Then each user will be required to activate MFA on their profile too. Very short and simple steps to take.
- Account activation
- User activation
Account activation:
Firstly, the Account Owner will need to install the MFA extension and enable the MFA authentication options in Hub Planner. (see steps below)
- Install MFA extension in Hub Planner
- Enable MFA authentication in Hub Planner
User activation:
Once enabled for the team. Each user will then be required to download an authenticator app, and connect with Hub Planner. (see steps below)
- Download the authenticator app to your phone/device
- Connect My Profile to MFA
- Get the app
- Scan the QR code
- Enter the authentication code to Hub Planner
Account Activation
Step 1 – Install MFA Business Leader extension
 First things first, the MFA business leader extension needs to be installed before it can be used. Once the extension is installed, you will have instant access to the MFA setup.
To install MFA:
- Install the MFA business leader extension under settings -> add/remove extensions.
- Click ’Try Free’ or ‘Add Extension’ and confirm.
- Agree to the terms & conditions.
- Right after that you will be ready and set to start using the MFA extension.
- Navigate to the Authentication tab in Settings for setup.
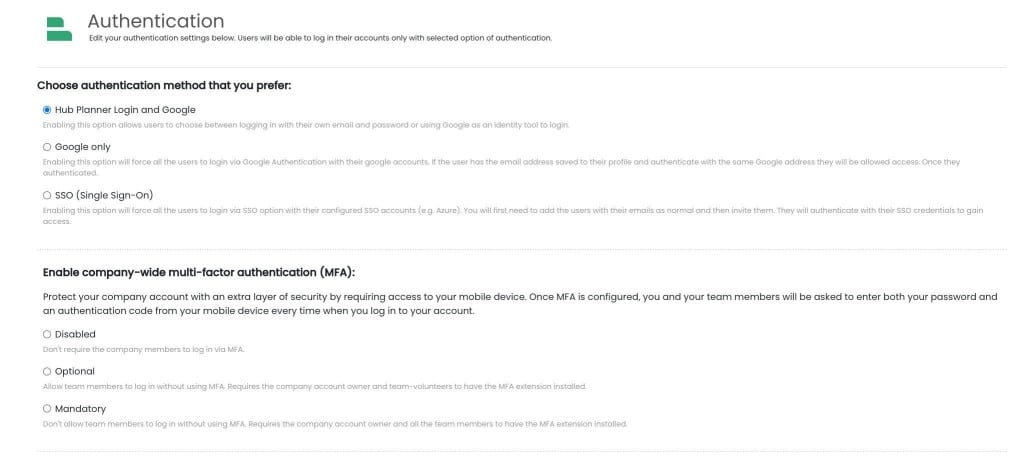
Step 2 – Enable MFA authentication
Next, within Settings, navigate to the Authentication tab in settings to configure MFA. Here you will choose if you will use MFA, SSO or google. In choosing MFA, you will then decide to:
Enable company-wide multi-factor authentication (MFA):
Protect your company account with an extra layer of security by requiring access to your mobile device. Once MFA is configured, you and your team members will be asked to enter both your password and an authentication code from your mobile device every time when you log in to your account.
MFA options:
Don’t require the company members to log in via MFA.
Allow team members to log in without using MFA. Requires the company account owner and team-volunteers to have the MFA extension installed.
Don’t allow team members to log in without using MFA. Requires the company account owner and all the team members to have the MFA extension installed.
User activation
Step 1 – Download the authenticator app to your phone/device
Each user must download an authentication app.
Google authenticator:
Apple
Android
Microsoft authenticator
Apple
Android
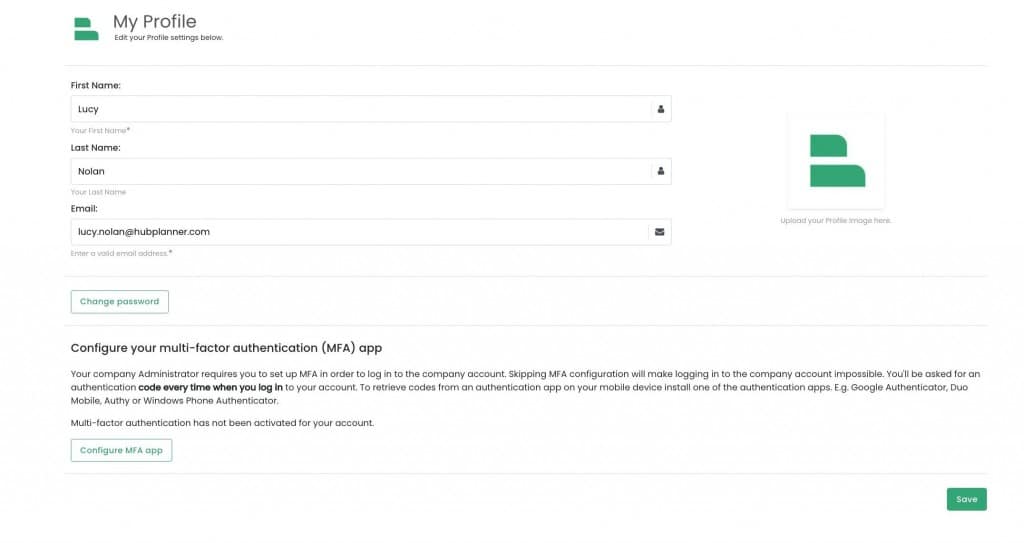
Step 2 – Connect My Profile to MFA
Lastly, let’s connect the authenticator app with your Hub Planner profile.
- Navigate to Settings
- My Profile
- Configure your multi-factor authentication (MFA) app
Note, each user must take this step to connect their Hub Planner profile to an MFA authenticator app.
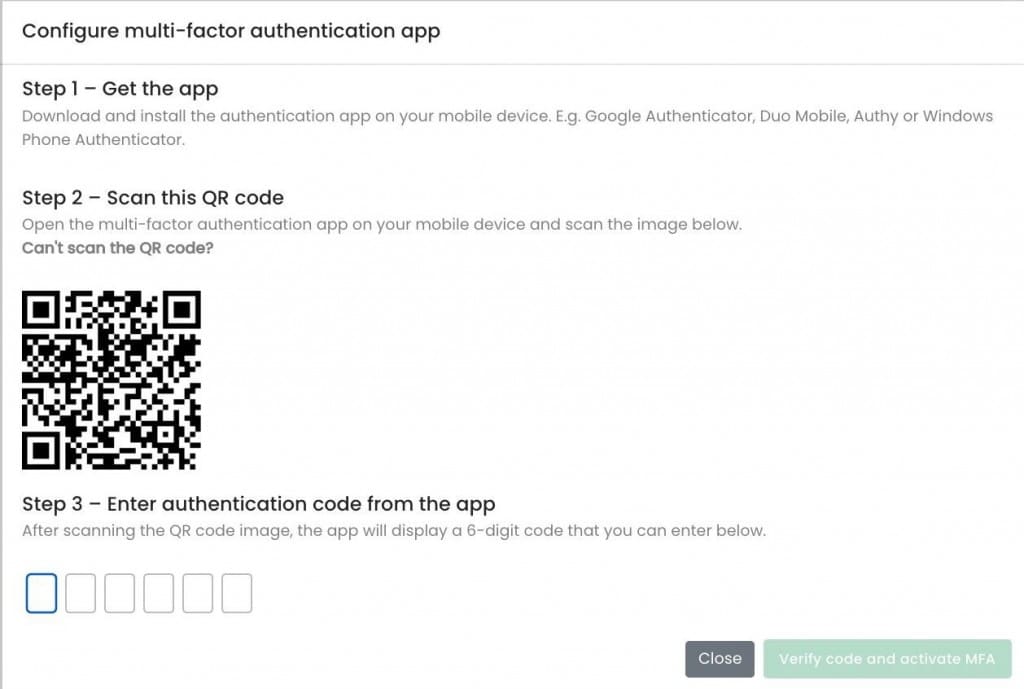
Configure your multi-factor authentication (MFA) app
Step 1 – Get the app
Download and install the authentication app on your mobile device. E.g. Google Authenticator, Duo Mobile, Authy or Windows Phone Authenticator.
Step 2 – Scan the QR code
Open the multi-factor authentication app on your mobile device and scan the image below.
Step 3 – Enter authentication code from the app
After scanning the QR code image, the app will display a 6-digit code that you can enter in the boxes provided.
FAQ’s
Where do I download the authentication app?
To use MFA you will need an authentication app. Download one of the following:
Google authenticator:
Apple: https://apps.apple.com/us/app/google-authenticator/
Android: https://play.google.com/store/apps/details?id=com.google.android.apps.authenticator2&hl=en&gl=US&pli=1
Authy – https://authy.com/
Apple https://apps.apple.com/us/app/twilio-authy/
Android https://play.google.com/store/apps/details?id=com.authy.authy&hl=en&gl=US
Duo
Apple https://apps.apple.com/us/app/duo-mobile
Android: https://play.google.com/store/apps/details?id=com.duosecurity.duomobile&hl=en&gl=US
Microsoft authenticator
Apple: https://apps.apple.com/us/app/microsoft-authenticator/
Android: https://play.google.com/store/apps/details?id=com.azure.authenticator&hl=en&gl=US
Is the app free to download?
Google authenticator is yes
I can’t scan the QR code:?
Can’t scan the QR code? – Click on the text and a passcode will appear.
My profile, my MFA
Each user will need to setup their MFA within their Hub Planner profile. Navigate to settings -> my profile -> configure MFA
I don’t see the option to configure MFA in my profile?
Sounds like you need to install the MFA extension first.
- Go to settings
- Add / remove extensions
- MFA
- Install (Note: if you do not have access to install the MFA extension, you can request the account owner to do so.)

Helpful Links about MFA?
- FAQ
- Intro to MFA
- MFA for Hub Planner
- SSO