How to create a report of resource vacation time?
There are a couple of ways to do this. Either via the Reports function or indeed via the Vacation Extension. Either way, the below is based on having the Vacation Extension is installed.
Hub Planner Reports – Vacation Report
 Open Hub Planner Reports
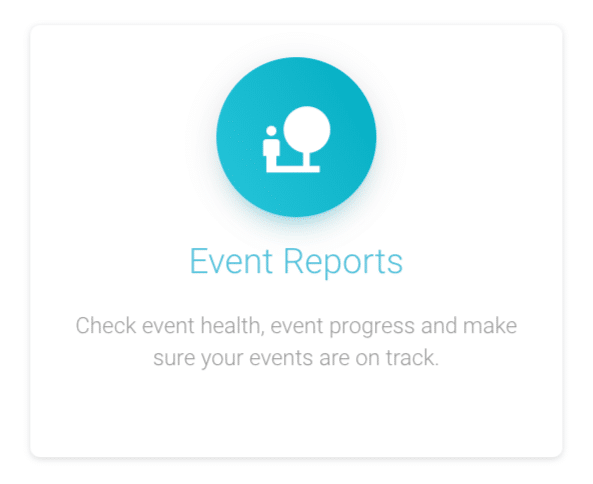
- From the home page, select the ‘Event Reports’ folder or along the sidebar.
- Choose the Event Reports folder or along the sidebar.
- Click into the Scheduled Time report template
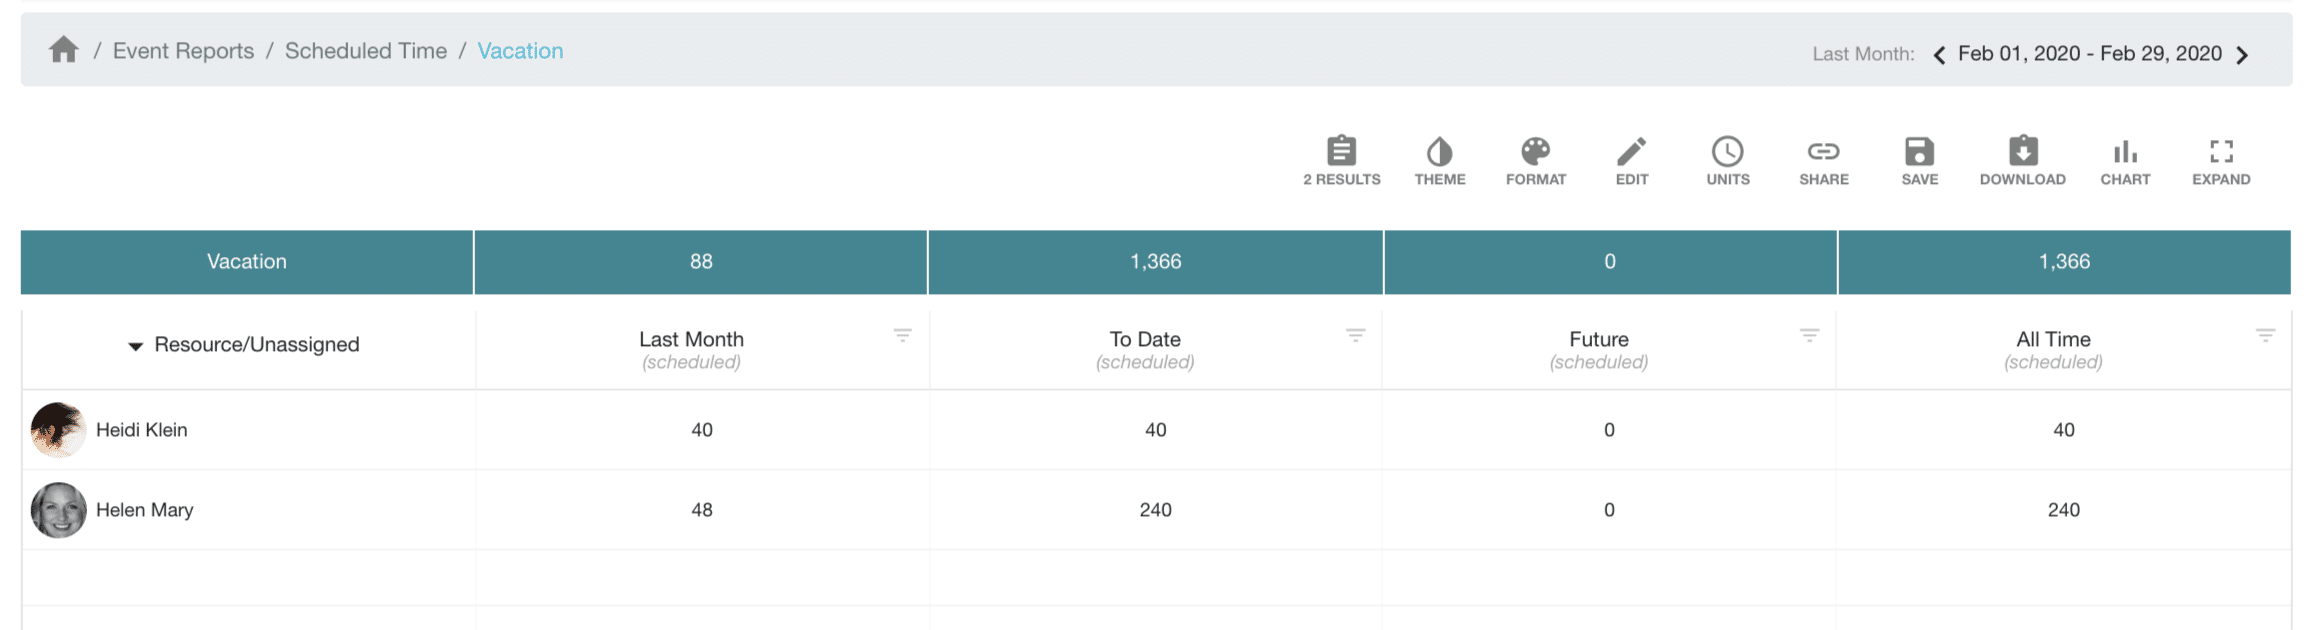
- From the list of scheduled events, select Vacation
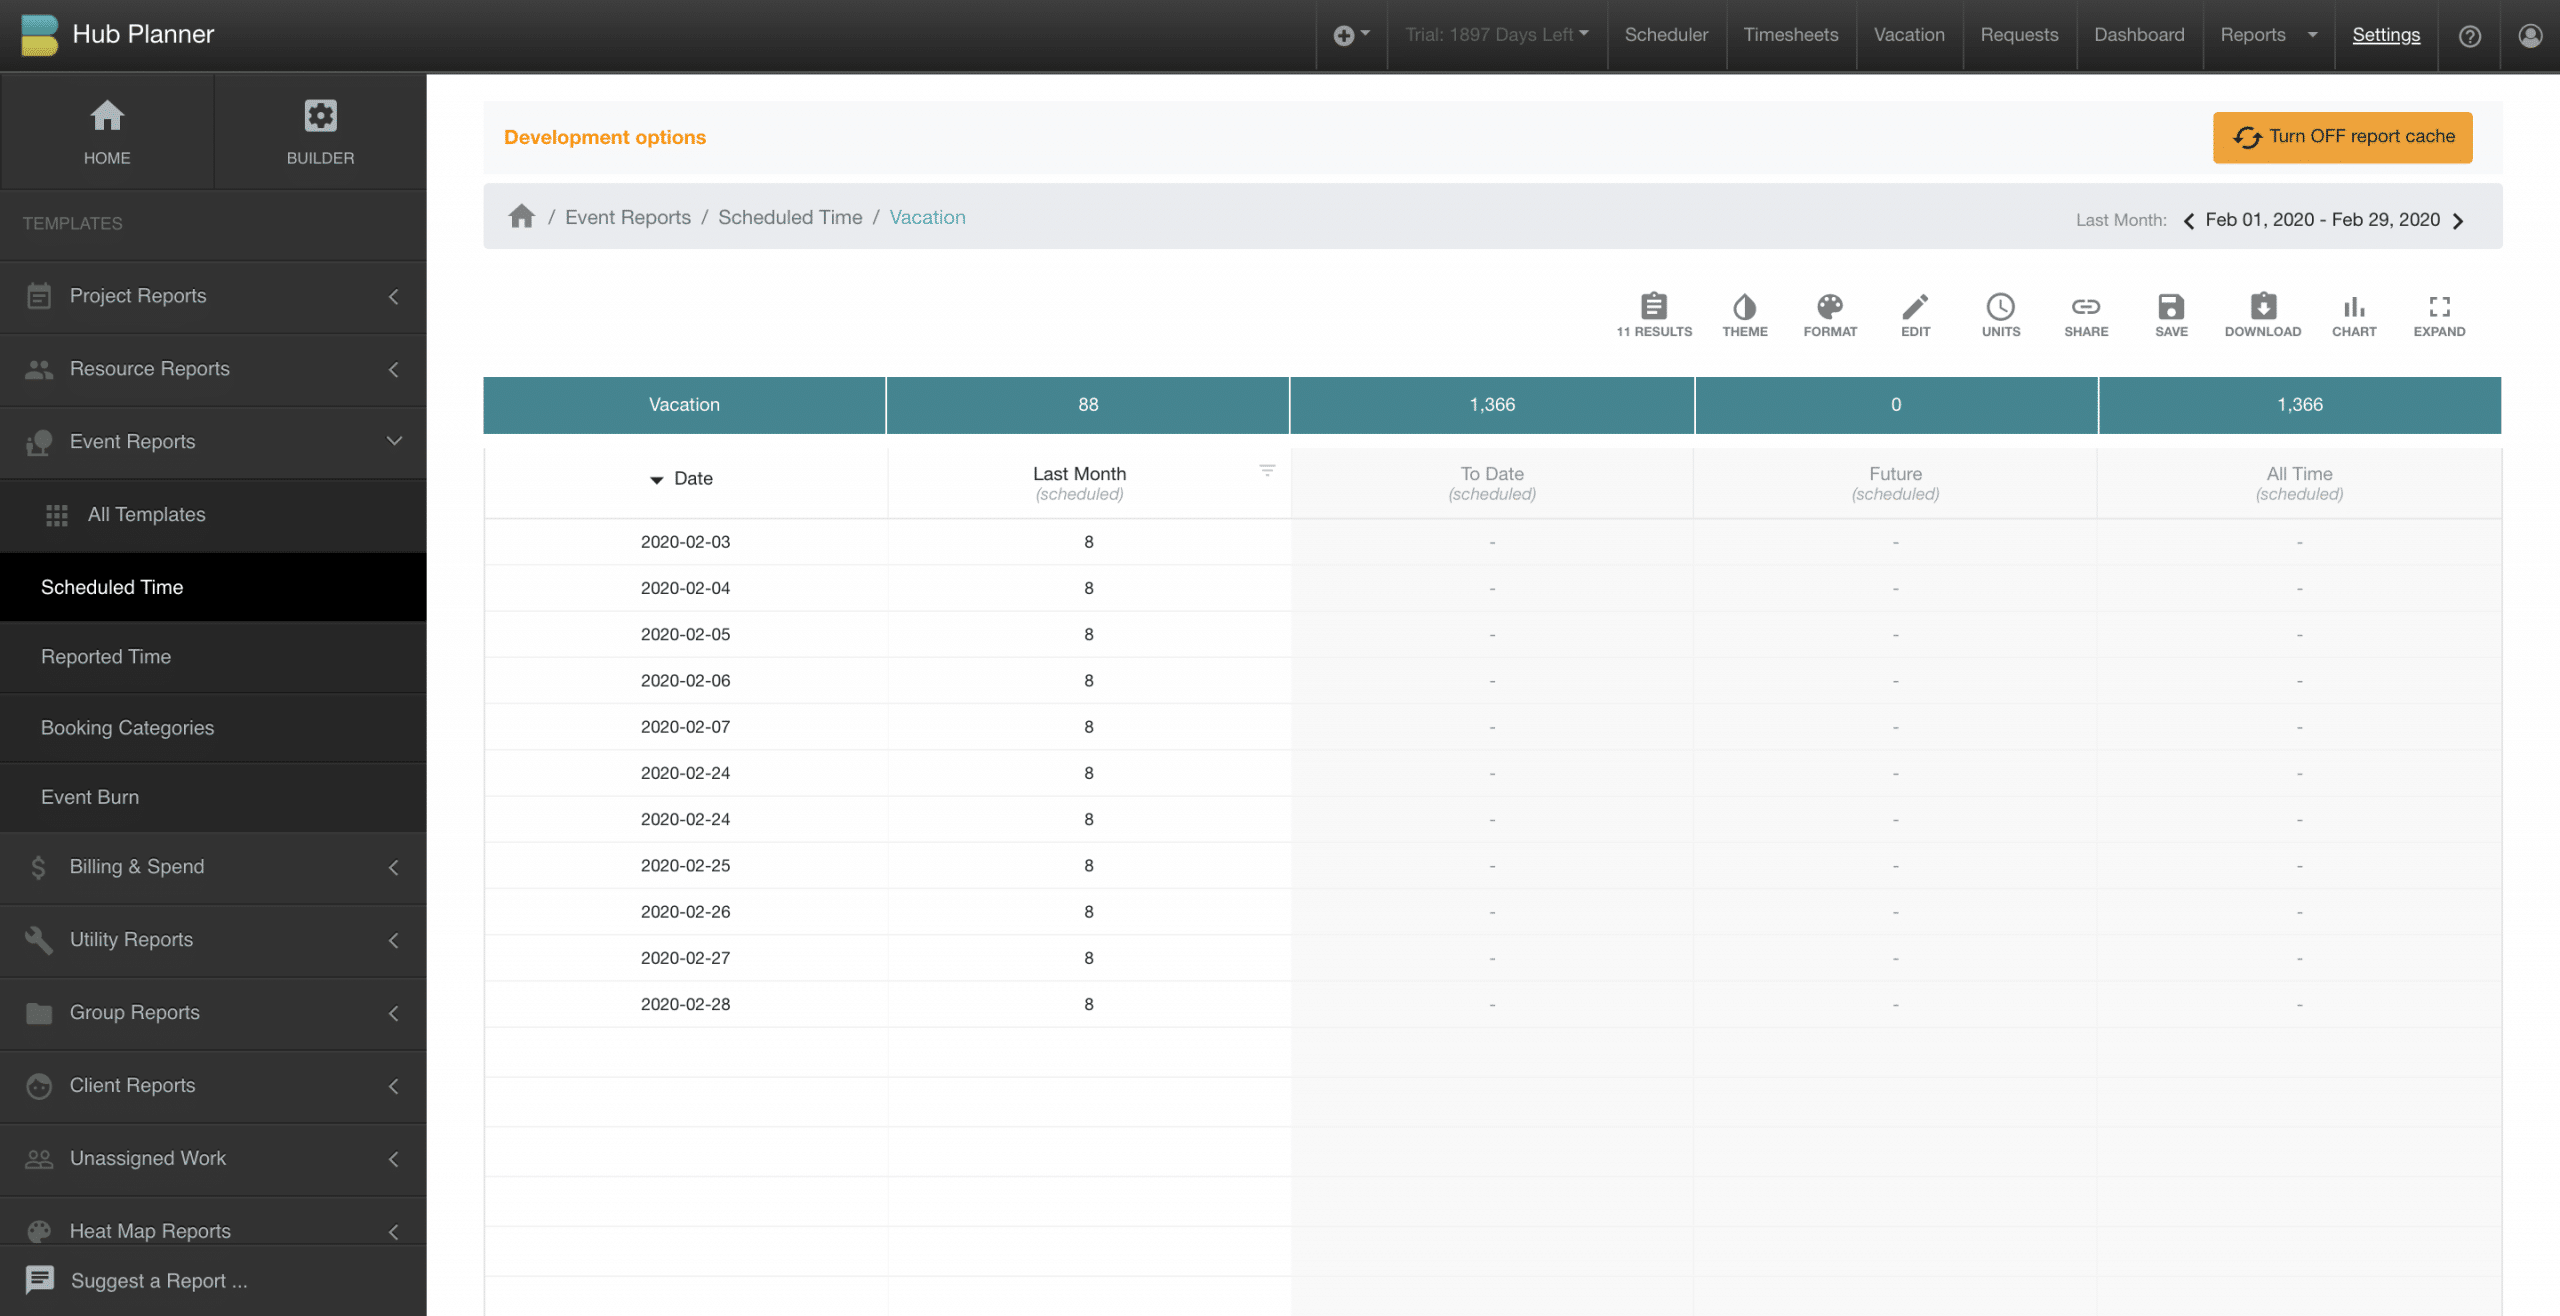
- Here you will have a breakdown report of resources with scheduled Vacation Time

Navigate to the line item ‘Vacation’ – here you see a breakdown report of vacation time within the chosen date range under the following column headings:
- Last Month
- To Date
- Future
- All Time

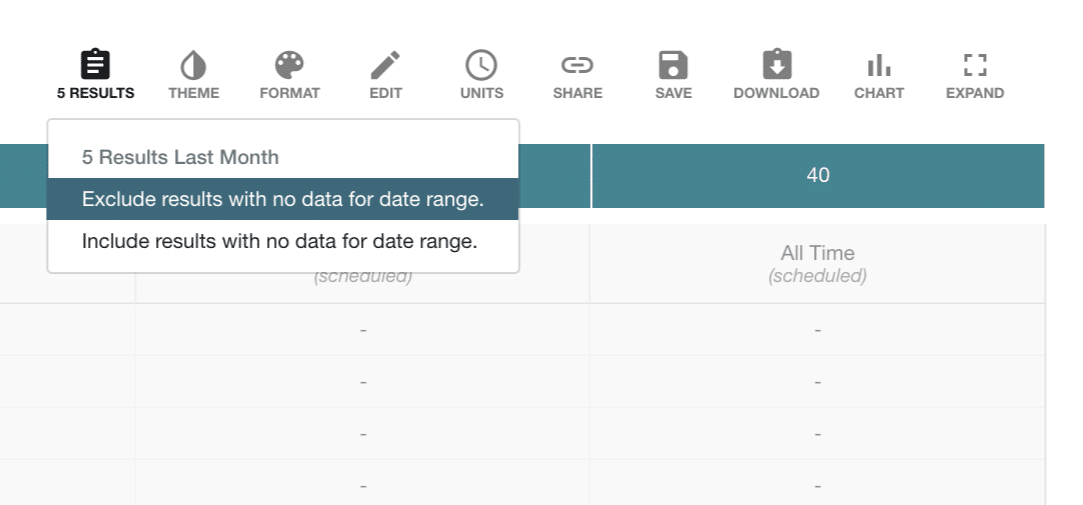
Exclude Results with no data for date range
Filter your vacation report. It can be useful to filter out resources with data for the date range. Especially if you have quite a few resources. To do so:
-
- Click the first option ‘Results’ within the report toolbar.
- Ensure ‘Exclude Results with no data for date range’ is selected.
More report data on Resource Vacation time
There are a few options to navigate to more vacation report data.
- Multi-Level Report
- Date Column Report
- Ungroup Report Results
Multi-Level Report
Here we are simply clicking through the levels to obtain the vacation report information. Click on ‘Vacation’ to navigate to the next level. Here you have a breakdown of day by day line item data.
Note you have the tracking the report levels within the address bar. To go backwards. Simply click the level you wish to navigate to.
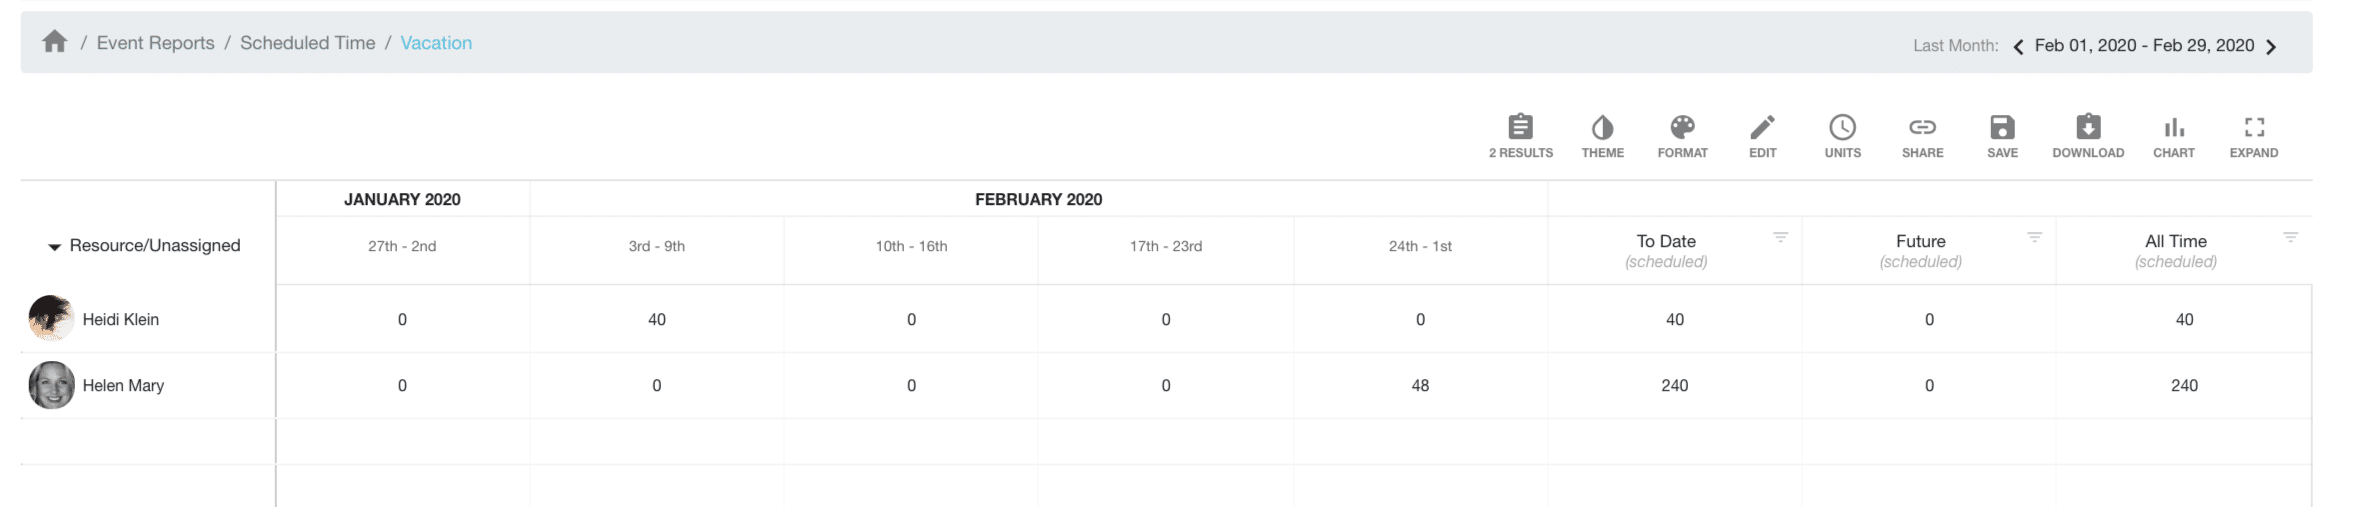
Date Column Report
You might opt for a date column report in order to include some more data columns or break the data down by week or month for example. To accces the date a column report. Firstly, navigate back to the Vacation Level of the report. Click on ‘Edit’ within the report toolbar. Select Columns. This will open up the Report Builder.
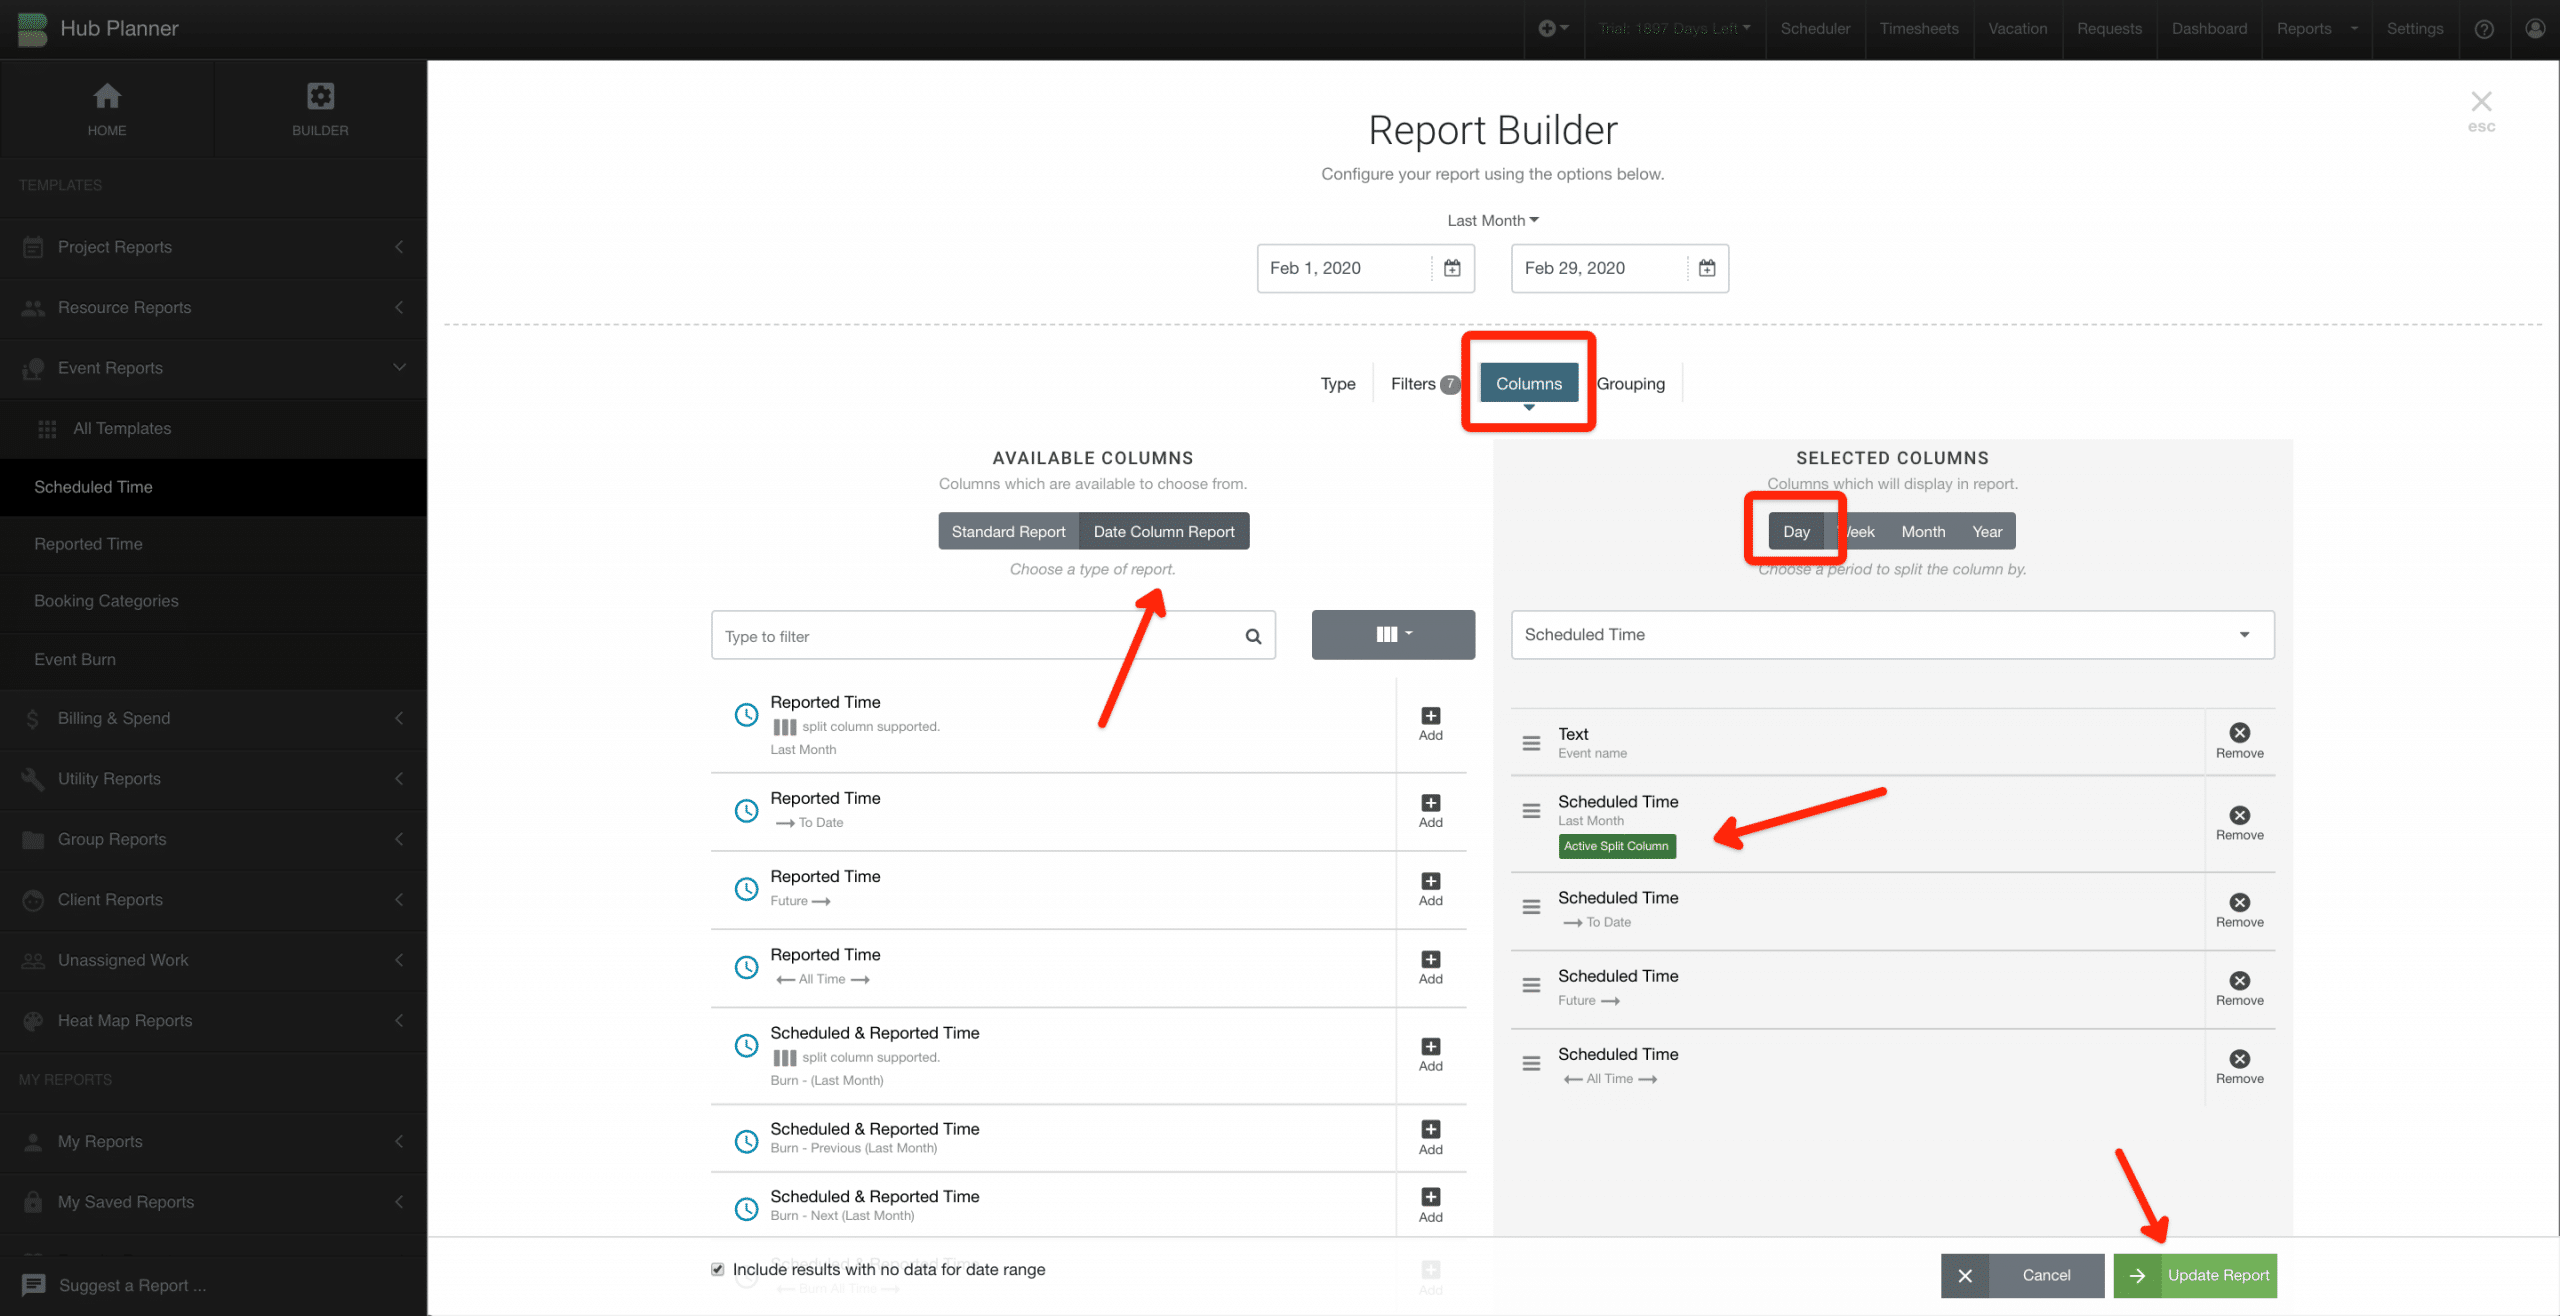
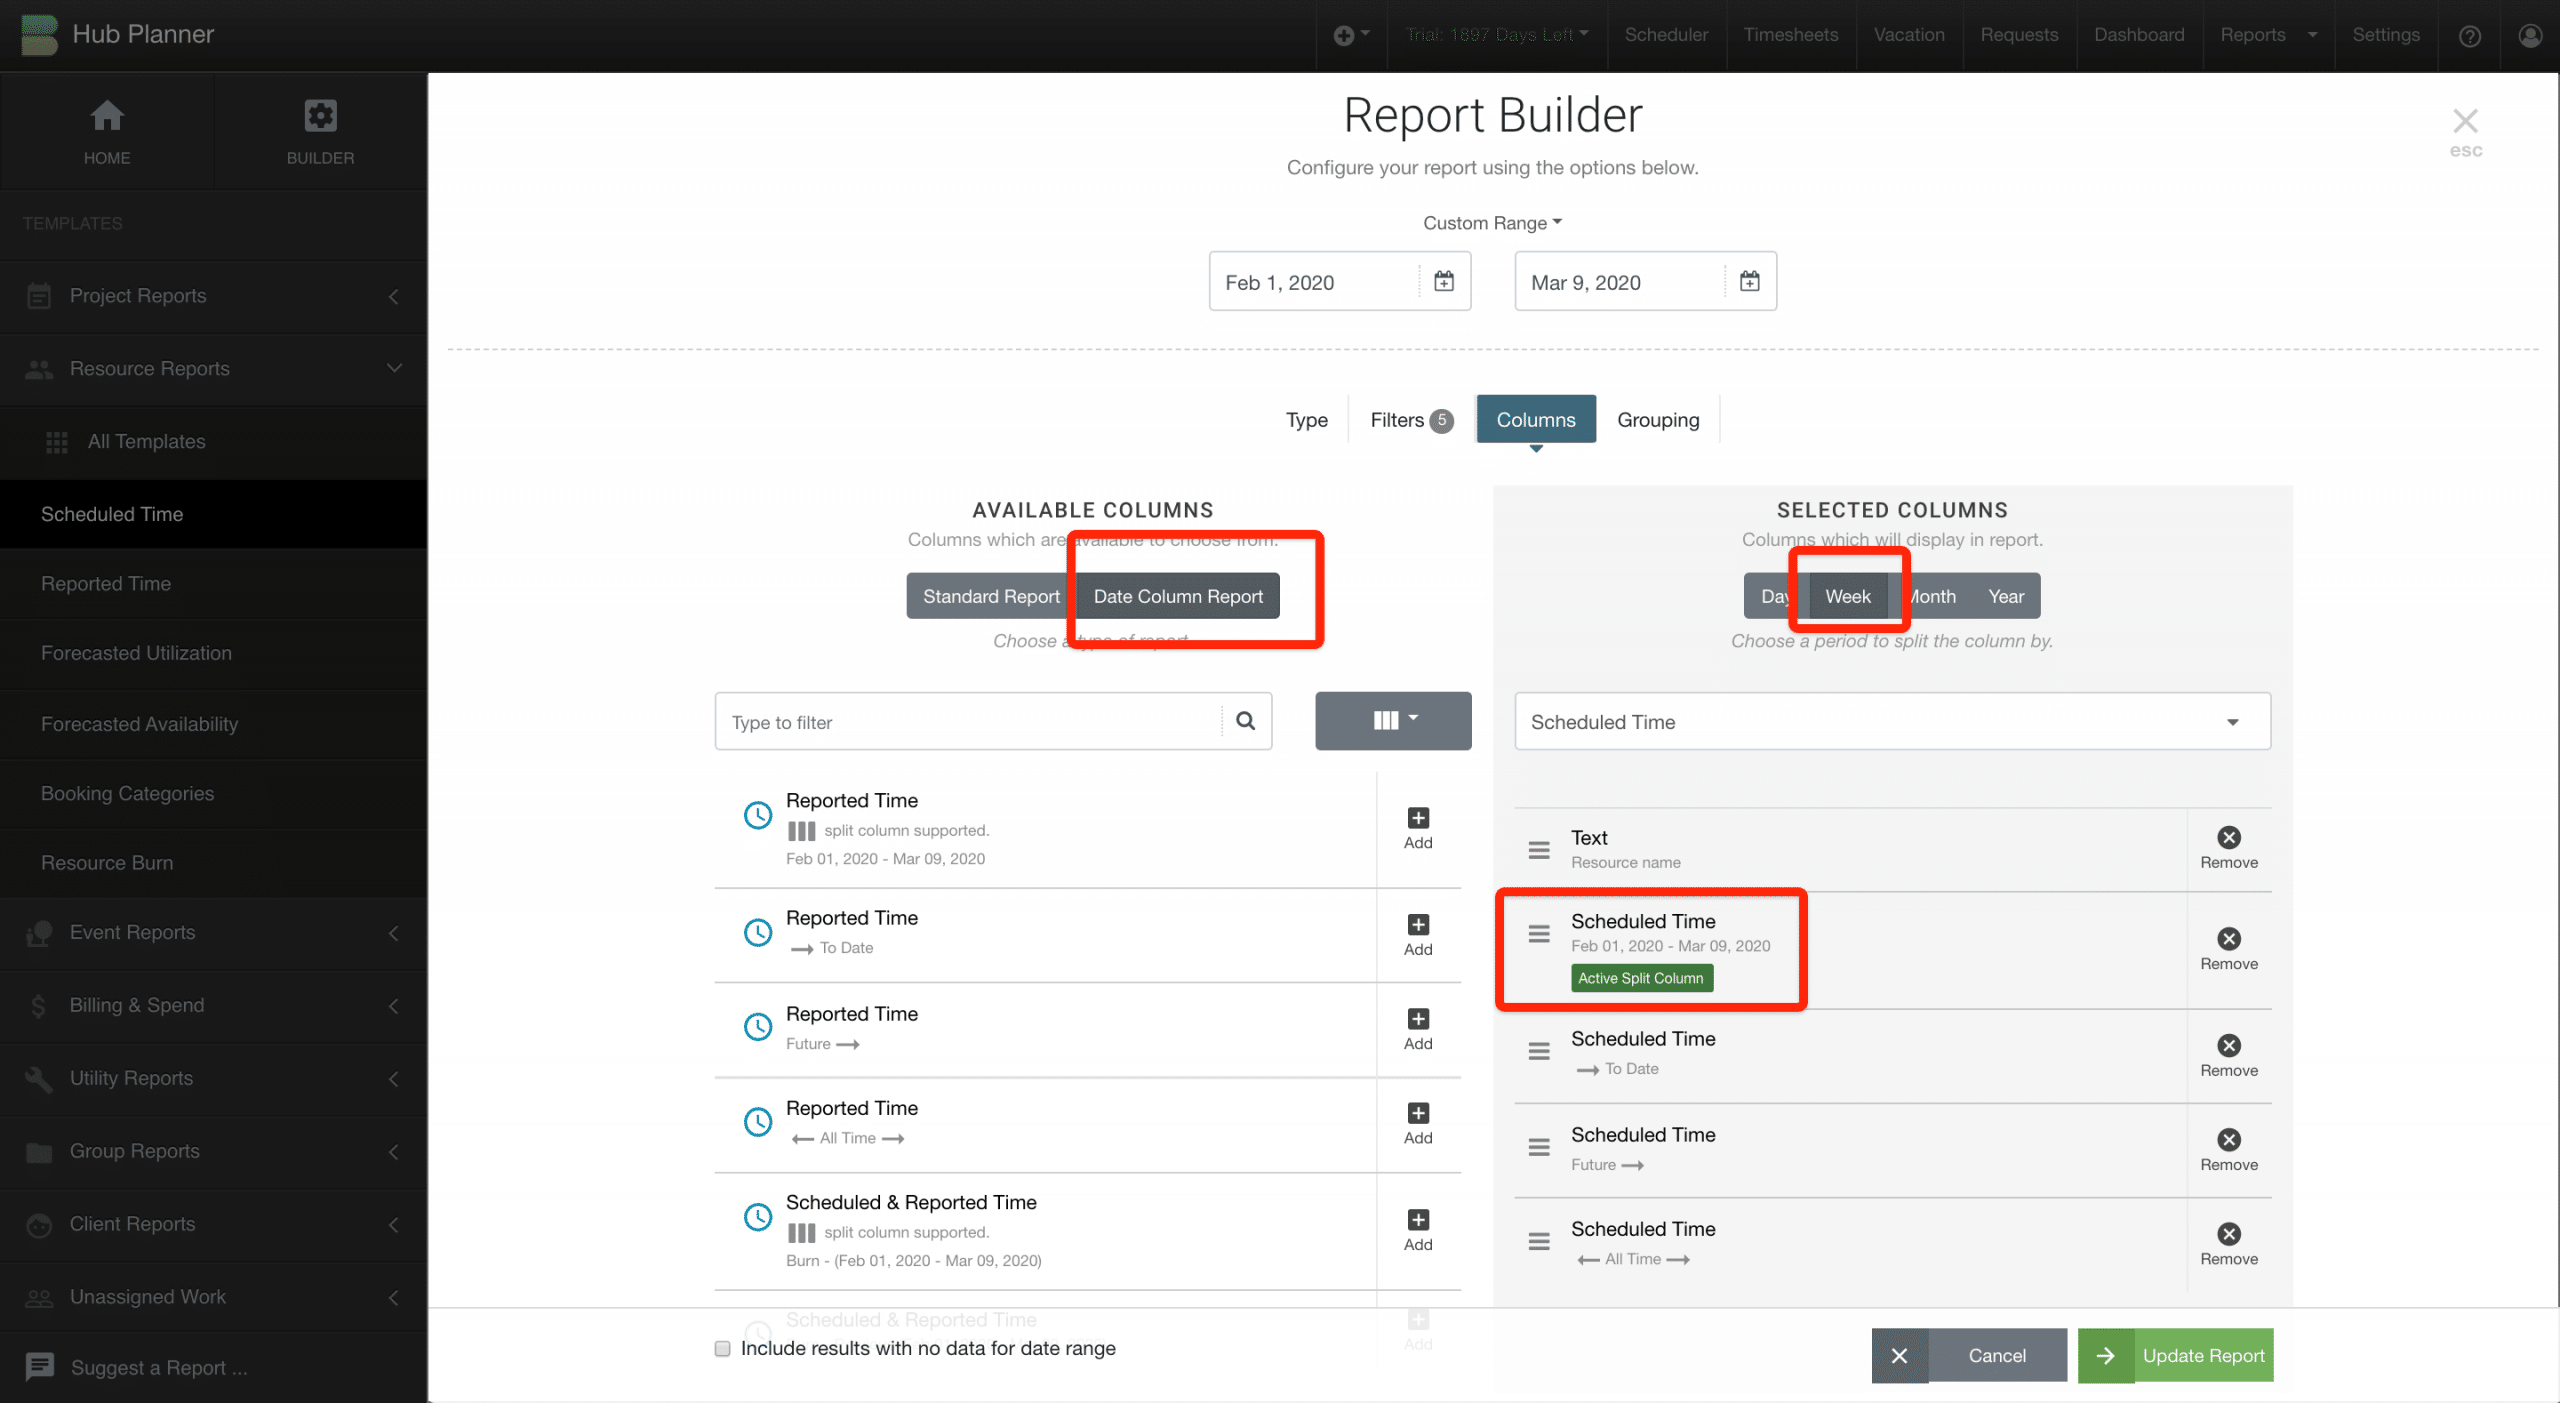
Report Builder – Date Column Report
- Date Range – Adjust as necessary
- Available Columns – Click ‘Date Column Report’ which will activate ‘Scheduled Time this month’ as the ‘Active Split Column’. This will be highlighted in Selected Columns.
- Selected Columns – Select date frequency (day, week, month or year)
- Feel free to remove unwanted columns and add in some new data columns.
- Click Update Report
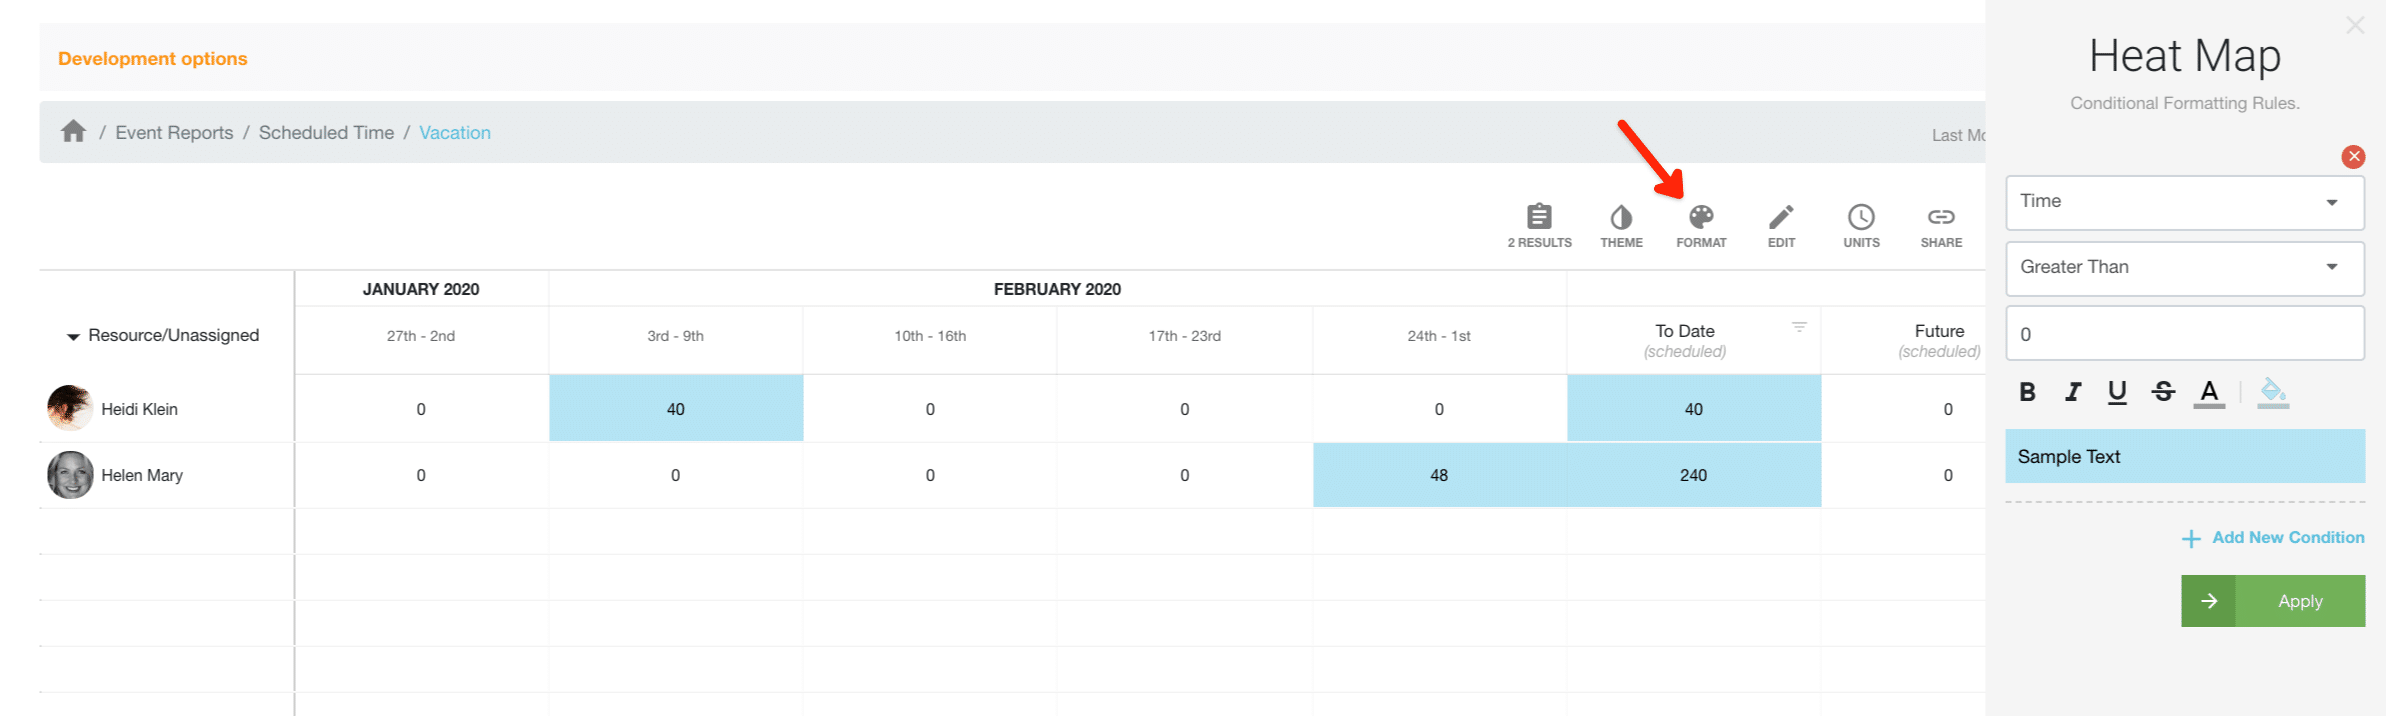
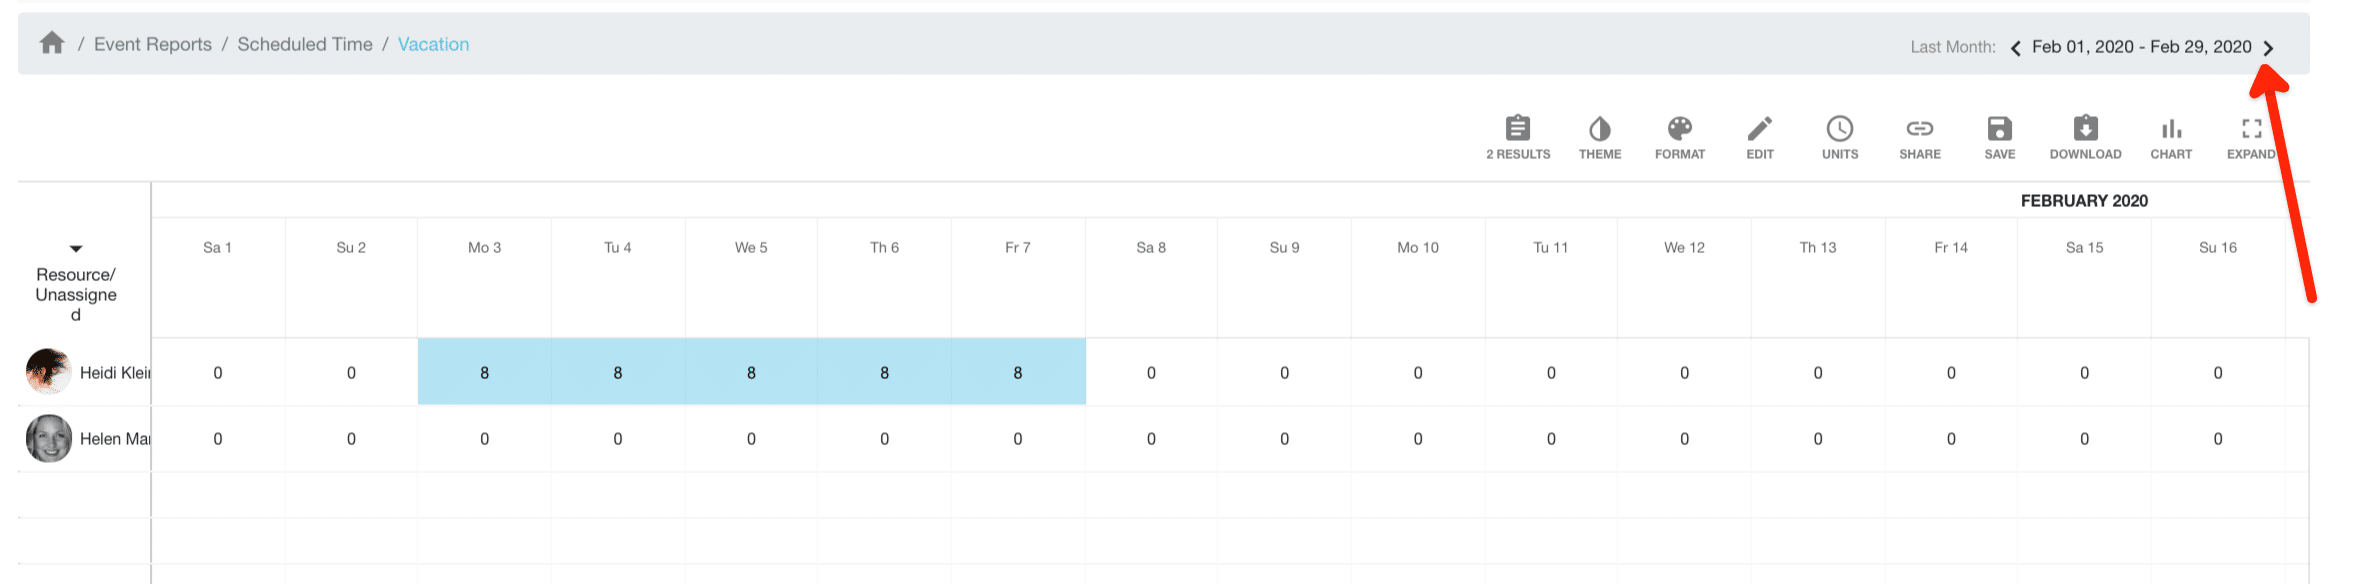
Highlight Vacation Report Data
To highlight vacation report data, click Format from the report toolbar. Add a conditional formatting rule. Below example, is a conditional formatting rule to highlight any data greater than 0 to the background color blue. Feel free to add as many rules as necessary to capture and highlight vacation report data.
Switch between Date Frequencies
Switch between Date Column Report Frequencies as necessary. This will allow you to view vacation report data in varying days, weeks or months etc. To do so:
- Click Edit
- Columns
- Selected Columns -> Click either ‘Day, Week, Month or Year.
- Click ‘Update Report’
Scroll left and right of the date picker to navigate through data range for more vacation report results.
Ungroup Results
Going back to the start. We can create a vacation report by ungrouping hte filter levels for raw data. We can also add in columns of interest to create a line item report.
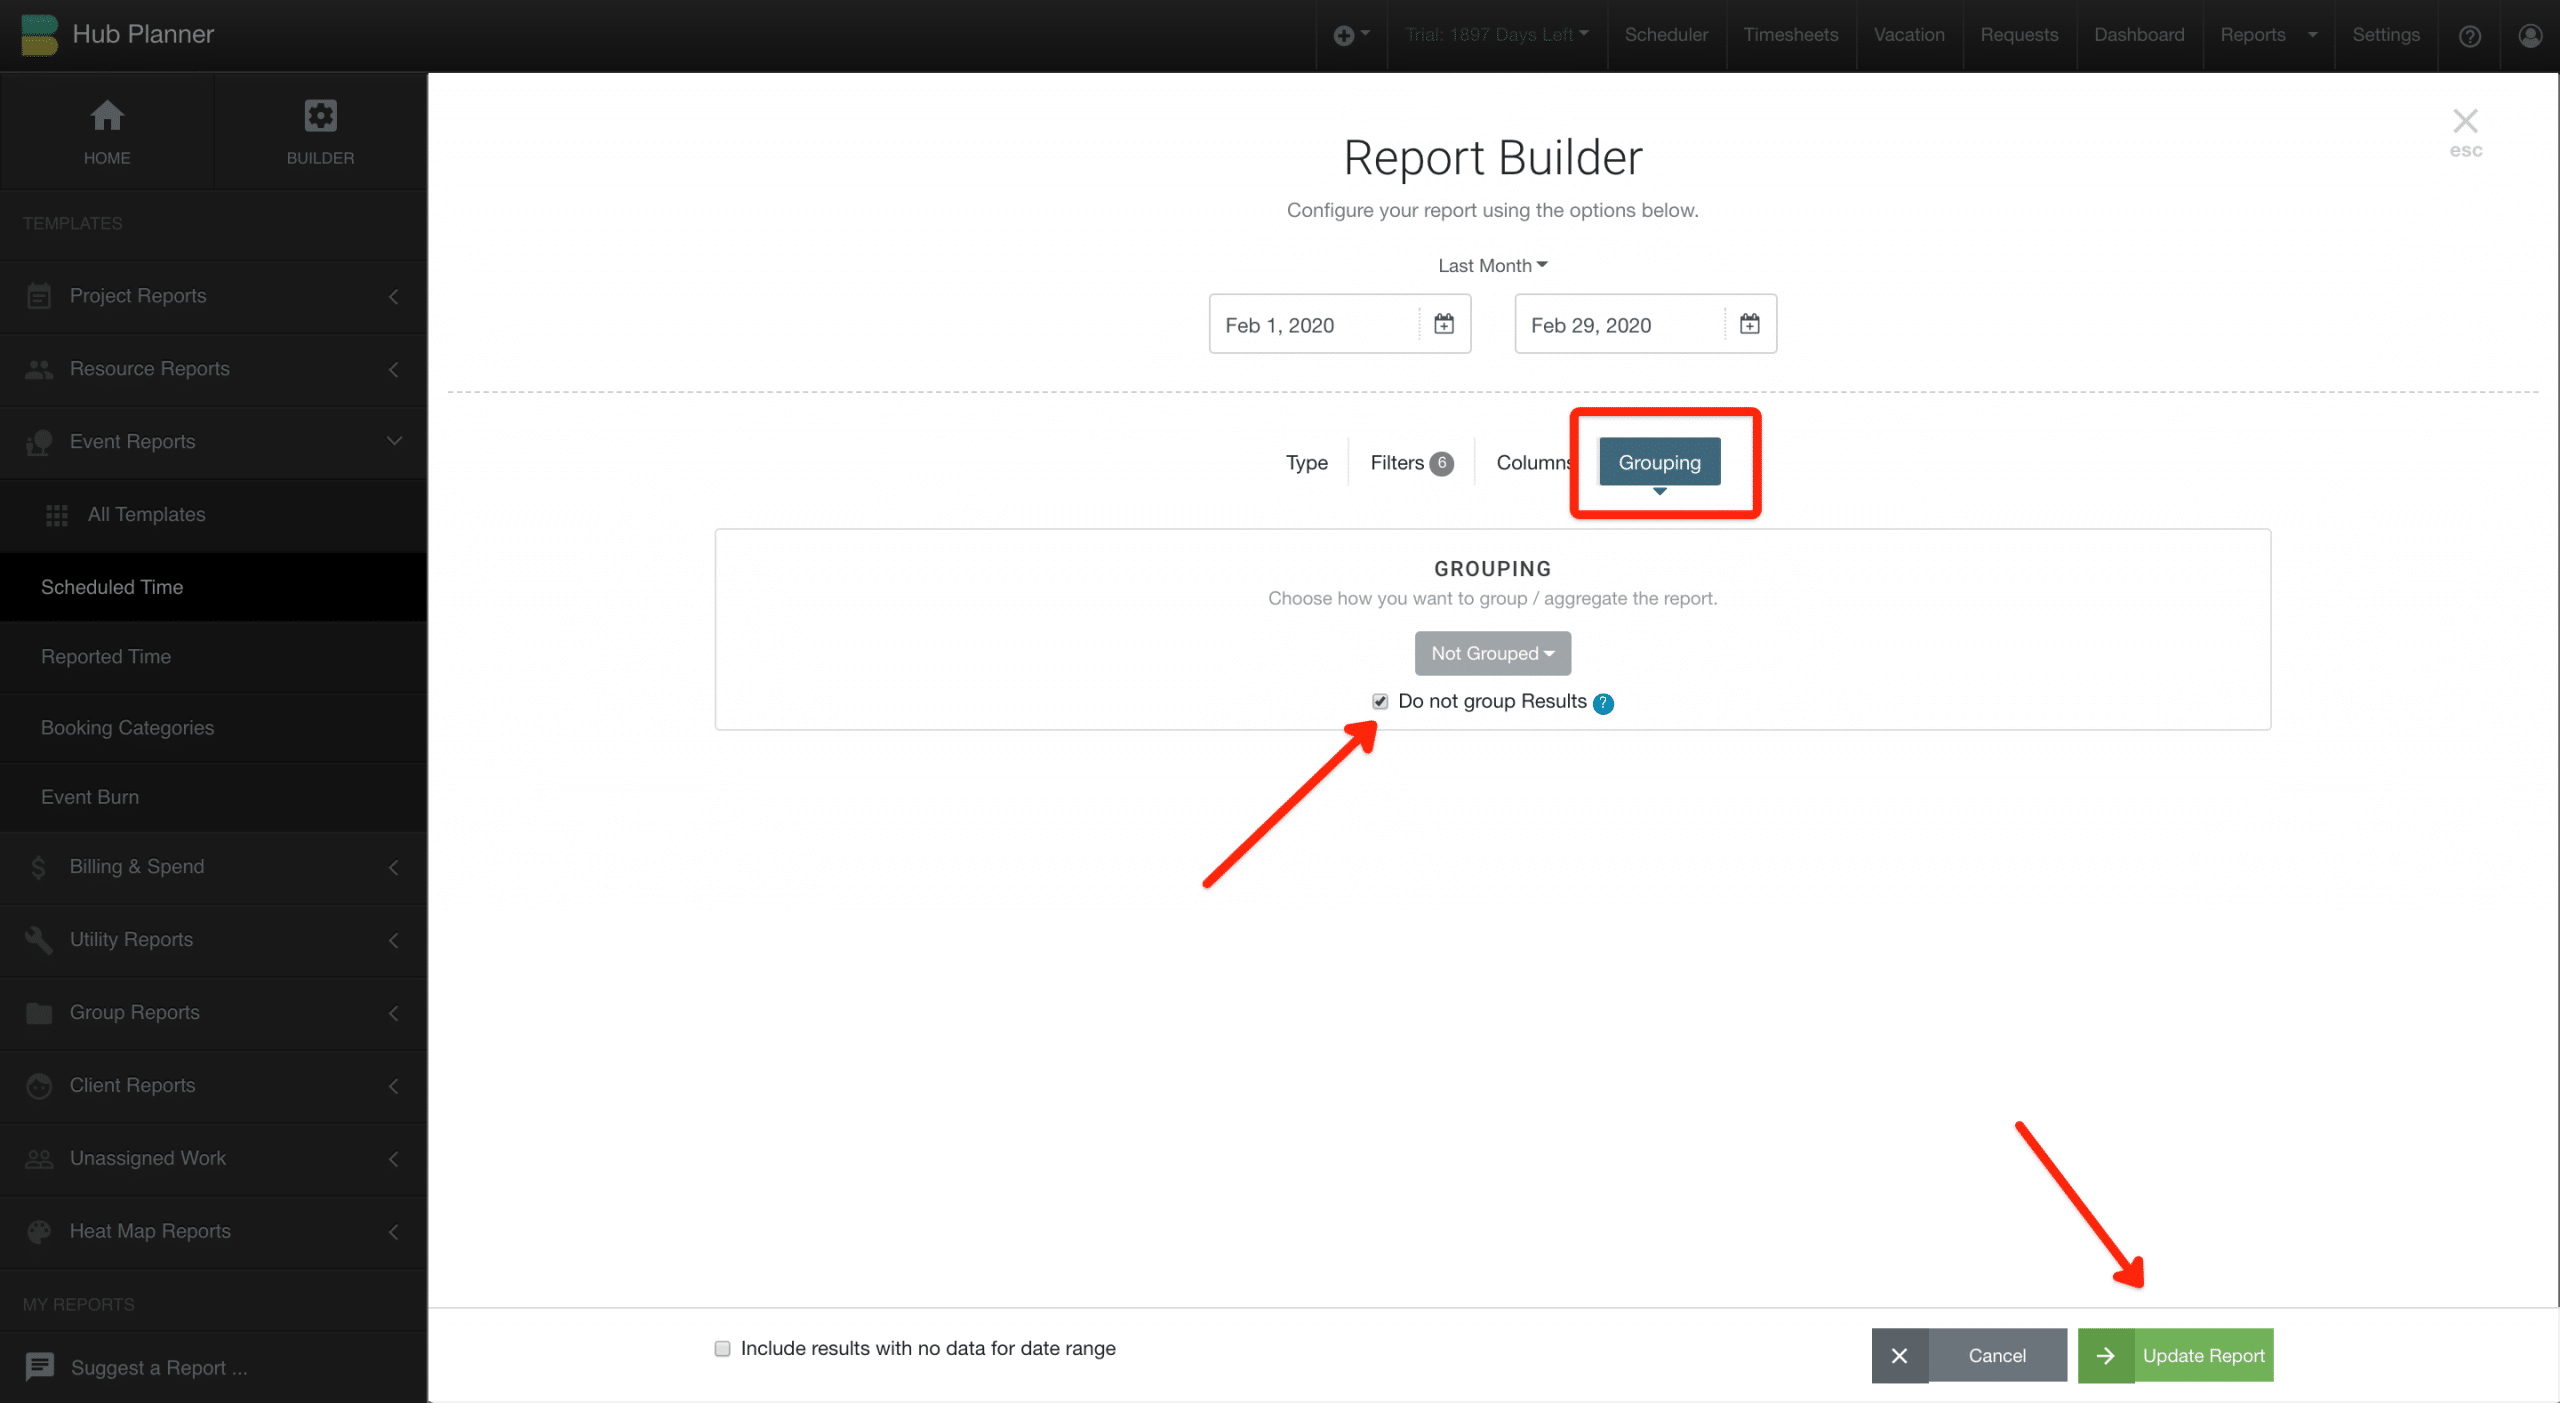
How to Ungroup Report Results?
Using the address toolbar navigate back to Scheduled Time. Or indeed starting from scratch go to Event Reports -> Scheduled Time.

From the Report Toolbar, click Edit. From here select Grouping to open the Report Builder. Click the option ‘Do not group results’. Followed by ‘Update Report’.
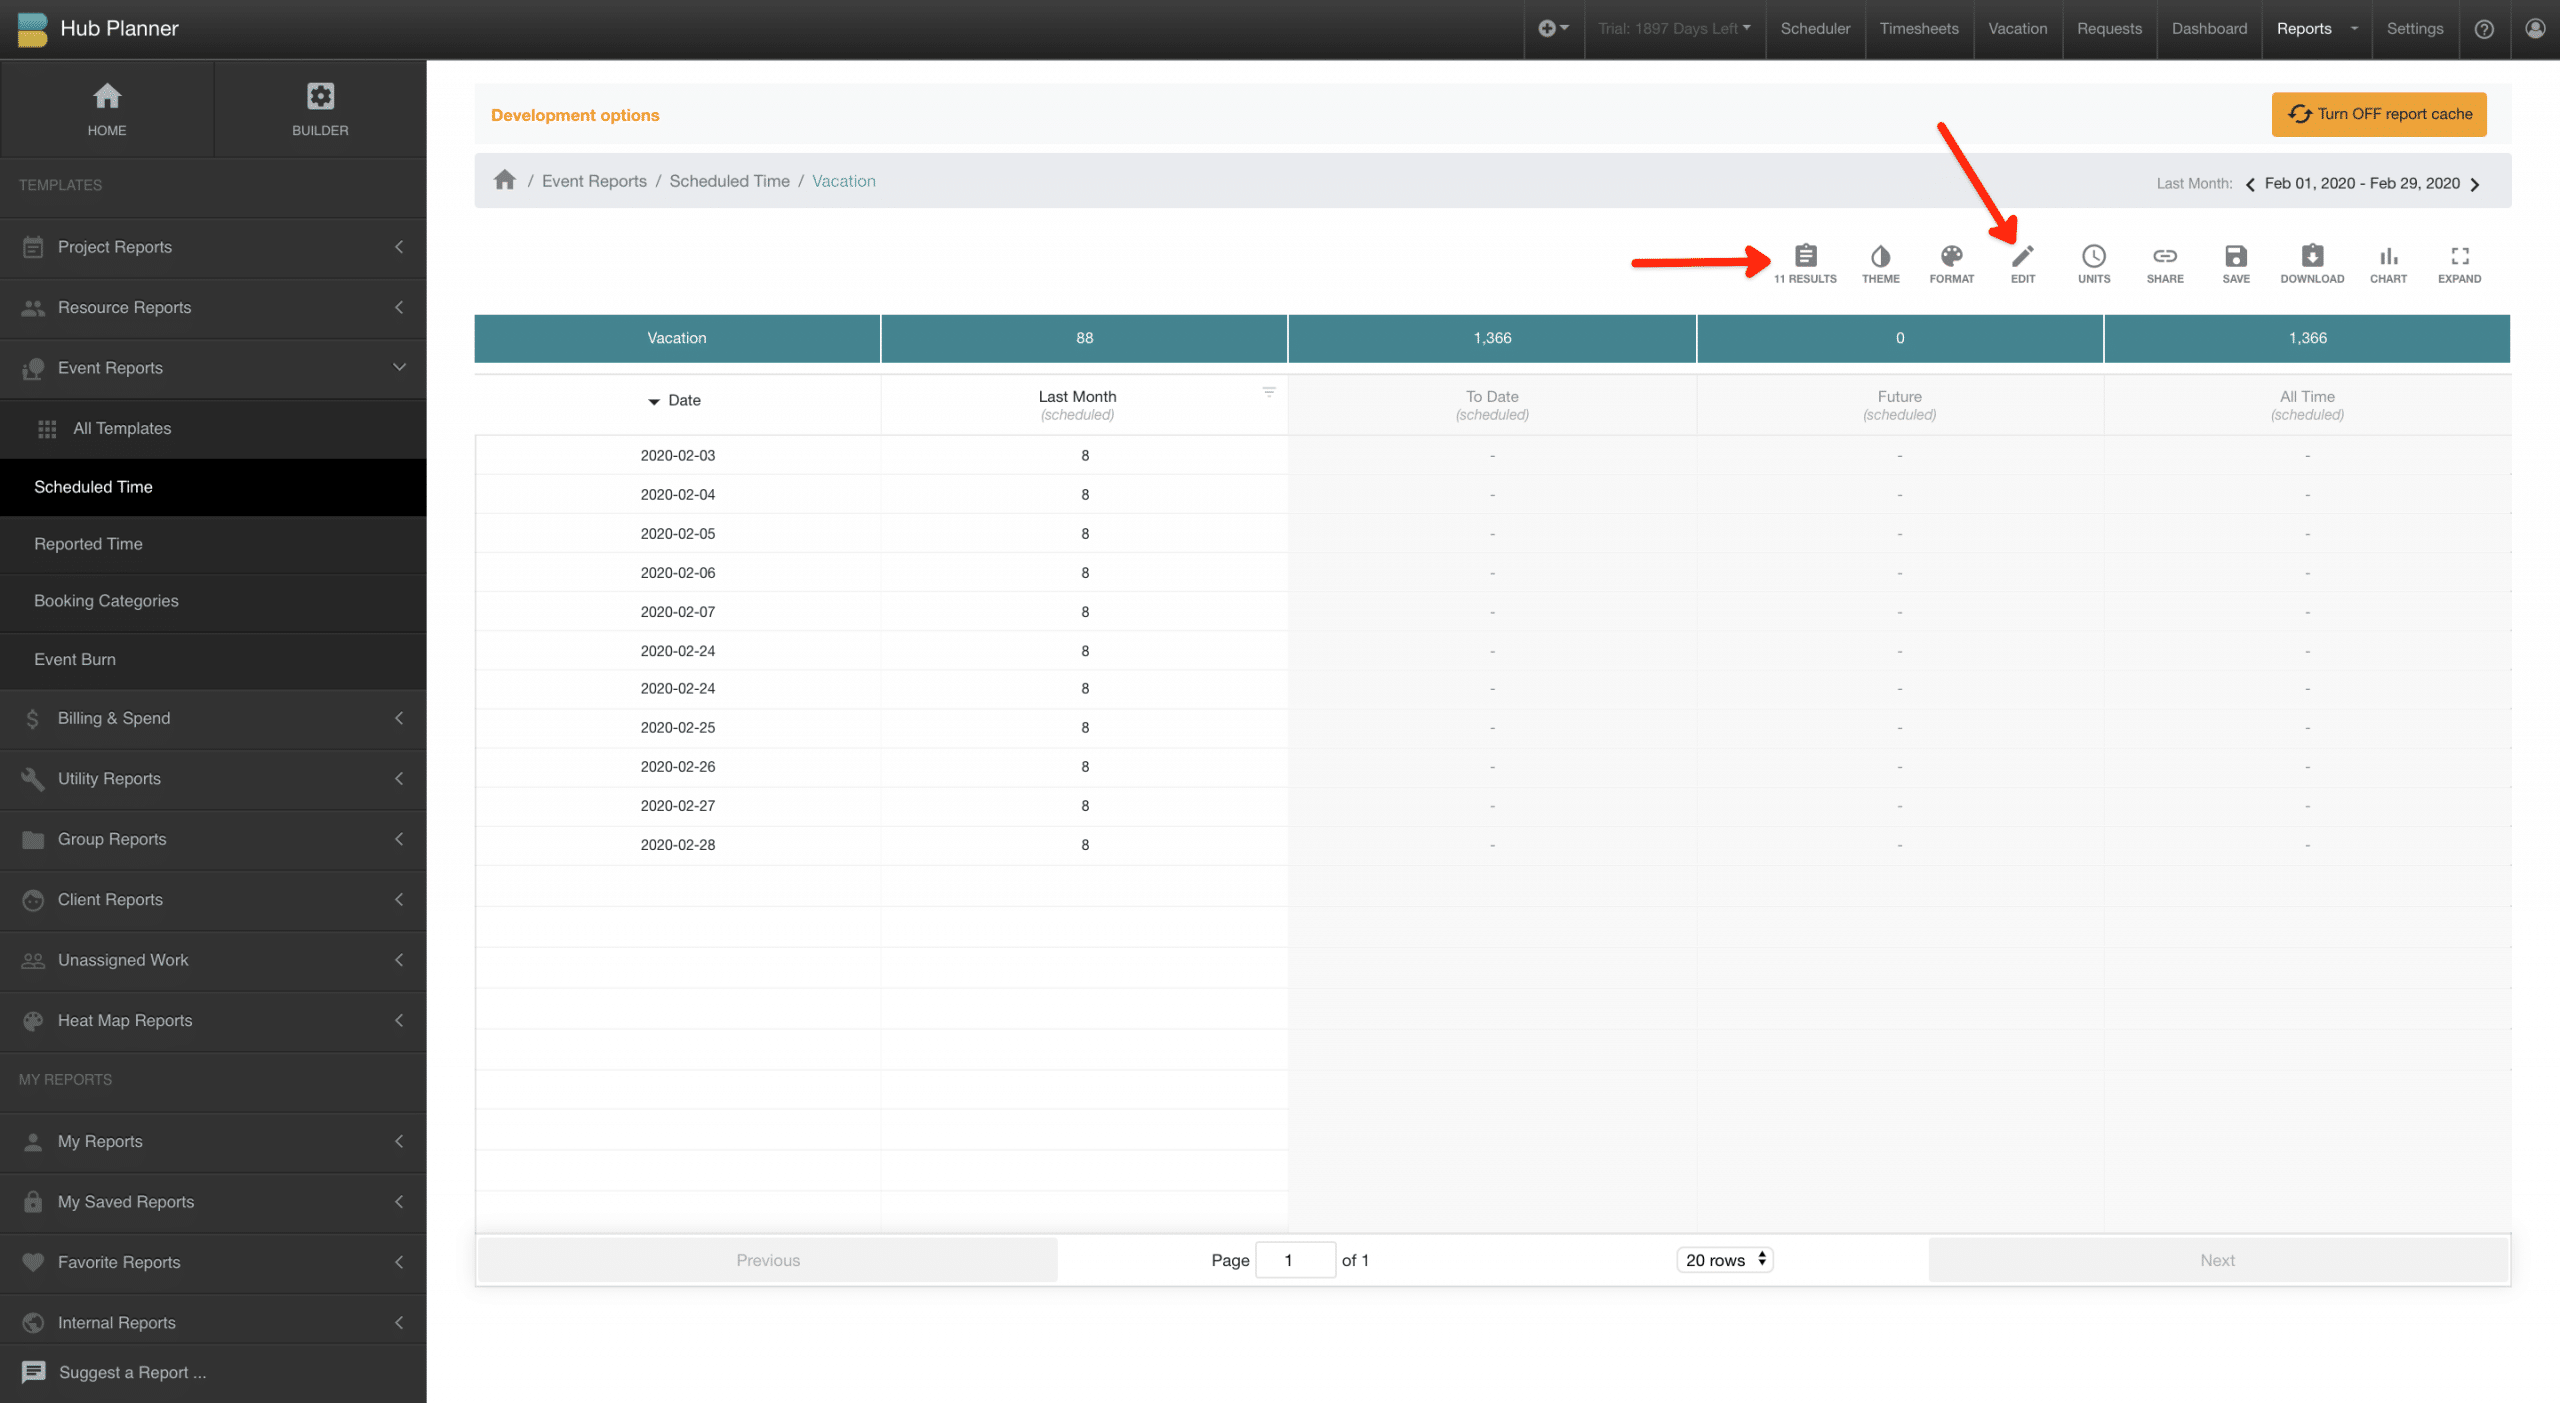
Heres what we are left with once we ungroup results and add the filter to only show data with results for the date range.
We now have a number of options to add some more data columns as well as the ability for add conditonal formatting.
Add more Data Columns
Click Edit -> Columns to open the report builder.
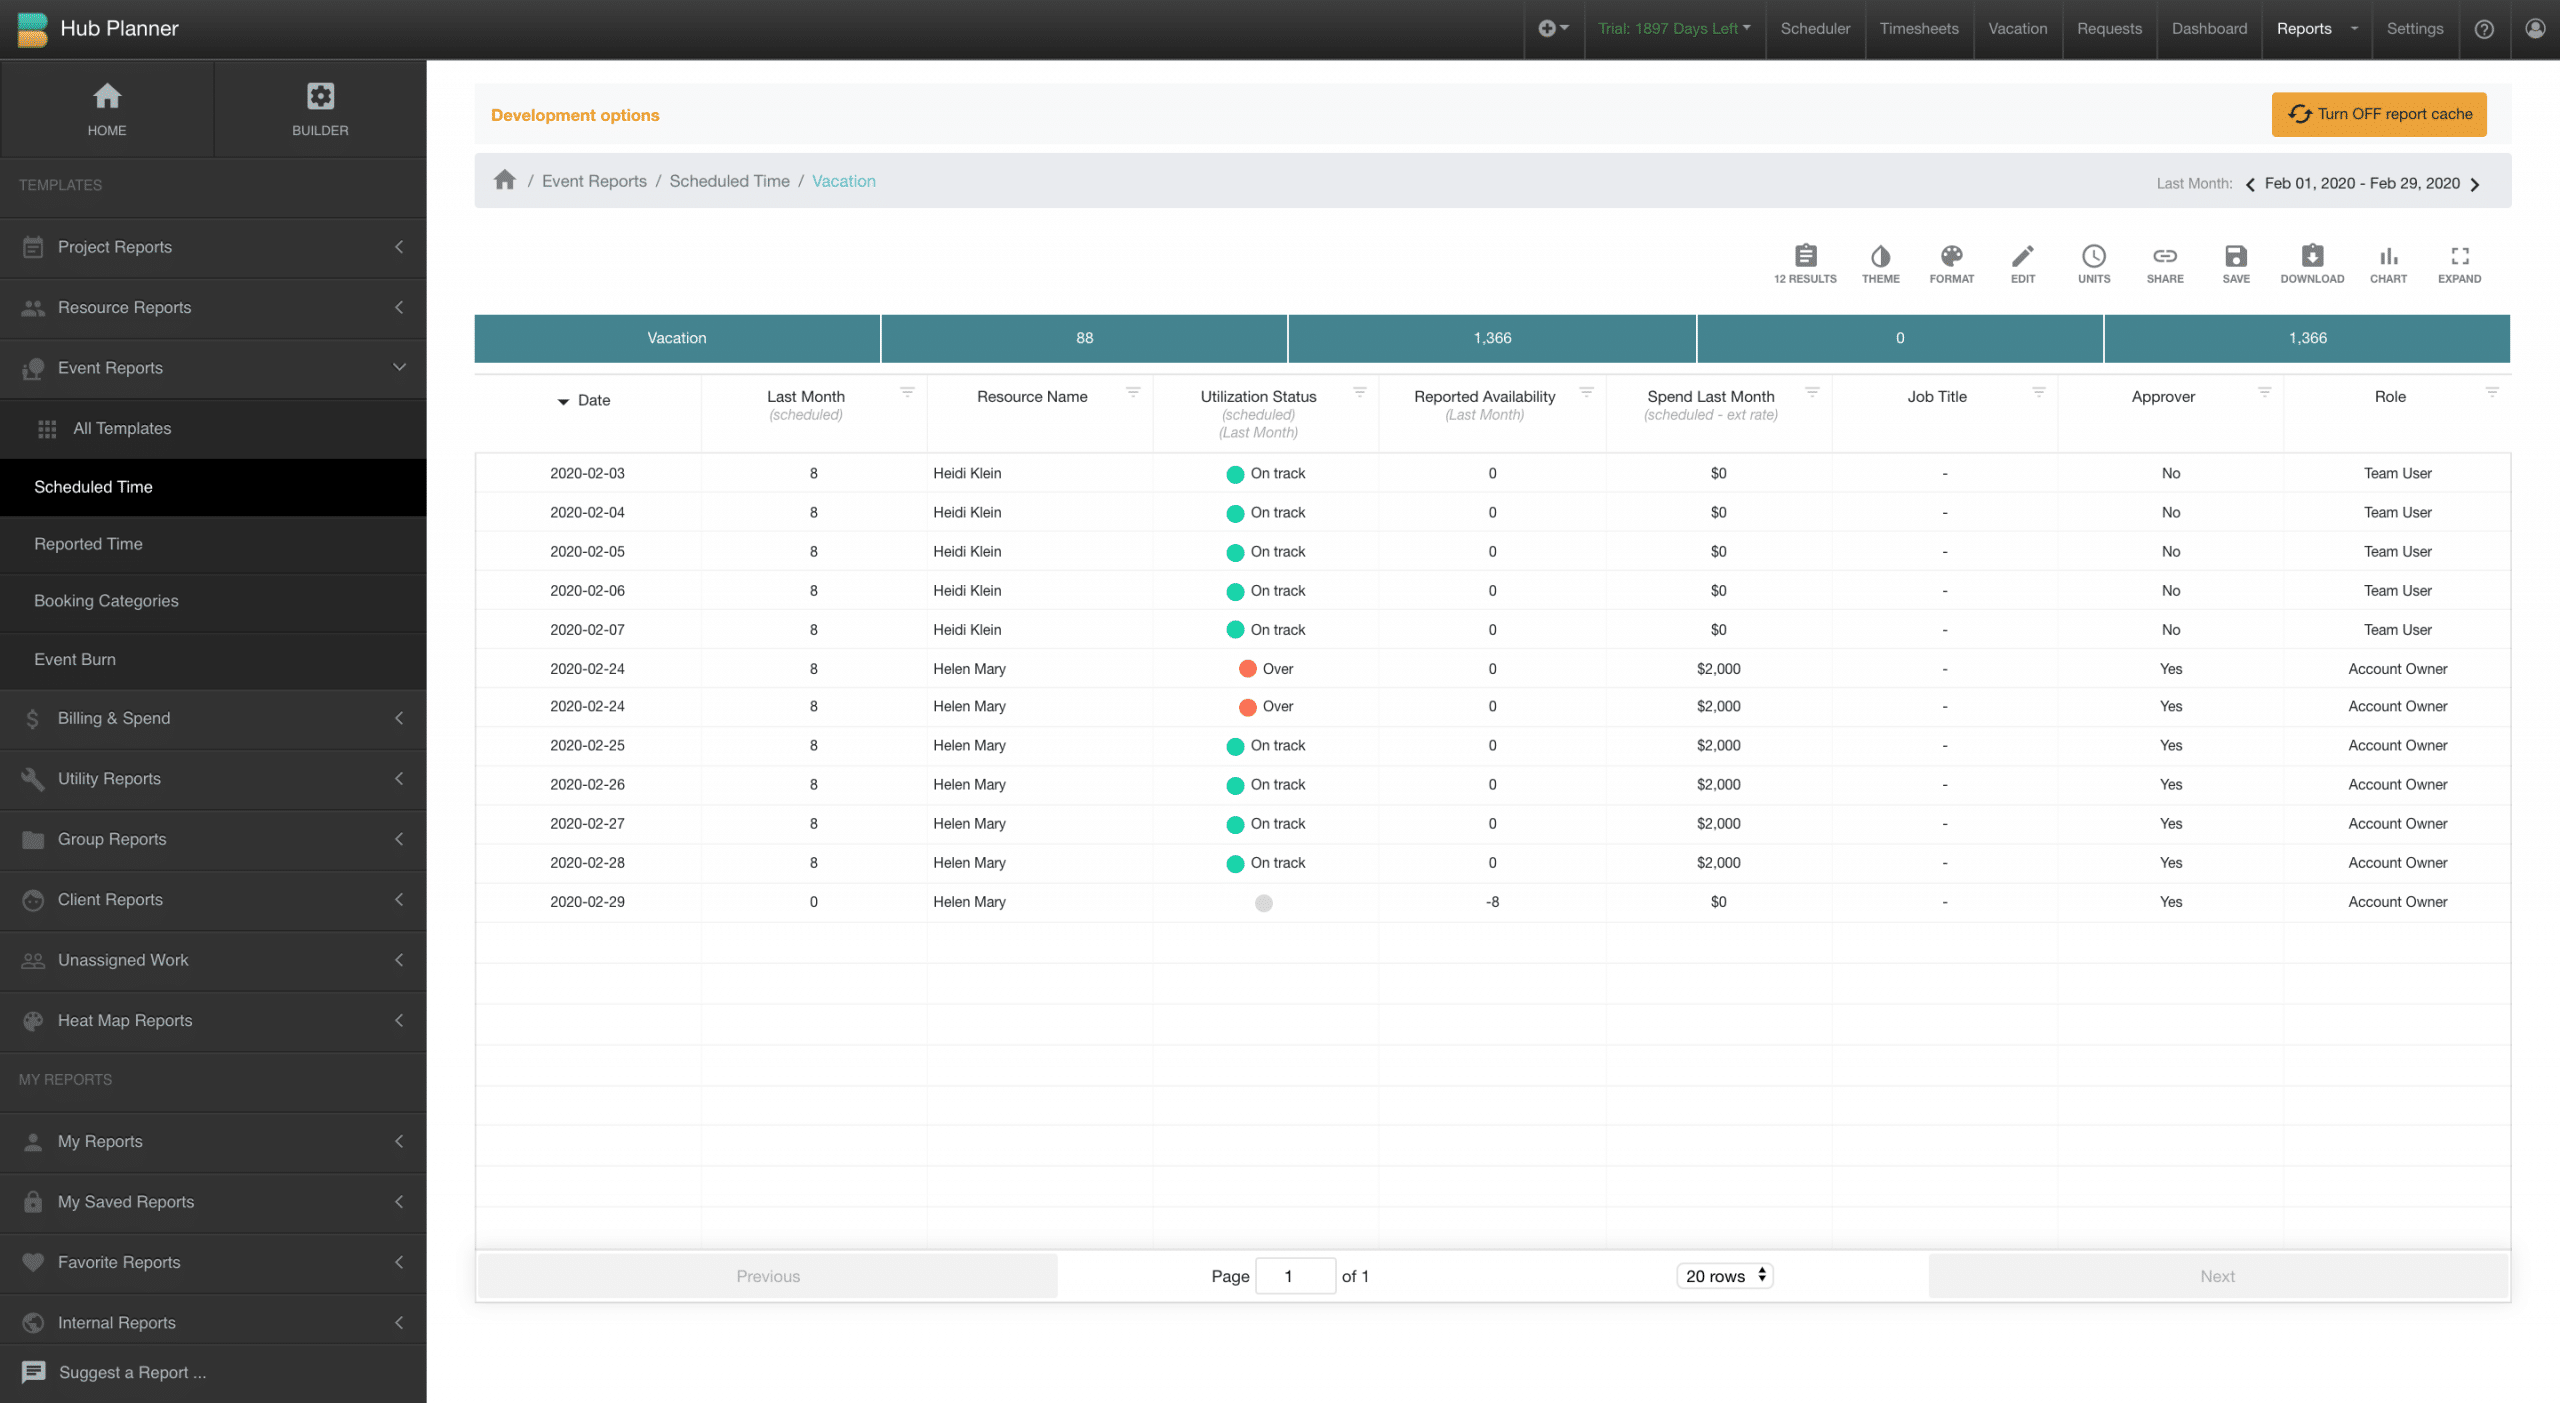
We need to add Resource Name so we know what line item data relates to. We can also remove unwanted columns too.
In the below example we have removed unwanted columns and added the following data columns
- Resource Name
- Utilization Status
- Reported Availability
- Spend Last Year
- Job Title
- Approver
- Role
Resource Reports – Vacation Report
Opt to create a vacation report direct from the Resource Reports.
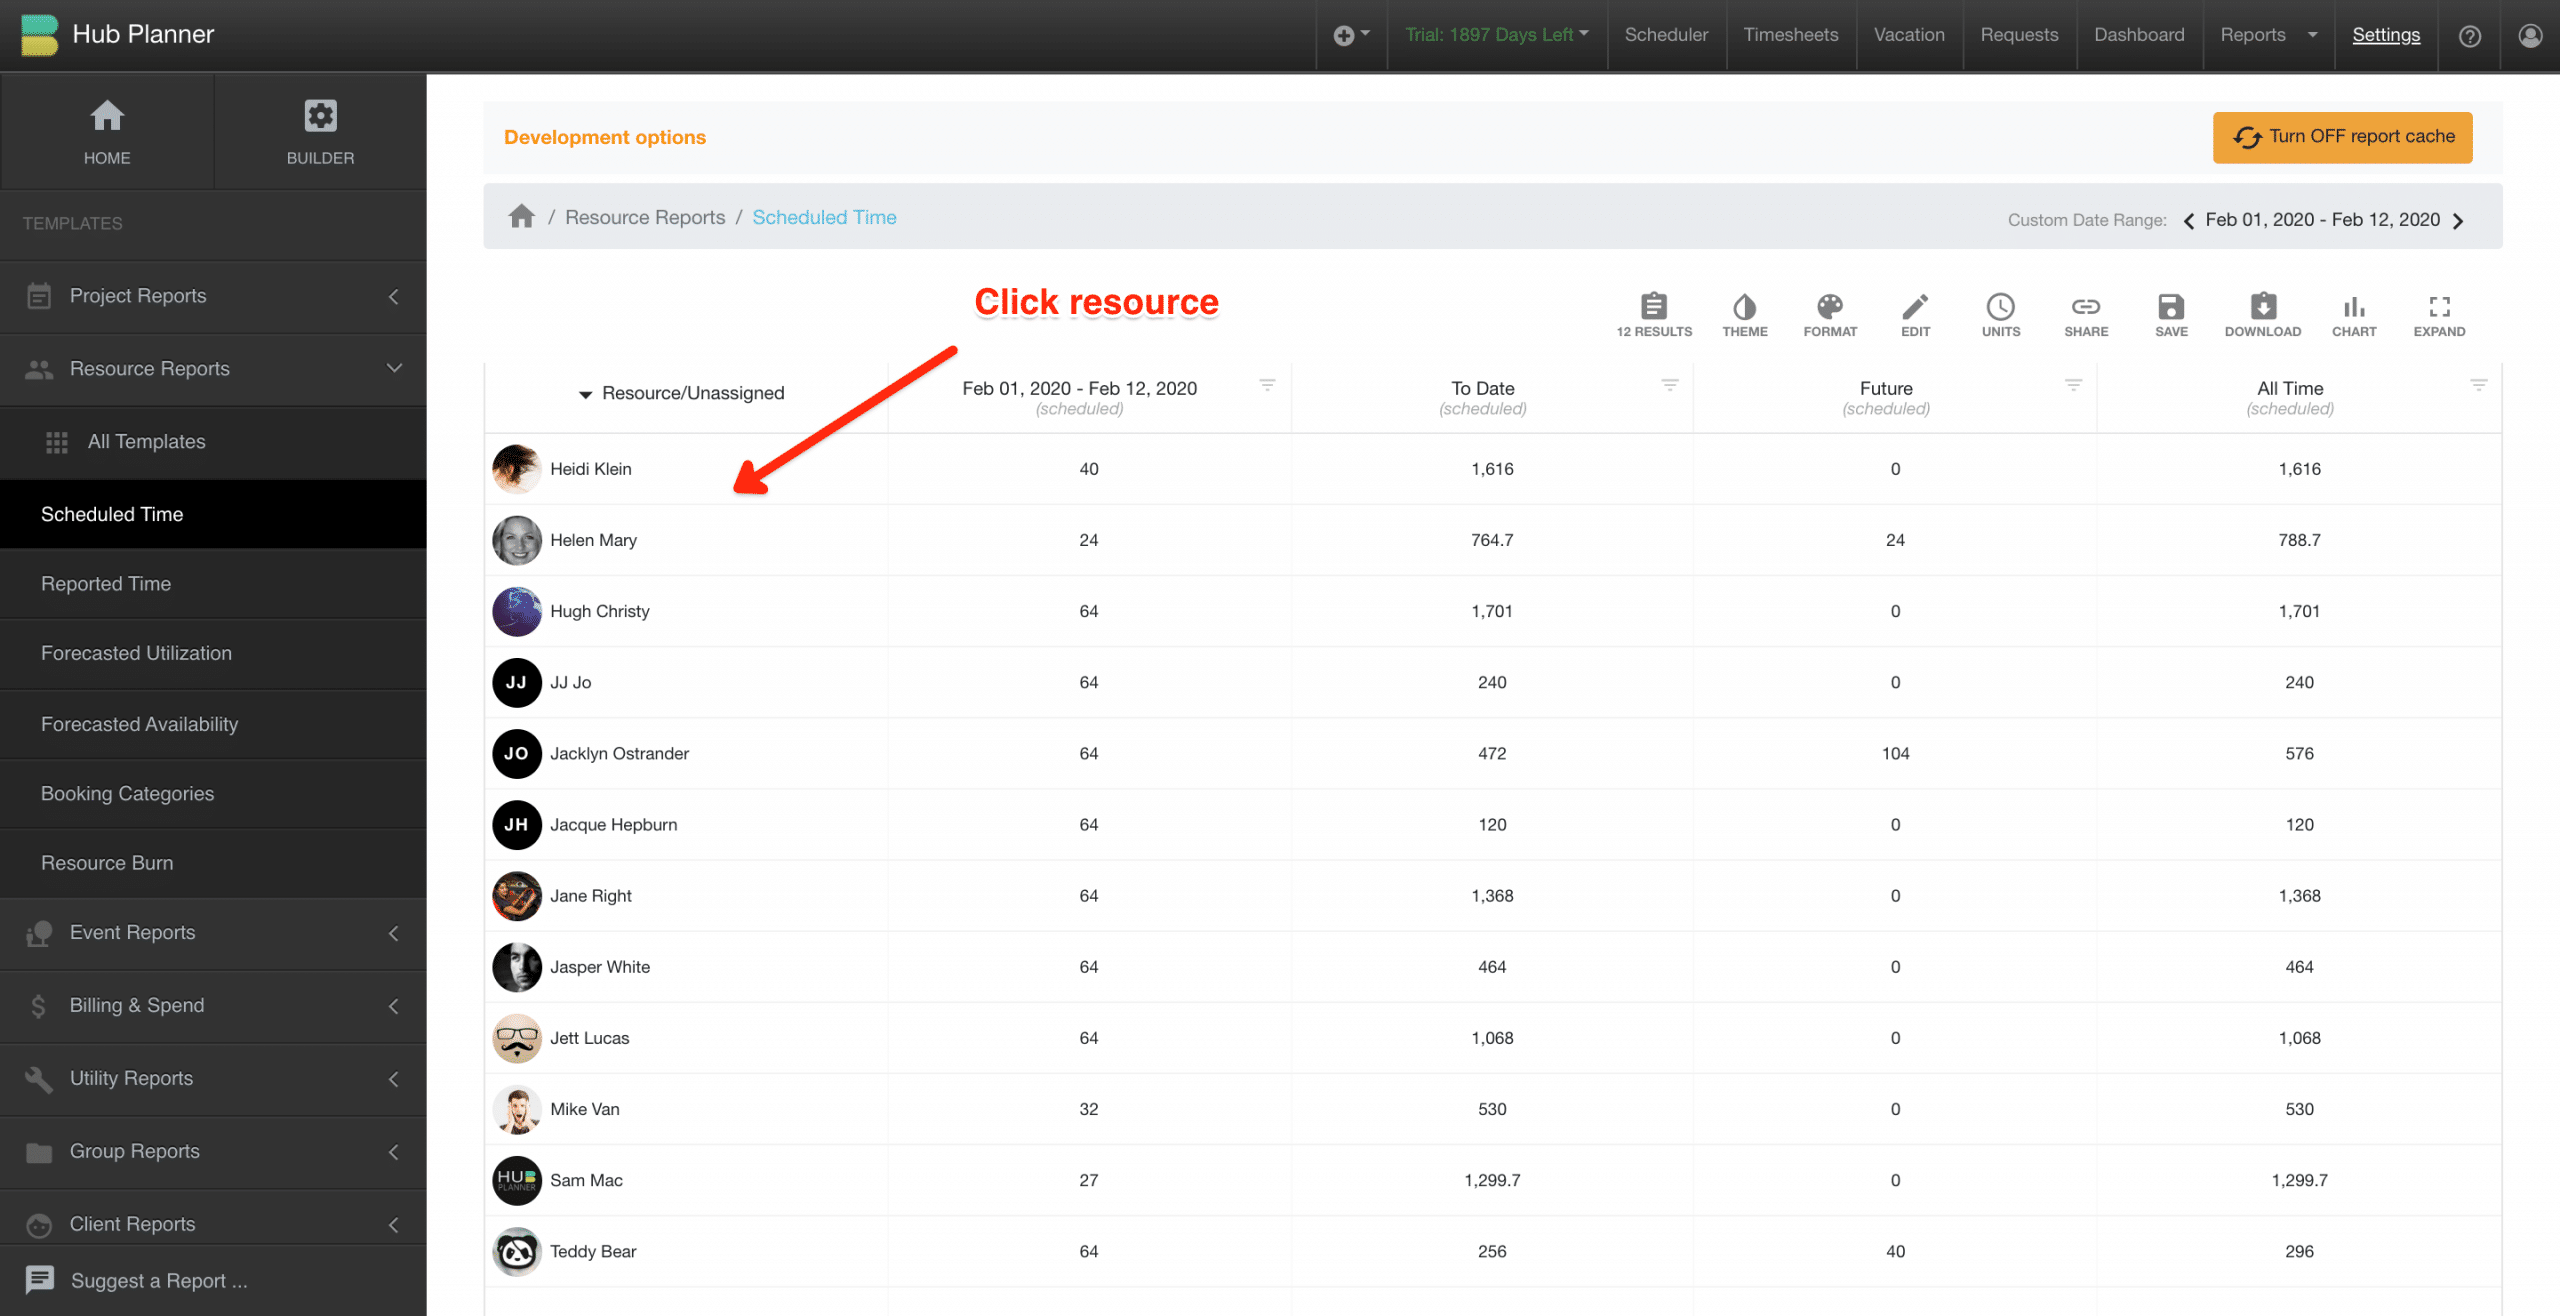
- Open Hub Planner Reports
- From the home page, select the ‘Resource Reports’ folder.
- Select ‘Scheduled Time’.
- Click a resource to report on.
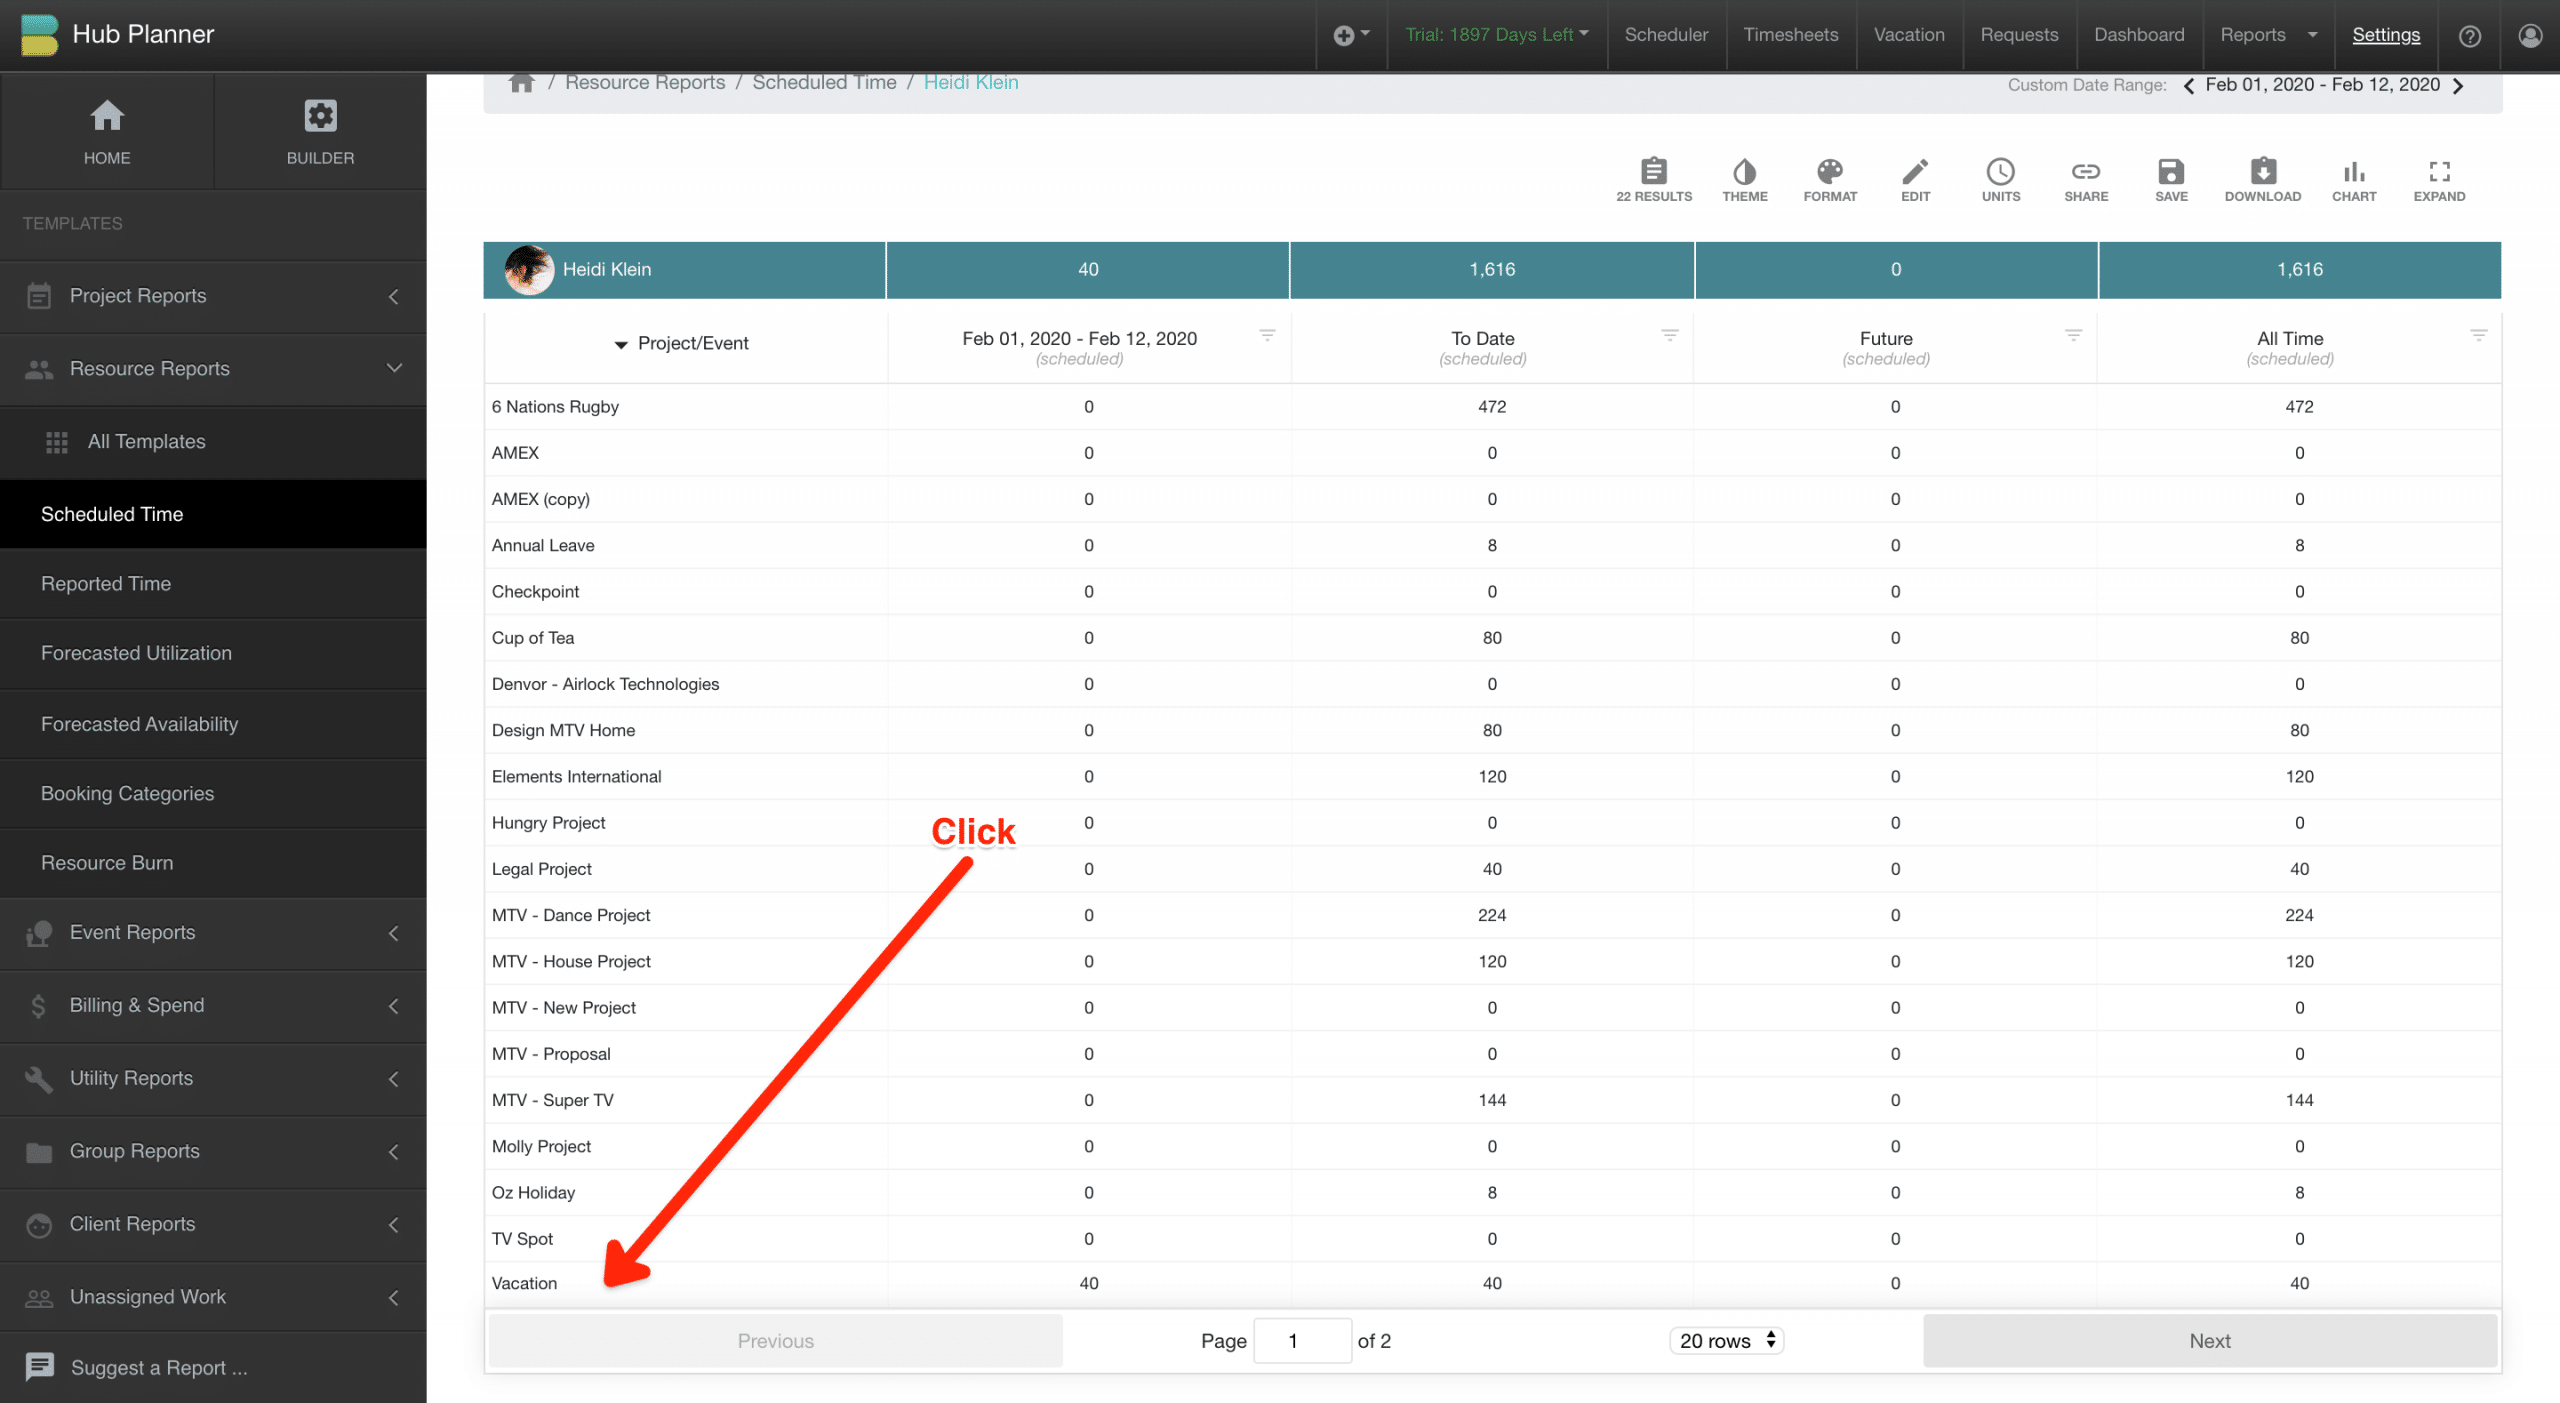
Navigate to the line item ‘Vacation’ – here you see a breakdown of vacation time within the chosen date range under the following column headings:
- Last Month
- To Date
- Future
- All Time

Now we want to get a breakdown by date of when the resource has vacation time scheduled. To do so we have a number of options.
- Multi-Level Report
- Date column report.
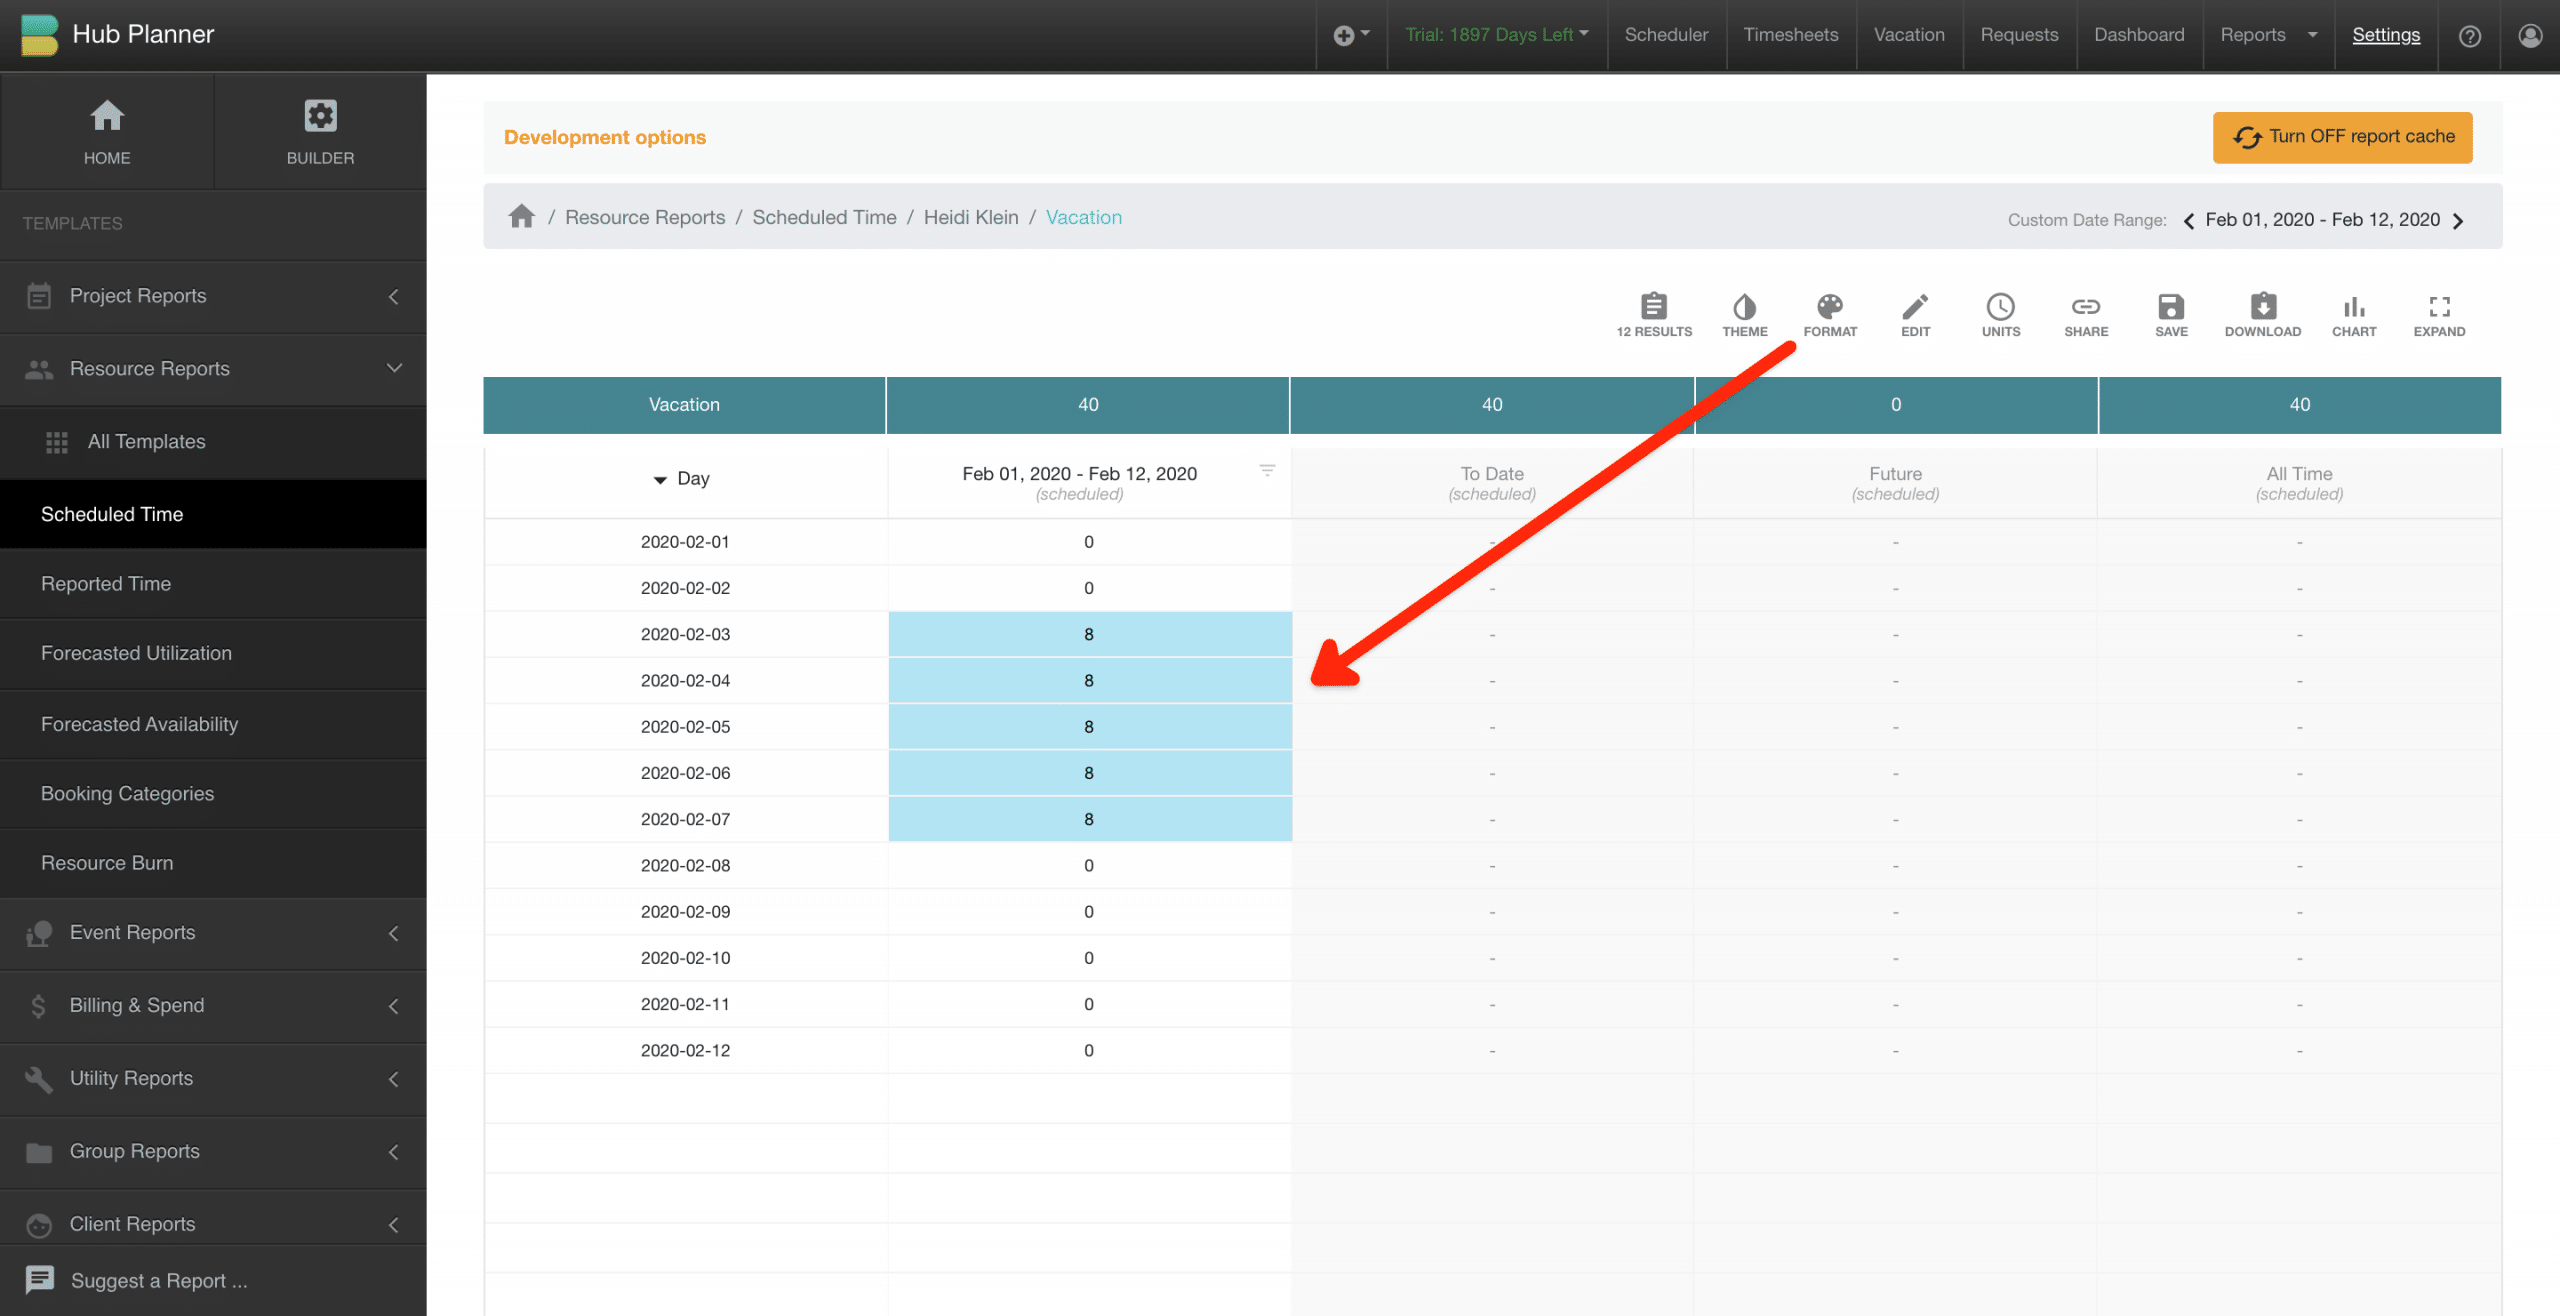
Multi-Level Report
Here we are simply clicking through the levels to obtain the information. Click on ‘Vacation’ to navigate to the next level. Here you have a breakdown of day by day line item data.
Go one step further and click Format to add a conditional formatting rule to highlight any data >0. See below example.
Note you have the tracking the report levels within the address bar. To go backwards. Simply click the level you wish to navigate to.
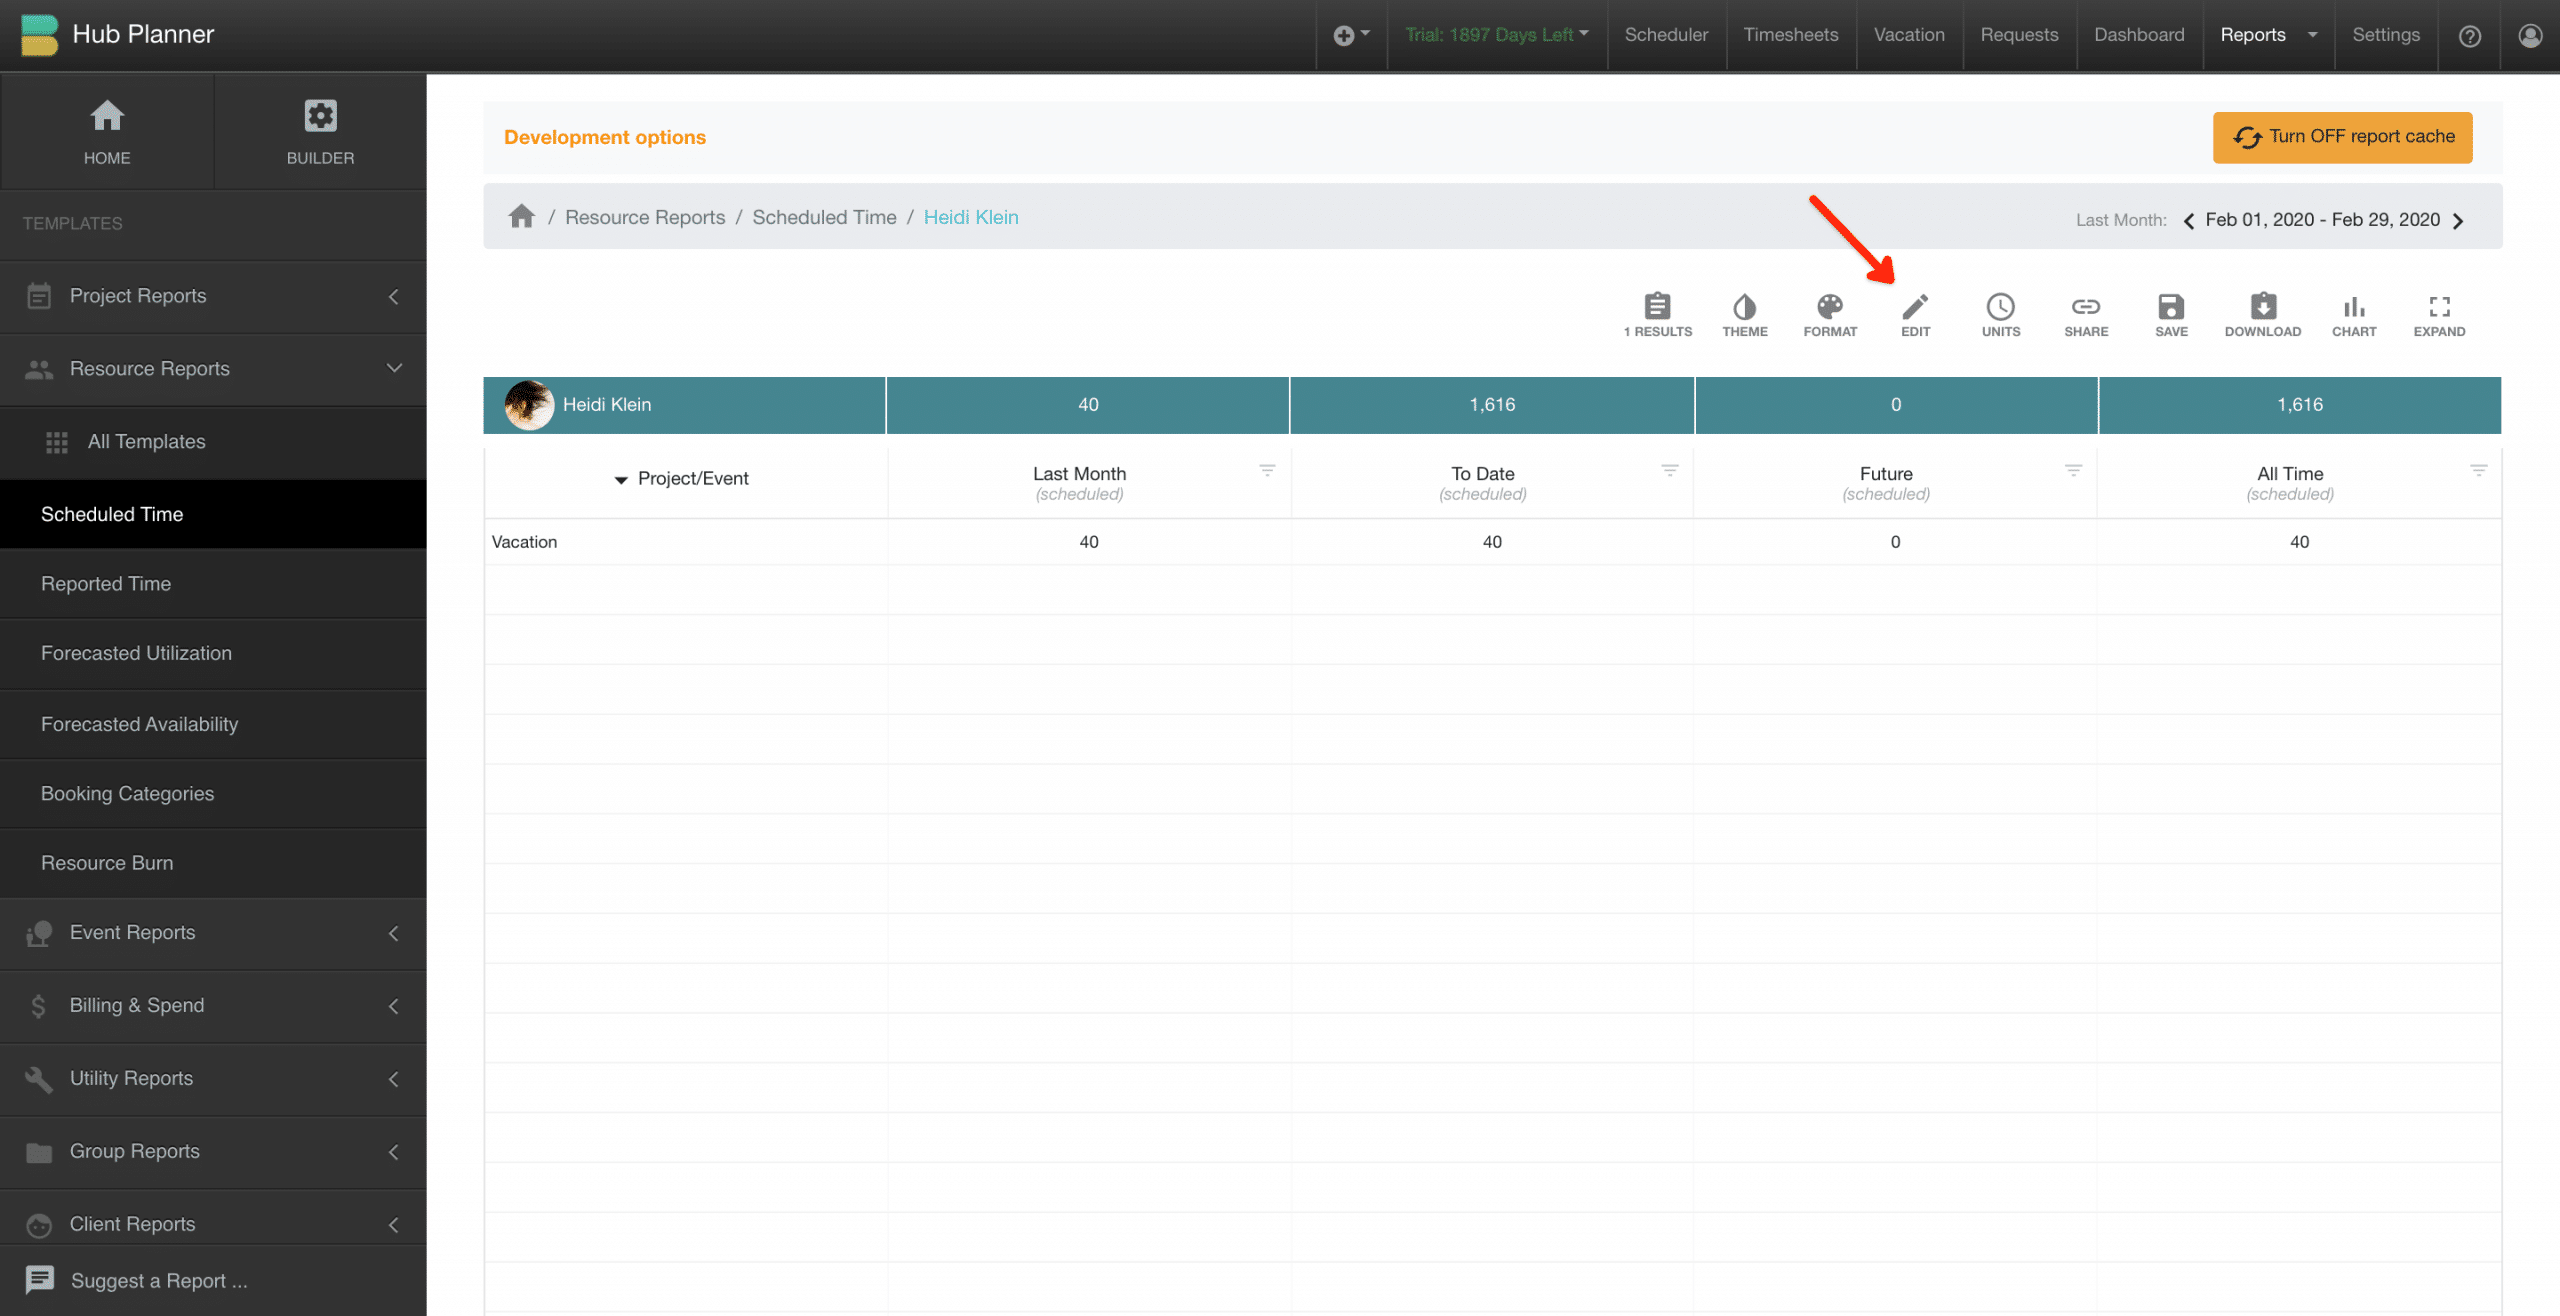
Date Column Report
You might opt for a date column report in order to include some more data columns or break the data down by week or month for example. To accces the date a column report. Firstly, navigate back to the Vacation Level of the report. Click on ‘Edit’ within the report toolbar. Select Columns. This will open up the Report Builder.
Report Builder – Date Column Report
- Date Range – Adjust as necessary
- Available Columns – Click ‘Date Column Report’ which will activate ‘Scheduled Time this month’ as the ‘Active Split Column’. This will be highlighted in Selected Columns.
- Selected Columns – Select date frequency (day, week, month or year)
- Feel free to remove unwanted columns and add in some new data columns.
- Click Update Report

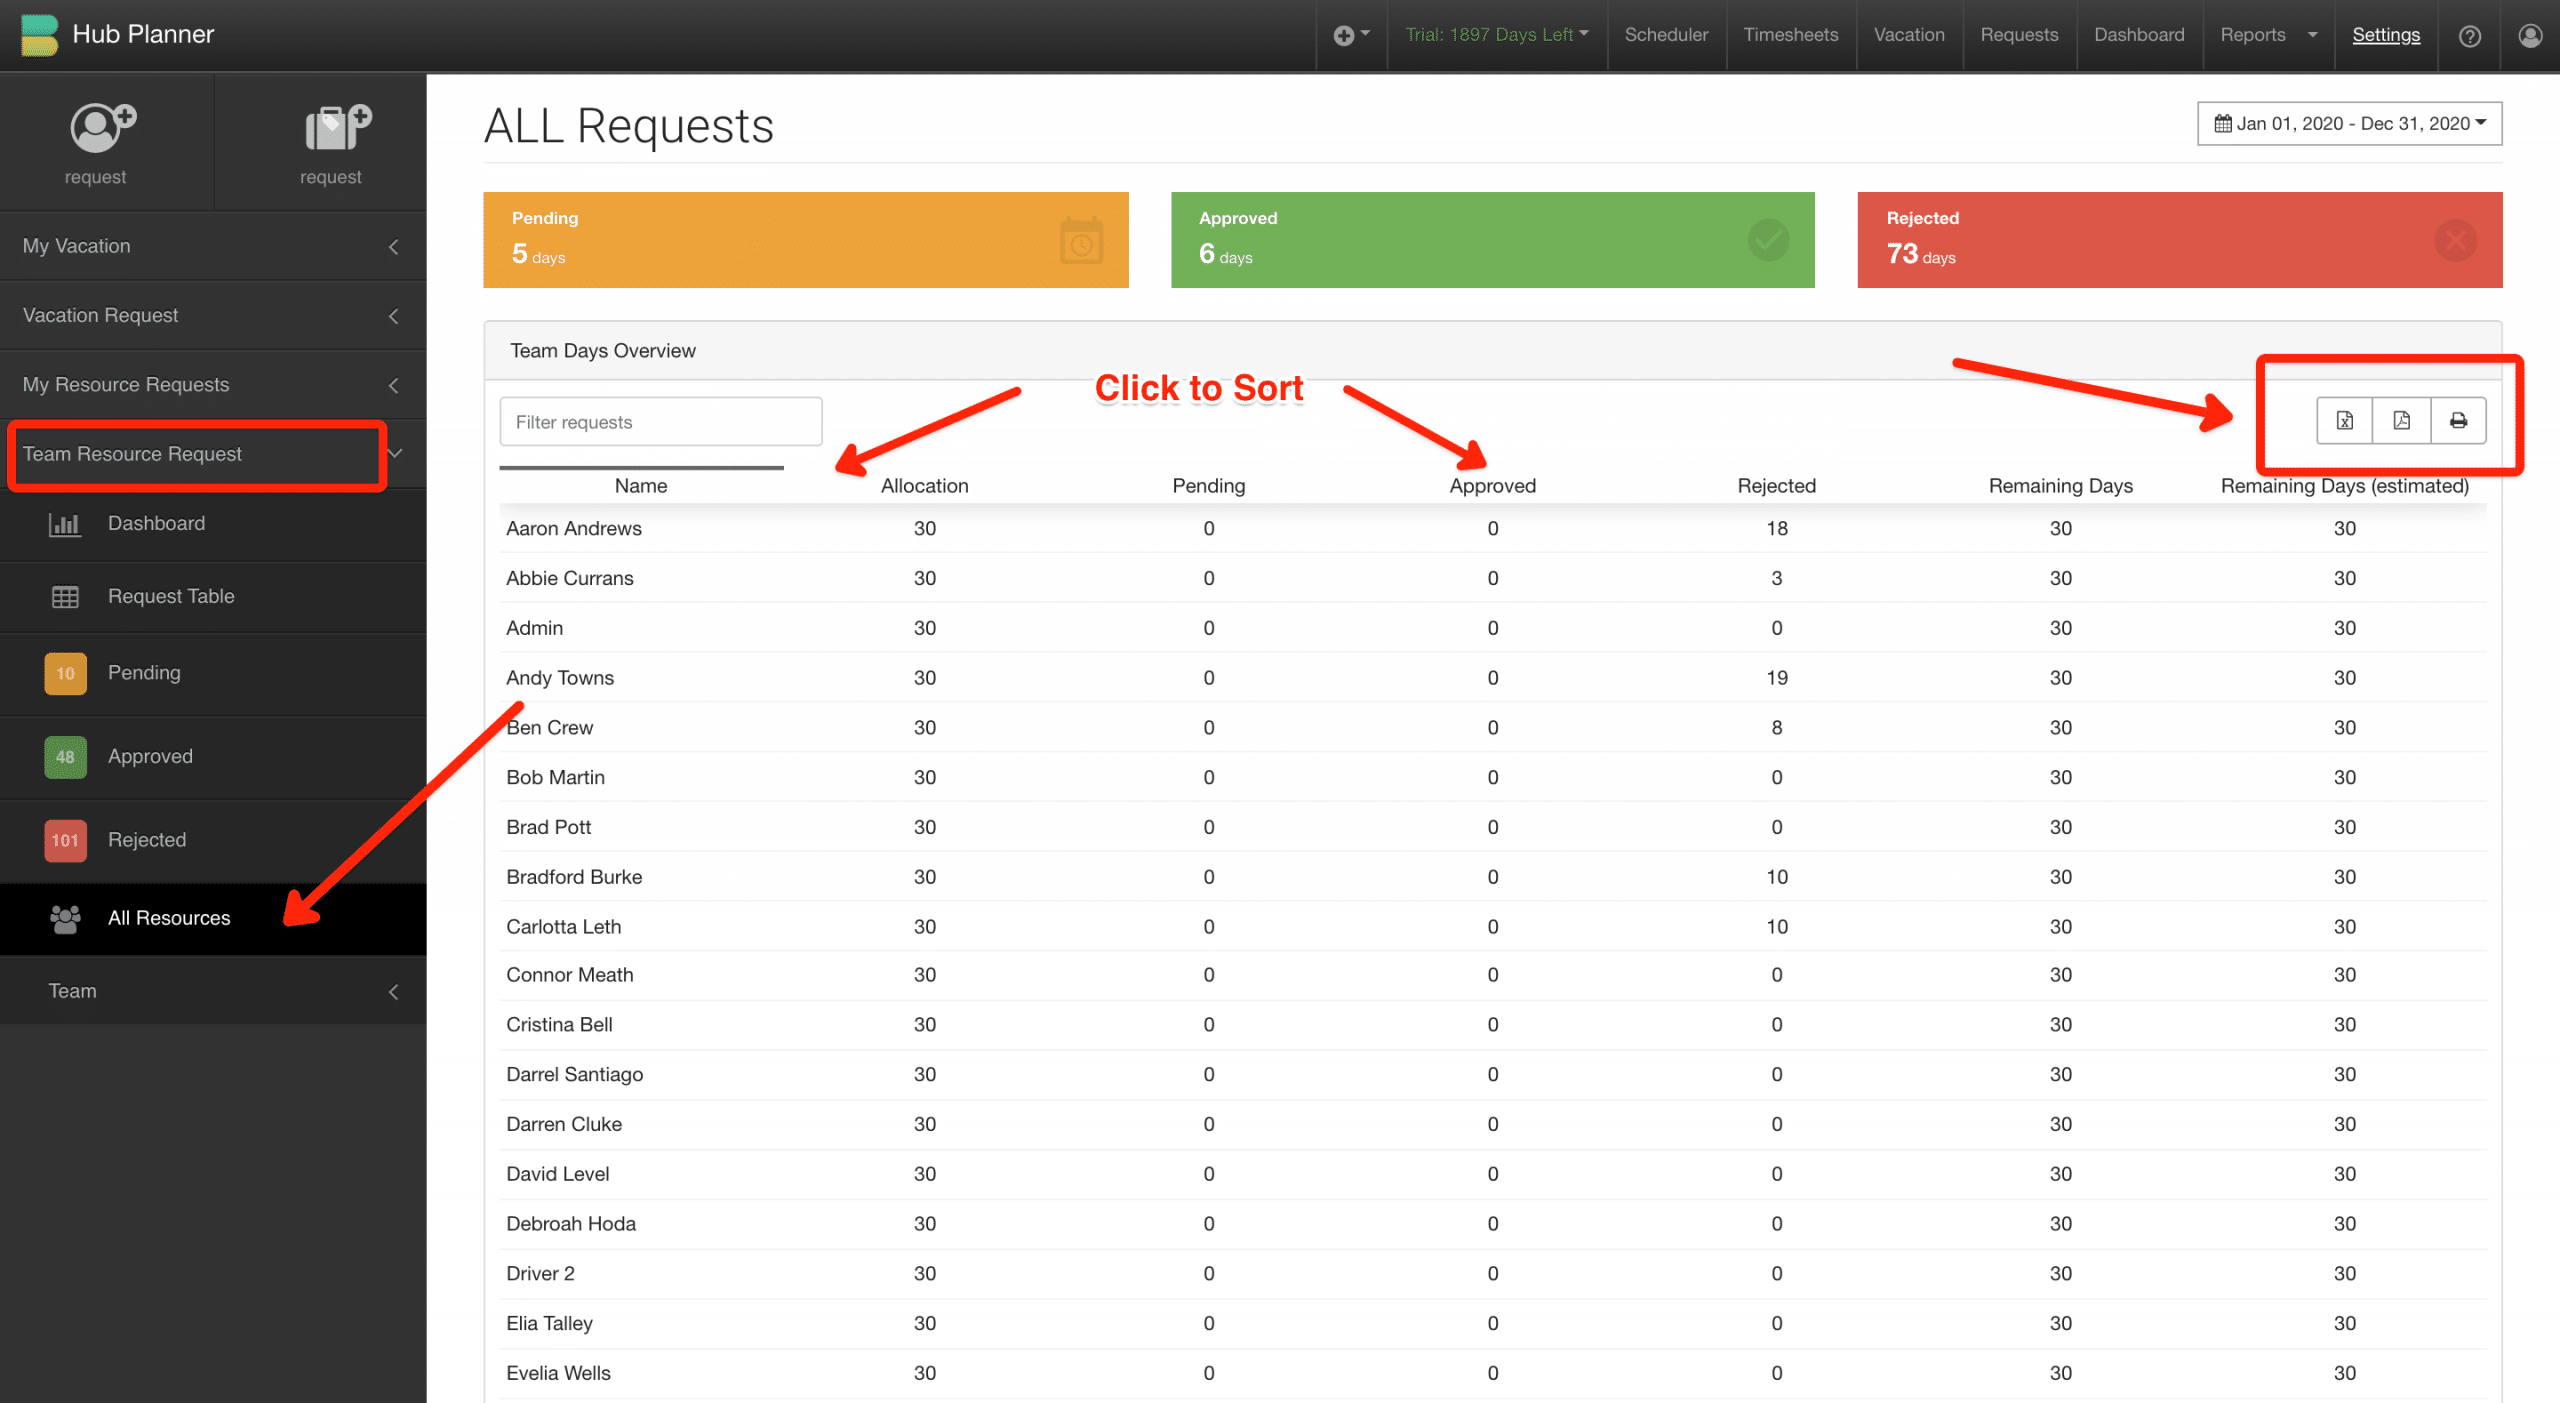
Report from the Hub Planner Vacation Extension
Navigate to Hub Planner vacation extension.
Within the sidebar, click on Team Resource Request. From here select ‘All Resources’. This will open the all resource team days overview. You can also opt to export or print this report. Options include:
- CSV file
- PDF File