How to Subscribe to a plan?
- Navigate to Settings
- Scroll to Billing
- Select Billing
- The Interface with now show you your Hub Planner Plan options. Prices are displayed in your default currency.
How do I change my default currency?
- Settings
- System Settings
- Account Settings
- Default Currency
- Select Currency
- Scroll to bottom of page
- Click Save
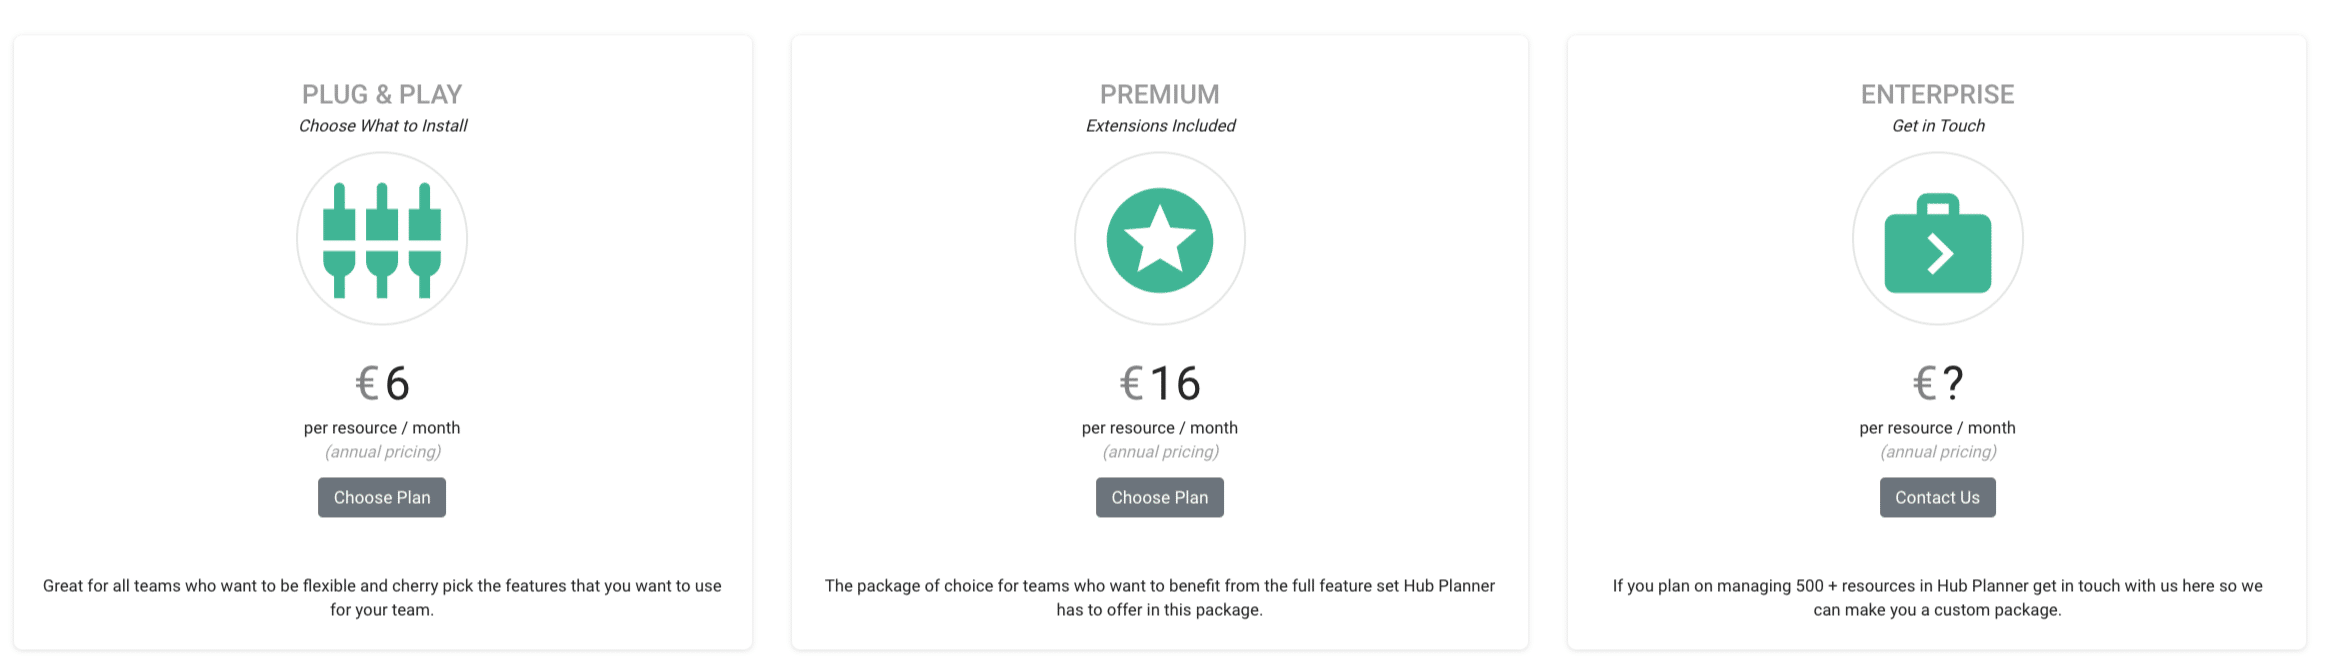
Choose your Hub Planner Plan
There are two main options available to you. Plug & Play and Premium Plans. The Enterprise Plan is for company’s seeking in excess of 500 licences.
What’s the difference between the Hub Planner Plans
Plug & Play is our starter plan. You have access to the main features of Hub Planner such as Scheduler and Reporting with unlimited Projects. Customers can add extensions as you need them. Whereas the Premium Plan includes all of the extensions for one heavily discounted price!
Choosing the Plug & Play Plan
Ok great, so once you have selected your plan. You will be brought to the next step to add in you company account details and VAT number.
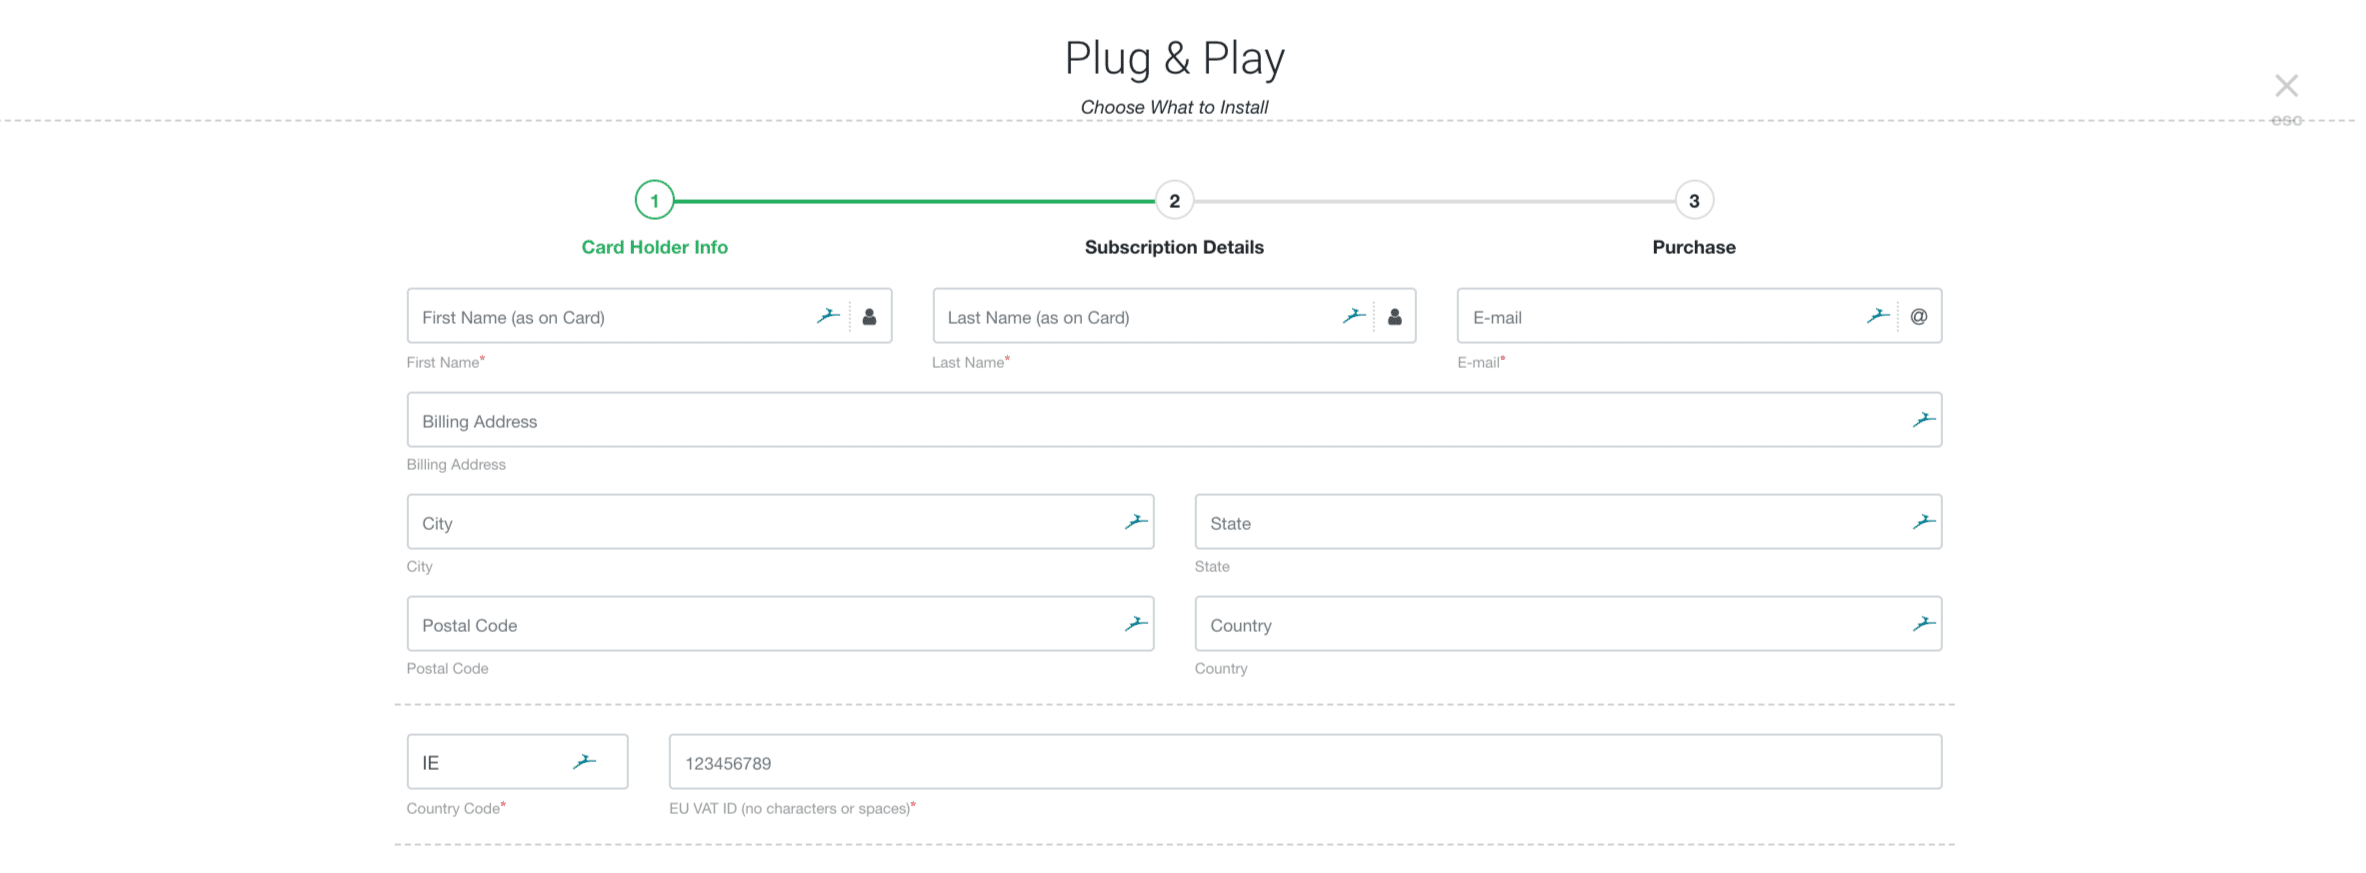
Subscription Details for Plug & Play Plan
The Plug & Play plan allows you to choose what you would like to install to Hub Planner.
- Choose the amount of Licences you require
- Select Yearly or Monthly (note yearly earns a discount)
- Click View / Configure your Plan
- Add or Remove the Extensions you need.
- For Project Management & Unassigned Work Extensions, you will need to select the amount required.
- Click Next to Purchase
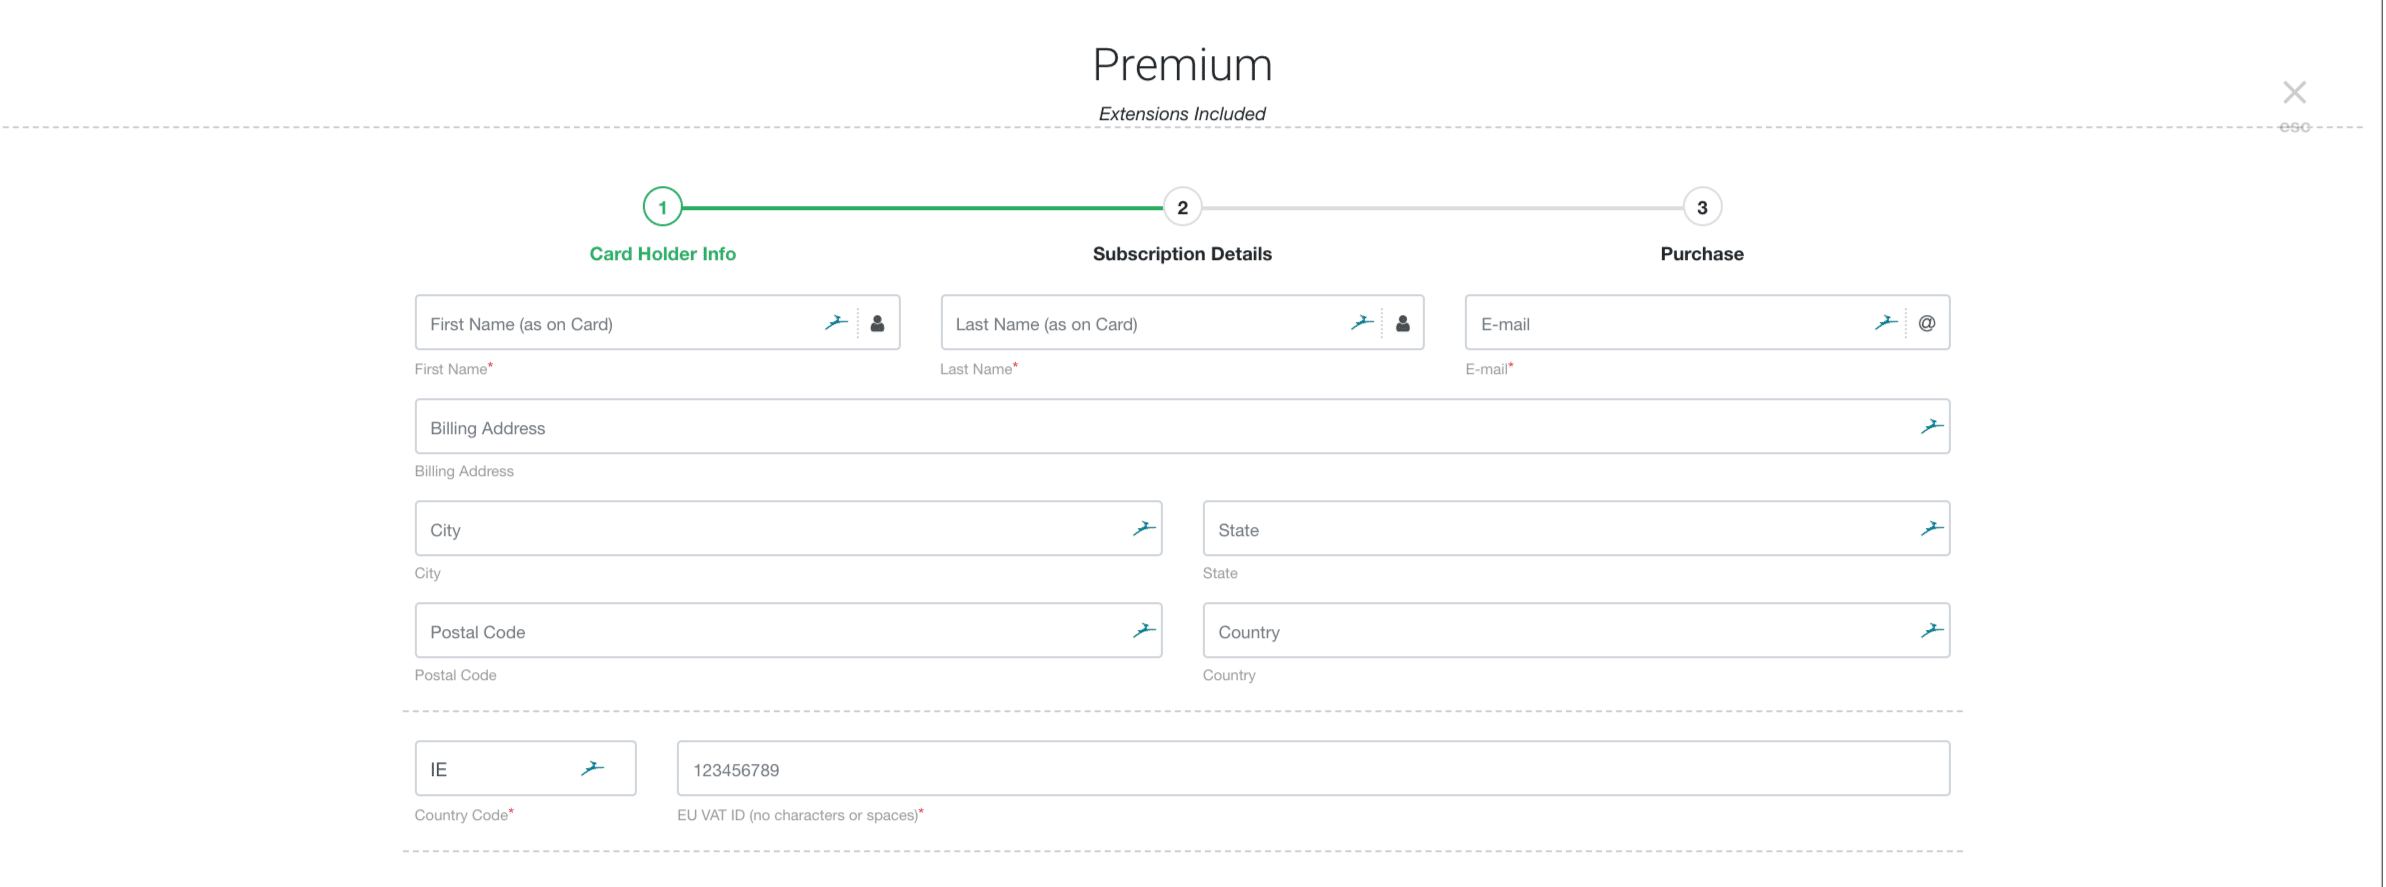
Choosing the Premium Plan
With the Premium subscription, you really are getting the full spectrum of Hub Planner functionalities. A great choice!
Taking similar steps to the Plug & Play plan, click the Premium Plan icon. You will be taken to the next step which is to enter the account owner details and company VAT number.
Subscription Details for Premium Plan
The Premium plan includes all extensions. So there is no need to delete or add, hem and haw about what to include. It’s all there.
- Choose the amount of Licences you require
- Select Yearly or Monthly (note yearly earns a discount)
- Click View the Premium Plan and what’s included
- Click Next to Purchase
See below example of 100 Premium Licences opting for a Monthly Subscription. 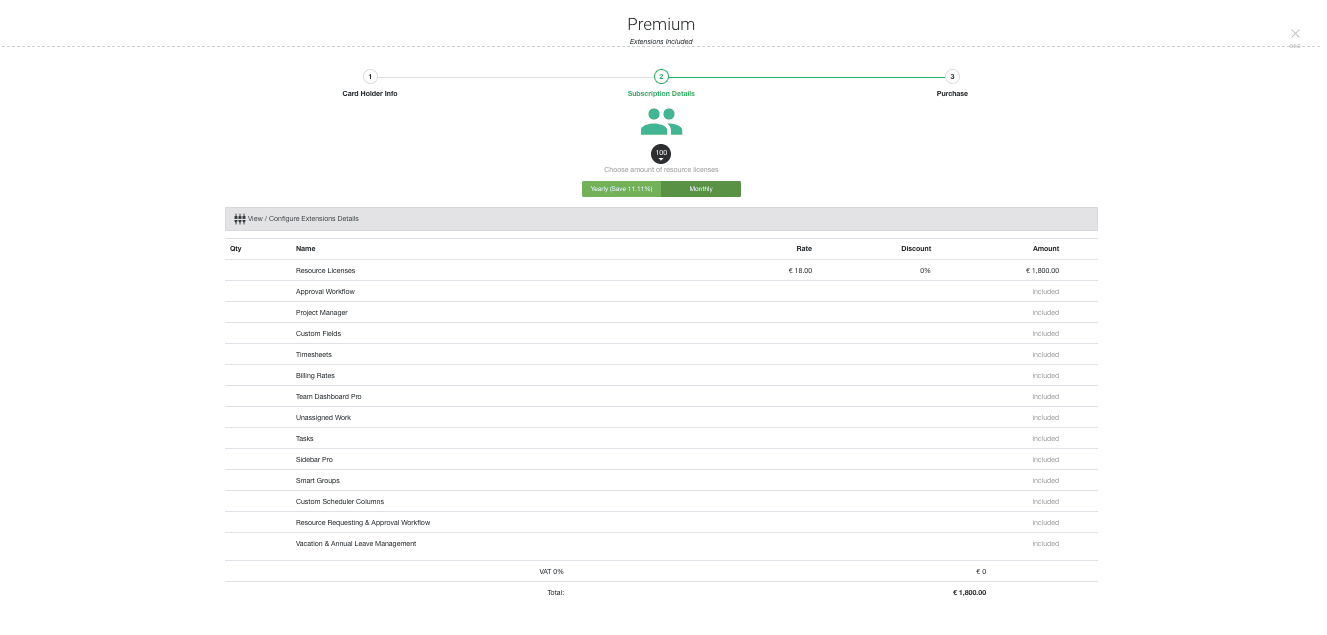
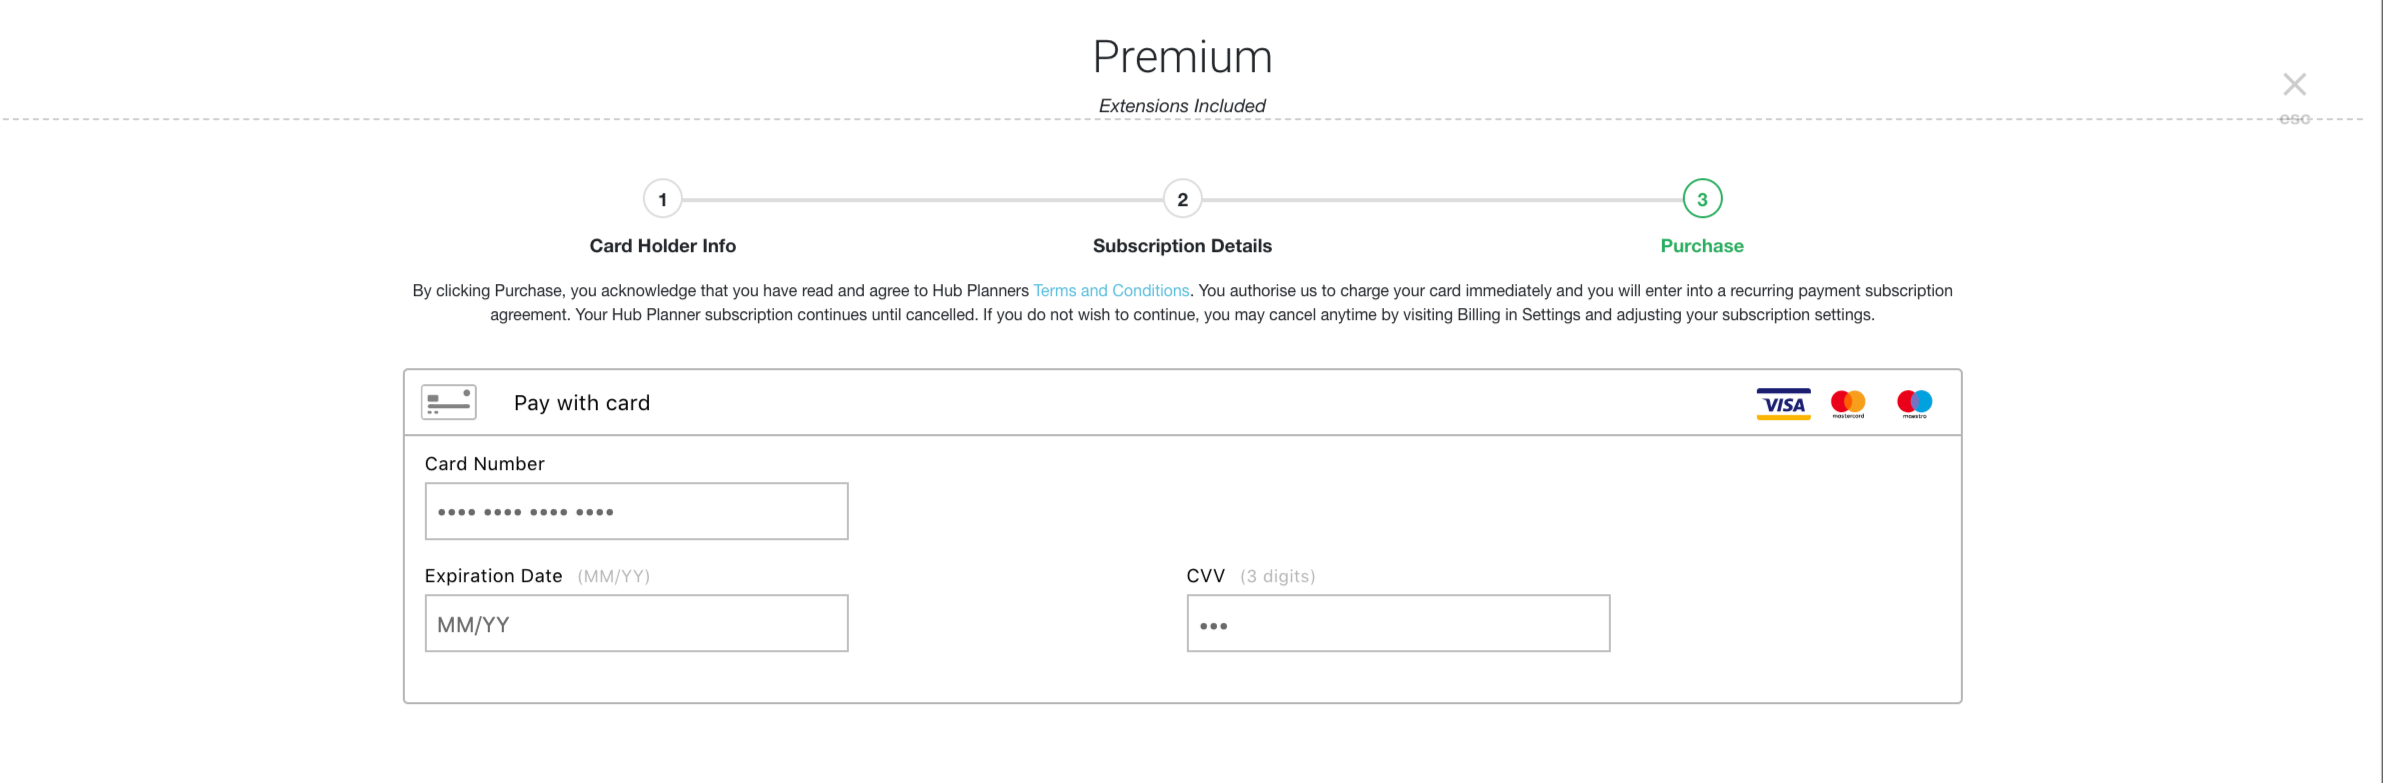
Purchasing the Hub Planner Plan
The last step is entering the card details of the Account Subscriber.
What Happens Next?
Now you have complete live access to your Hub Planner Account with your chosen subscription. All you projects and resources remains as is. There is no loss of data. Now, you can begin to invite resource to your account by sending them the sign up email.
Sending an Invitation to join your Hub Planner Team
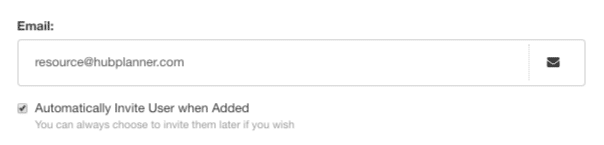
If you are creating a new resource. You can tick the box to include an automatic invitation to be sent to the recipients email address.
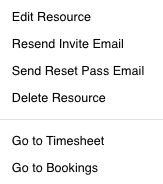
You can also opt to resend an invitation to a resource via Manage Resources.
- Settings
- Manage
- Manage Resources
- Select the resource
- Click the drop down list
- Select ‘Resend Invite Email’
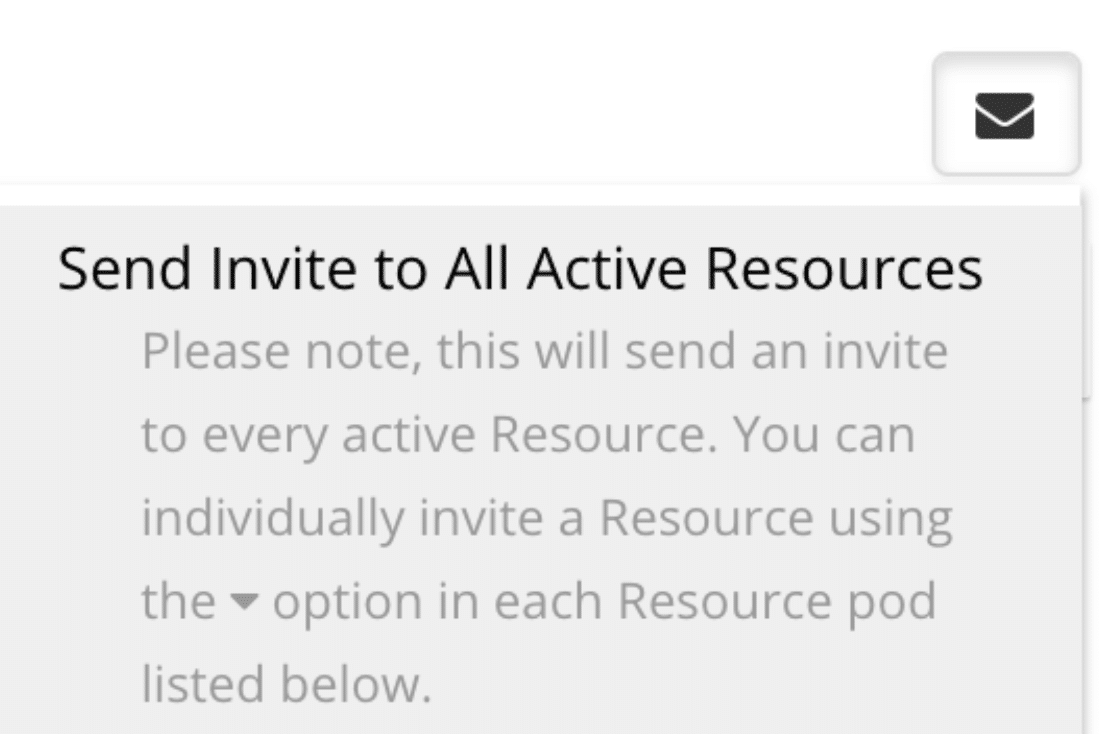
Adding Users – How do you send invites to existing users?
If you wish to invite all existing resources. There is an option at the top right hand of the screen. Click the envelope icon.
How do I see my Billing History?
Navigate to Settings. Scroll to Billing. Now you have your options to view Billing History, Billing Details and Billing. If you need to make any changes to your subscription, this is where you need to go.