Billable / Non-Billable FAQ’s
Some helpful hints and tips on how track and tag non billable work. In Hub Planner, there are multiple ways in which you can capture non-billable work.
- Booking
- Resource
- Project
- Time Entry
We will use timesheets and reports to assist with the tracking on non-billable work. Firstly, let’s show you how to set Bookings, Resources and Projects as non-billable work.
What happens when I make a booking Non Billable?
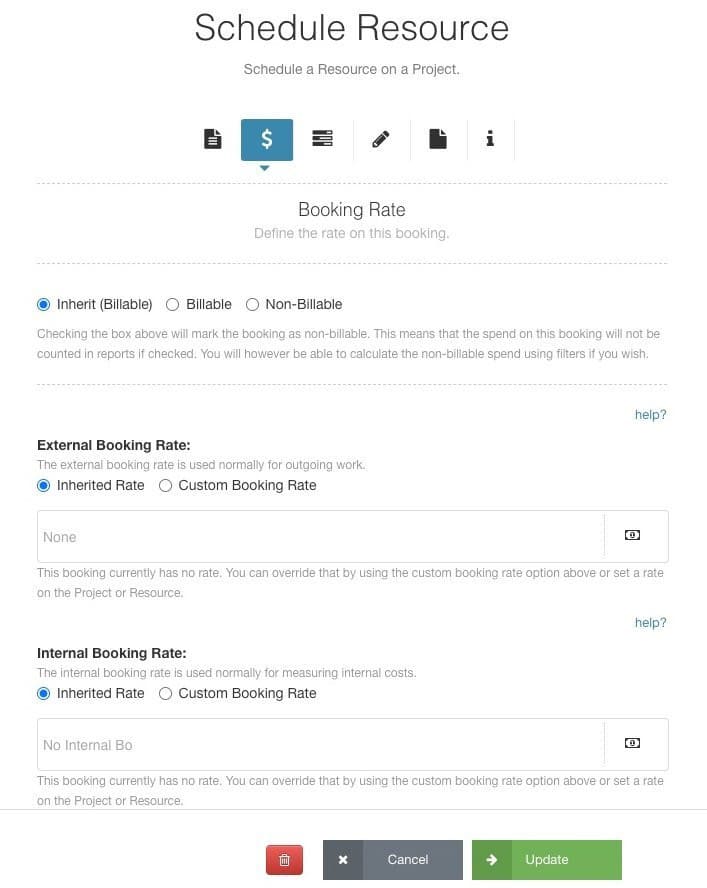
Checking the box above will mark the booking as Non Billable. This means that the spend on this booking will not be counted in reports if checked. You will however be able to calculate the Non Billable spend using filters if you wish.
How do I make a booking Non Billable?
- Select a booking from the scheduler and double click to open the booking modal.
- Go to the 2nd tab Booking Rate
- Check the box ‘Non Billable’
- Scroll to the bottom and hit ‘Update’
What if the non-billable box is already ticked? What does inherited mean?
This means that the project has already been selected non billable prior. What happens if you un check the box? If you un check the box of the booking. Then it will charge out the booking rate applied if there is one set.
Can I make a resource Non Billable?
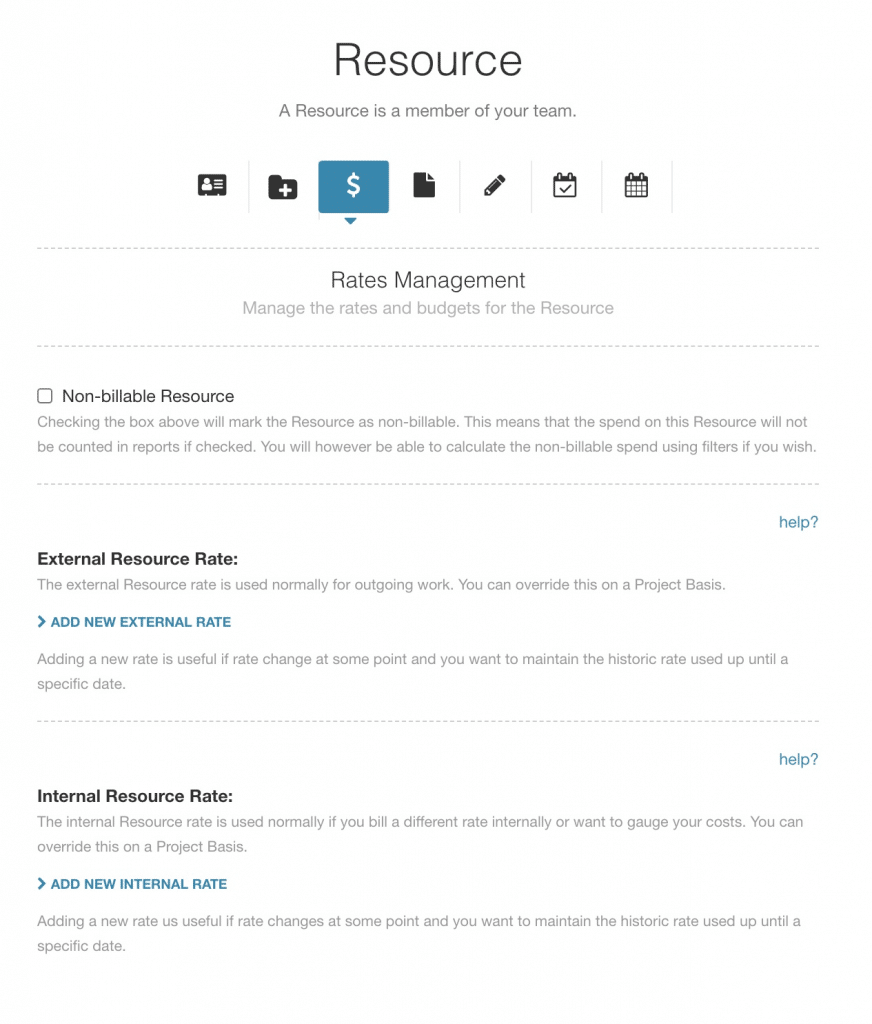
Yes. Checking the box above will mark the Resource as Non Billable. This means that the spend on this Resource will not be counted in reports if checked. You will however be able to calculate the Non Billable spend using filters if you wish.
How to make a resource Non Billable?
- Select a resource from the scheduler and double click to open the resource modal.
- Go to the 2nd tab Rates Management
- Check the box ‘Non Billable’
- Scroll to the bottom and hit ‘Update’
Can I make a Project Non Billable?
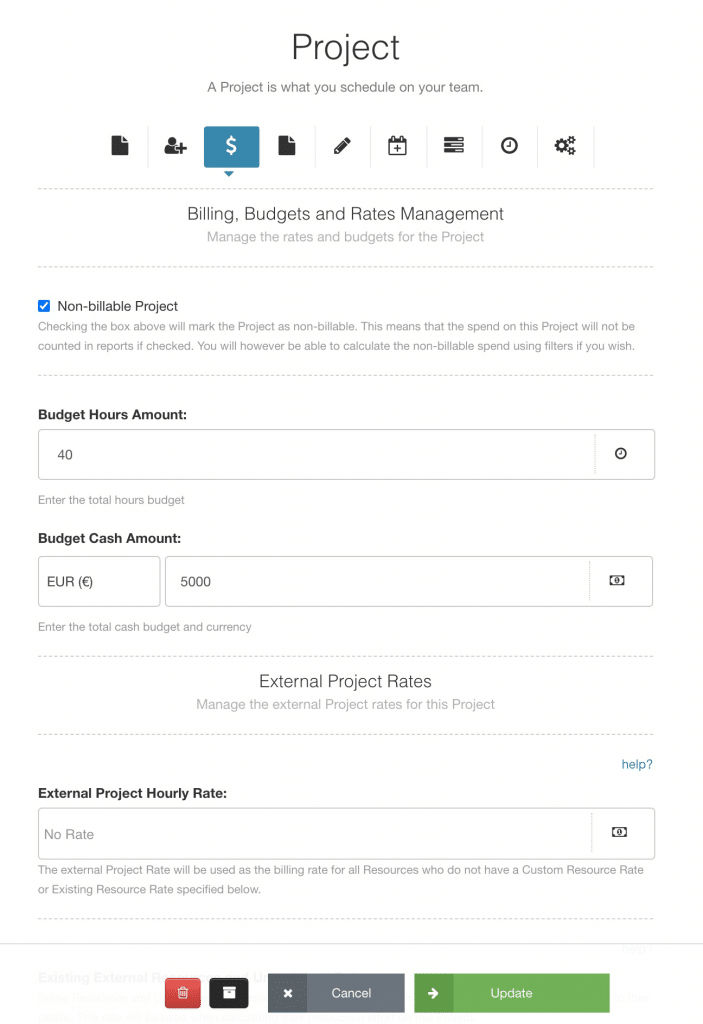
Checking the box above will mark the Project as Non Billable. This means that the spend on this Project will not be counted in reports if checked. You will however be able to calculate the Non Billable spend using filters if you wish.
How to make a project Non Billable?
- Select a project from the scheduler and double click to open the project modal.
- Go to the 2nd tab Rates Management
- Check the box ‘Non Billable’
- Scroll to the bottom and hit ‘Update’
Timesheets
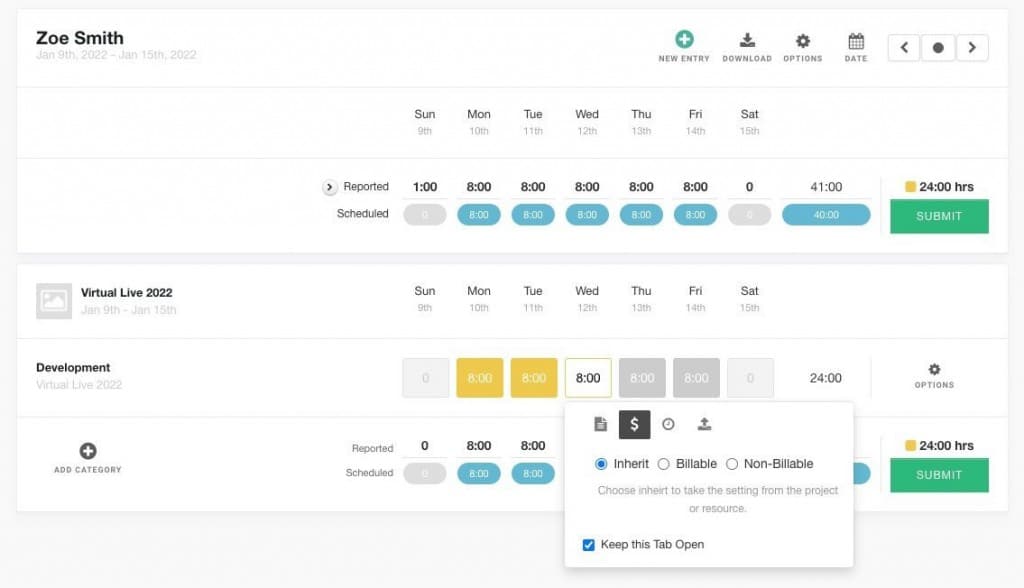
You can mark a single time entry as non-billable. Simply activate the Billable/Non Billable options by clicking a time entry. A pop up will appear with options to select from. Keep the tab open to help with simply ticking and choose which entry is non billable or billable. All entries will be defaulted to billable.
How do I make a time entry Non Billable?
- Select the Time Entry.
- Select the $ icon for access to non billable options.
- Tick the box for ‘Non-Billable’ to make the time entry.
- Submit
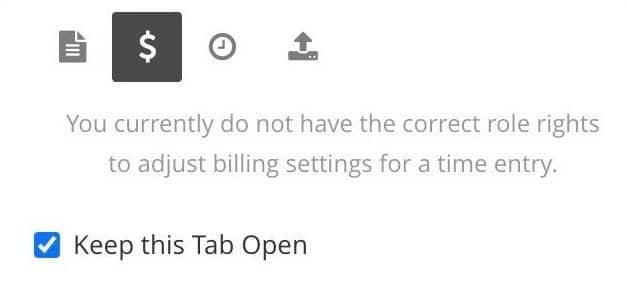
How come I can’t make an time entry non billable?
Do you see this message? This means that you do not have the role right to set a time entry as non-billable. You will need to request access from your Hub Planner Account Owner.
How do I set the role right to allow users to mark time entries as billable/non-billable?
Sure, navigate to Settings -> System Settings -> Roles -> Billing Rates -> Time Entry Rate. Tick each role right of those who should have the right to set time entries as billable/non-billable.
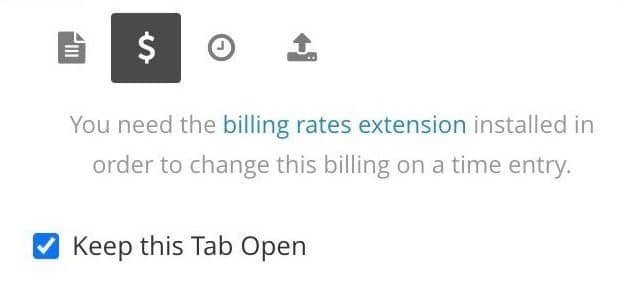
It says I need to install the billing rates extension?
Yes, you will need to install the billing rates extension, if you wish to set a time entry as billable or non-billable. This feature ties in with the billing rates whereby you can apply rates to Projects, Resource and Bookings as well as the option to set them as non-billable. With this extension installed, you can also set a time entry as a billable/non-billable rate.
How to install the billing rates extension?
To install the billing rates extension you can click on the link in timesheets or navigate to:
Settings -> Manage Extensions -> Add/Remove Extensions -> Billing Rates – >Install.
Reports & Non-Billable entries?
Any entries that are non billable or indeed billable will reflect in the spend on reports. There are billable filters you can apply to your reports that will reflect spend.
Report Columns & Non-Billable Work
Below is a list of the spend report columns where billable/non-billable columns are taken into account:
Scheduled & Reported Spend based on:
- External Rate
- Internal Rate
- Difference
- Estimated
- Profitability
- Time Between
- To Date
- Future
- All Time
In these columns spends for non-billable bookings can be calculated or not, depending on the filters set.
Report Filters & Non-Billable Work
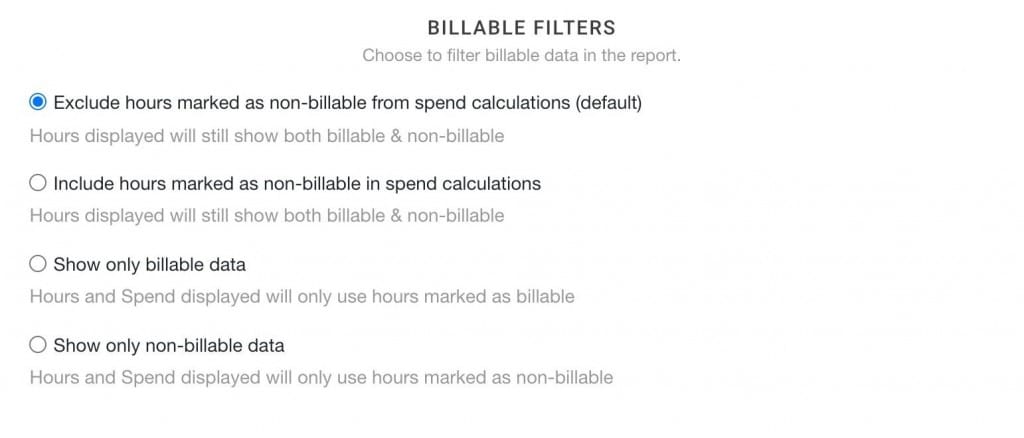
To filter the non billable there are a number of options to choose from:
- Exclude non-billable from spend (default)
- Include non-billable in spend
- Show only billable data
- Show only non-billable data
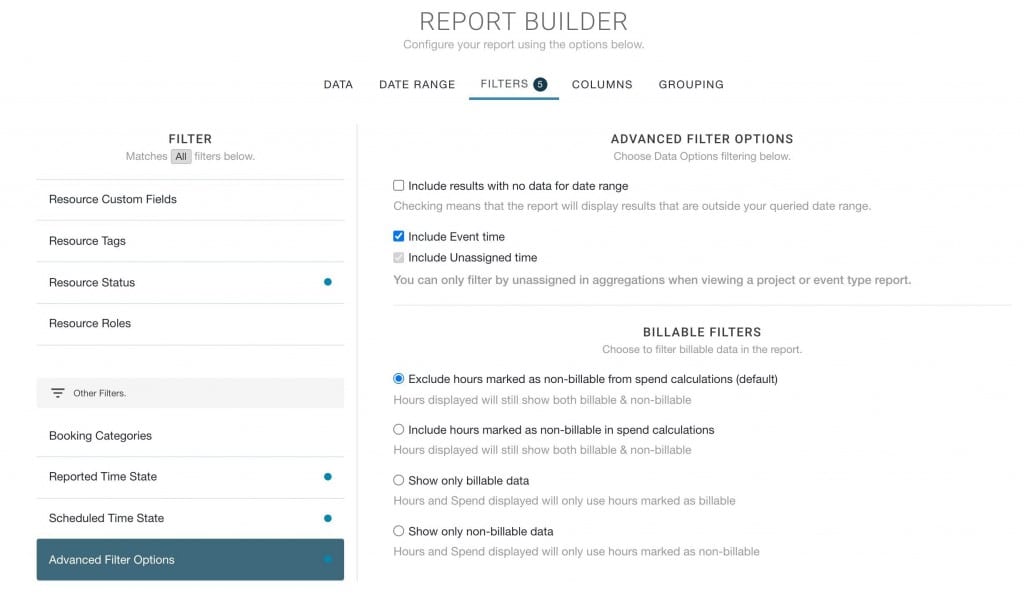
You will locate these options with the Report Builder Filters.
- From the Report select edit from the toolbar.
- Click on Filters to open the Report Builder on the Filters tab.
- Scroll to Advanced Filter Options
- Here is where you can pick and choose the billable options you wish to show.
- By default, the option will be Exclude non-billable from spend.
Hierarchy of Non Billable?
You will notice the word ‘Inherited‘ beside the checkboxes of booking and resource. So which setting overrides which?
Working the same way as would applying a billing rate to a project, resource or booking. The overriding rate is the booking rate. This is the exact same way the non-billable options work too.
- Booking Rate (highest)
- Custom Resource Rate on a Project
- Resource Rate
- Project Rate (lowest)
What happens when I select the time sheet entry is Billable?
The booking is updated within the UI
Bulk Uploads?
Yes, you can indicate if the booking is Billable.
Default is Billable
All entries will be deemed billable unless it’s inherited as Non Billable or you check the box.
Do I need a Premium Extension for Non-Billable?
Yes and no. Non-Billable is already a part of the Billing Rates and Timesheets Premium Extensions. You will need to install the billing rates premium extension for activating a booking, resource or project as non-billable. If you need to mark time entries as non-billable, you will also need the Timesheets extension. If you have both installed already, you’re good to go.


