To set up or make changes to your Hub Planner account, simply navigate to Account Set Up within Settings. Here there are a number of options for you to customize your Hub Planner profile.
My Profile:
As a Team User you can update or change your login password. You can also upload a profile image of yourself. Make sure to click ‘Save Changes’ at the bottom of the page.
My Notifications:
You can subscribe to our Hub Planner feature updates and blog posts.
If you have Resource Request Premium Extension installed. You have the option to setup notification emails for Resource Request and also for Vacation & Annual Leave. You will receive an email notification for any Approved and Rejected requests. Or you have a role as an Approver, you will also be notifed of any requests you need to action.
Custom Fields:
This is a premium extension in which you can replicate your business terminology with Hub Planner. Should you have the authorization to edit or add custom fields you can do so here within your settings.
Can I add a Company Logo?
Indeed you can. Feel free to upload your desired logo by clicking ‘Select Image’. A pop up of your system folders will appear where you can select the image. You must scroll down to the bottom of the page to save your changes. Should you with to change or remove the logo it’s just easy by clicking on the the button. Again, don’t forget to save your changes at the bottom of the page.
How do I make my company name appear on the Interface?
As an account owner, you have the option to customize the name of your Hub Planner that appears in the top left hand corner of the Hub Planner interface. Within Account Settings, navigate as far as ‘Company Name’ – Enter your desired name within the field next to it. Save the setting by scrolling to the end of the page and clicking ‘save’.
Can I customize my URL?
As an account owner, you have the option to customize the URL domain name of your Hub Planner account that is unique to your company wide account. For example ABCInc.hubplanner.com – you have the option to change ‘ABCInc’. Within Account Settings, navigate as far as ‘Company URL’ – Enter your desired domain name within the field next to it. Save the setting by scrolling to the end of the page and clicking ‘save’.
Can I alter the account owner?
You can, but be aware that there can only be one account owner. As an account owner you can edit and adjust your Account Settings. To change, firstly navigate to Account Settings within the Settings tab. Scroll to Account Owner where you can select a resource from the drop down list. Save the setting by scrolling down the page and clicking ‘Save Changes’.
How do I upload my profile photo?
To make change to your profile you need to firstly navigate to ‘My Profile’ the first option within Settings. Upload your profile image by clicking ‘Select Image’. Select your desired image from your folder and save by scrolling down the page and click ‘Save Changes’. You can change the image via the same process. Should you need to, you also have the option to change your password here too.
Can I customize what page opens when I login?
Like a start up feature, you can customize what page your Hub Planner account opens on and also what sub page opens from the page category. For example; When I log in, My Scheduler is my landing page. Subsequently on my left hand side toolbar I have chosen My Schedule. You can choose opening landing pages from Scheduler, Timesheets, Dashboard, Settings or Reports.
To save, click ‘Save Changes’.
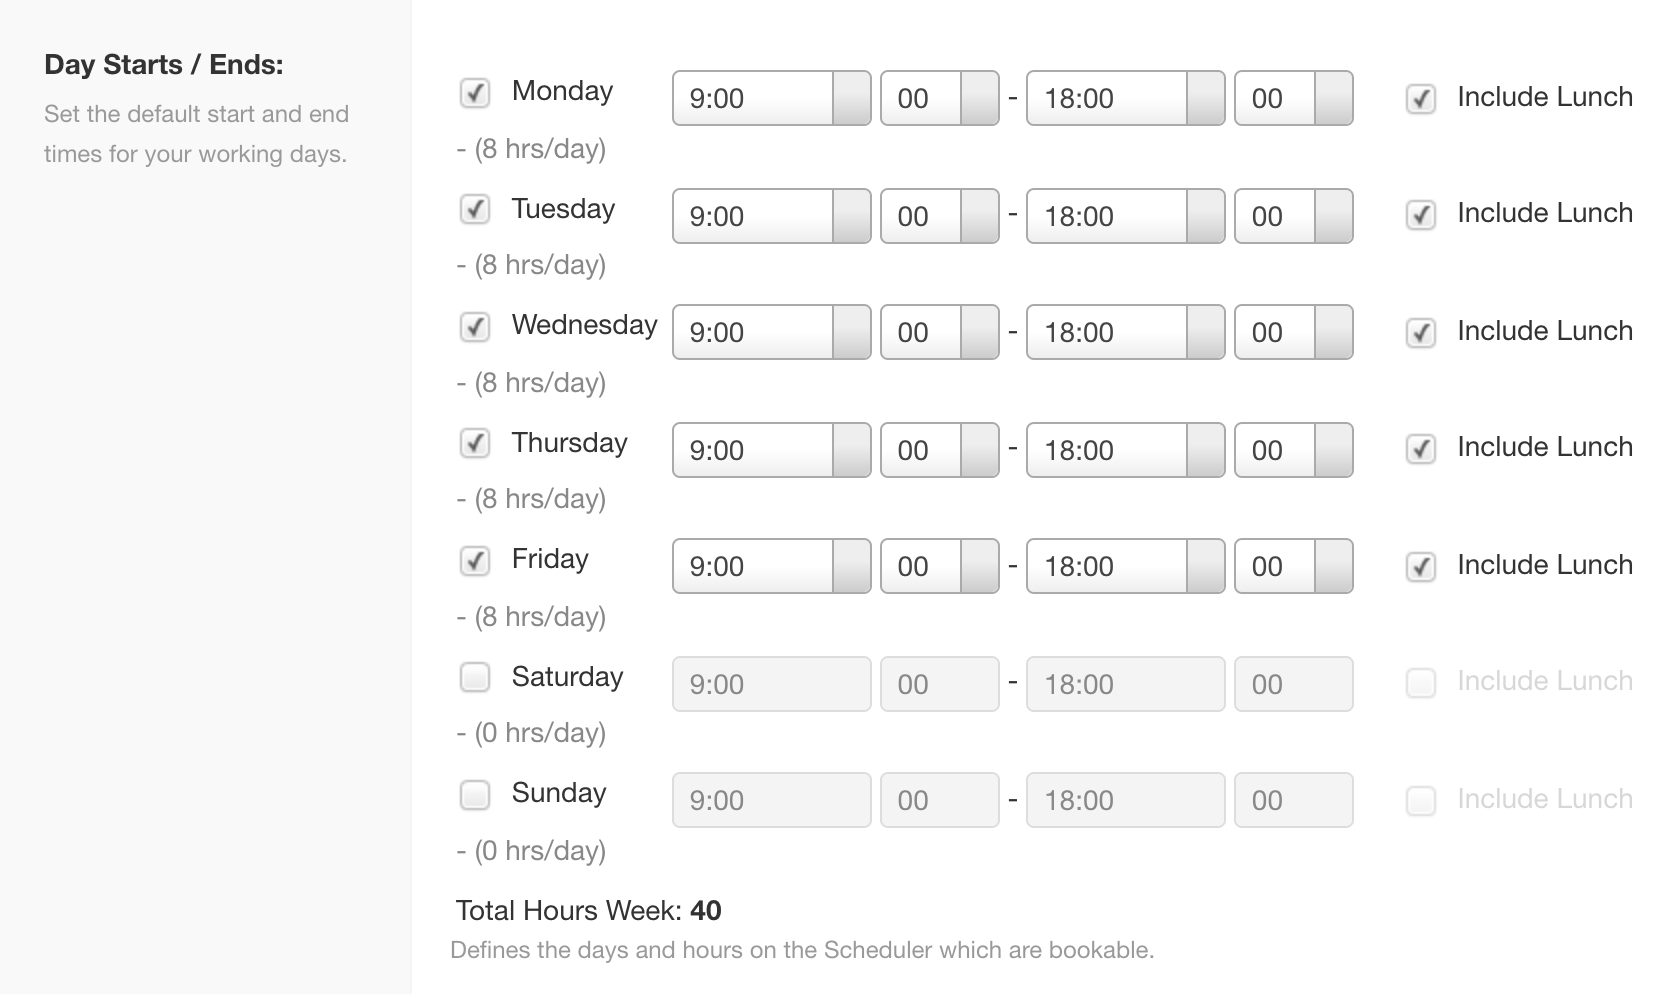
How do I set the Start / Finish / Lunch times of our working day?
Customize your working day by setting your starting and finish times to suit your companies needs. To do so, the Account Owner needs to navigate to Settings – System Settings – followed by Account Settings.
Set the default start and end times for your working days going through each day one by one. You have the option to schedule in time for lunch by ticking the box at the right hand side of each day.
The total hours per week will calculate based on the hours you have selected. In turn, this figure will define the days and hours that are bookable within the scheduler.
Next, you will need to allocate the average daily capacity of hours. This figure is important for viewing reports and settings. For some calculations we will use your average daily capacity to convert hours to days.
If you have scheduled a lunch hour, the system will default to 12pm – 1pm. Again, this is important for reports in so far as it will not be included. Should you need to alter the timings of lunch you can simply do so by selecting from the drop down list.
Lastly, to save all changes you must scroll to the bottom of the page and click ‘Save Changes’.
How do I change the default currency?
We have 21 of the most popular world currencies included within Hub Planner. You can easily change your default currency. Just to note that should you require to alter a currency for a booking, project or resource – you can do so within the edit settings of the Booking / Project / Resource.
To set your default currency, navigate to Settings – System Settings – Account Settings – Default Currency. Select your desired currency from the drop down list.
Lastly, to save all changes you must scroll to the bottom of the page and click ‘Save Changes’.