Project Rates
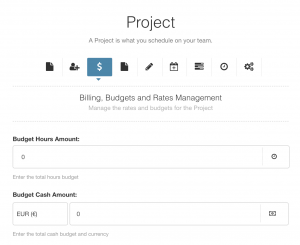
Project Rates allows you to apply a rate to a selected project from your Billing Rate Card or customized by adding a new rate. Utilized separately for both External and Internal capacities you also have the ability to select a range of dates to apply your desired project rate with a number of alternatives to customize the starting / finishing date or simply no date range. The Project Rate will act as the default rate unless there is an existing Resource Rate applied which you can always edit should you need to. To manage the project rates you need to navigate to the selected project and click on Billing, Budgets & Rates Management. Your options will include the following:
Budget Hours & Cash Amount
Enter the amount of hours that are available to the project which can be amended here at any time. Should you schedule in more hours than allocated, the billing panel will flag this to you by displaying the number of hours in RED. Subsequently, select your desired currency followed by the external budget total amount. Again, this can be altered here when required. Also, should your scheduled funds exceed the budget amount, the billing panel will flag this to you by displaying the spend in RED.
Apply a Project Rate
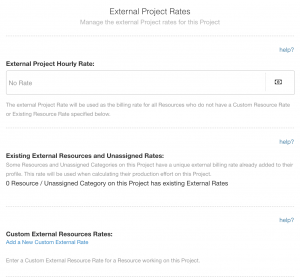
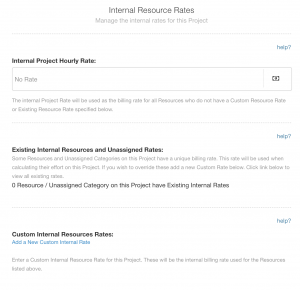
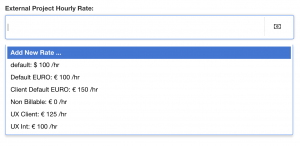
The Project Rate is the billing rate for all resources unless you have a customised a rate for a specific Resource or number of Resources which will be documented further below. The below two images indicates that there are no existing rates for this project or indeed any resources at this point. The next step is to apply a project rate for both Externally and Internally. Once you click in the field of External Project Rates and Internal Project Rates respectively, the list of available rates that you have set up in Billing Rates Card will appear. Select the rate you wish to apply as a default project rate that you wish to charge.
Project Hourly Rate
Here you will see any existing rates that have been allocated to a Resource selected on this project. Should you have a Resource with a customised rate over different dates, it will also show each block of dates you have allocated. Just to reiterate that both External and Internal Rates act independently of each other giving you the freedom to allocate a separate rate or different allocation of dates than External / Internal.
To apply a rate from the Billing Rate Card, simply click on the tab where a listing of rates shall appear. Select from this list or alternatively you can add a new customised rate by clicking the first option ‘Add New Rate’.
Add New Rate
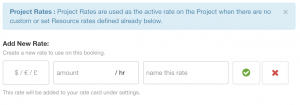
You have the ability to add a new customised external / internal project rate by clicking ‘Add New Rate’ from the drop down list. This rate will act as the external / internal billing rate as long as there are no custom or set resource rates already defined. To add a new rate, simply click on your desired currency, apply the rate amount you wish to bill followed by the name you wish to refer to. Lastly, ensure to select the green tick box to confirm or the red X to cancel.
Add New Resource Rate
At this point you also have the ability to create a new rate for a particular resource or indeed a number of resources that are working on this project.
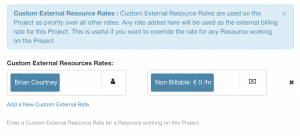
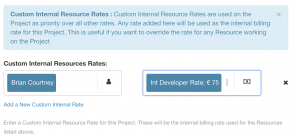
To apply, simply click ‘Add a New Custom External Rate’ / ‘Add a New Custom Internal Rate’. Two tabs will appear for you to select your resource from the drop down list followed by your desired rate. You can add multiple resources and multiple rates, and just to note this rate will override any project rates set out above. Also, not forgetting you can always manage these rates accordingly from this page or by editing the individual resource.
Rate Reports
Reporting is imperative throughout resource scheduling and now you have the ability to provide reports from a billing and forecasting perspective to include scheduled verses actual.
By including Internal and External rates you can now provide vital data from a budgeting point of view as well as identify any area specifics that are highlighted. For example, you may see that there is more time allocated than necessary to UI and Bug Fixing needs more resource time. Another example could be that you pinpoint an increase in budget spend for Delivery, where you have identified Sprint Planning could use more. Either way, these reports can provide vital information of resources to create a more efficient planning process. Not only that, these reports reflect the real time providing even further benefits to your resource scheduling.
How to access
To access the reporting for Billing Rate, select the Settings tab on the top right hand side of the interface. Scroll to Billing & Forecasting on the left hand sidebar. Here you will see a number of reports that can assist you in reviewing data in a real time manner. There are 5 reports under the umbrella of Billing & Forecasting which lead into three reports by External Rate, Internal Rate and Scheduled Profit:
-
Scheduled Project Spend
-
Actual Project Spend
-
Scheduled vs Actual Spend
-
Actual Resource Capacity
-
Scheduled Resource Spend
When you have selected a report, you then have the option to choose a specific project which can be filtered or navigated to by filter.
How Billing Rates are Determined
The following table displays the hierarchy of the billing rates and how they are used in the system. The same hierarchy applies to both Internal and External rates.
| Order | Rate Type | Scheduled Time | Actual Time |
|---|---|---|---|
| 1 | Booking rate | Yes | No |
| 2 | Custom Resource Rate on Project | Yes | Yes |
| 3 | Resource Rate | Yes | Yes |
| 4 | Project Rate | Yes | Yes |

