Smart Groups & Custom Fields
Tips: Making a Project Pipeline flow using Custom Fields and Smart Grouping.
There are two things we recommend you do prior to creating a Project Pipline Flow using Custom Fields and Smart Grouping is the following:
- Take a look at our blog post on Building a Simple Project Pipeline Flow
- You will need both Custom Fields and Smart Groups extensions installed.


Step 1 – Add your listing of Custom Fields via Settings.
How do I create Custom Fields?
- Settings
- Manage Extensions
- Project Custom Fields or Resource Fields
- Resource Custom Fields – select enable
- Resource Tab Name – enter
- From the Custom Field Page, Choose “Add New Field”.
- A new Custom Field Pod will get added below.
- Click the Pod to start editing it.
- Choose a Field Label
- Select a Field Type (Text)
- Choose Field Instructions
- Set a Default Value
- Include any Placeholder Text
- Restrict with a Character Limit
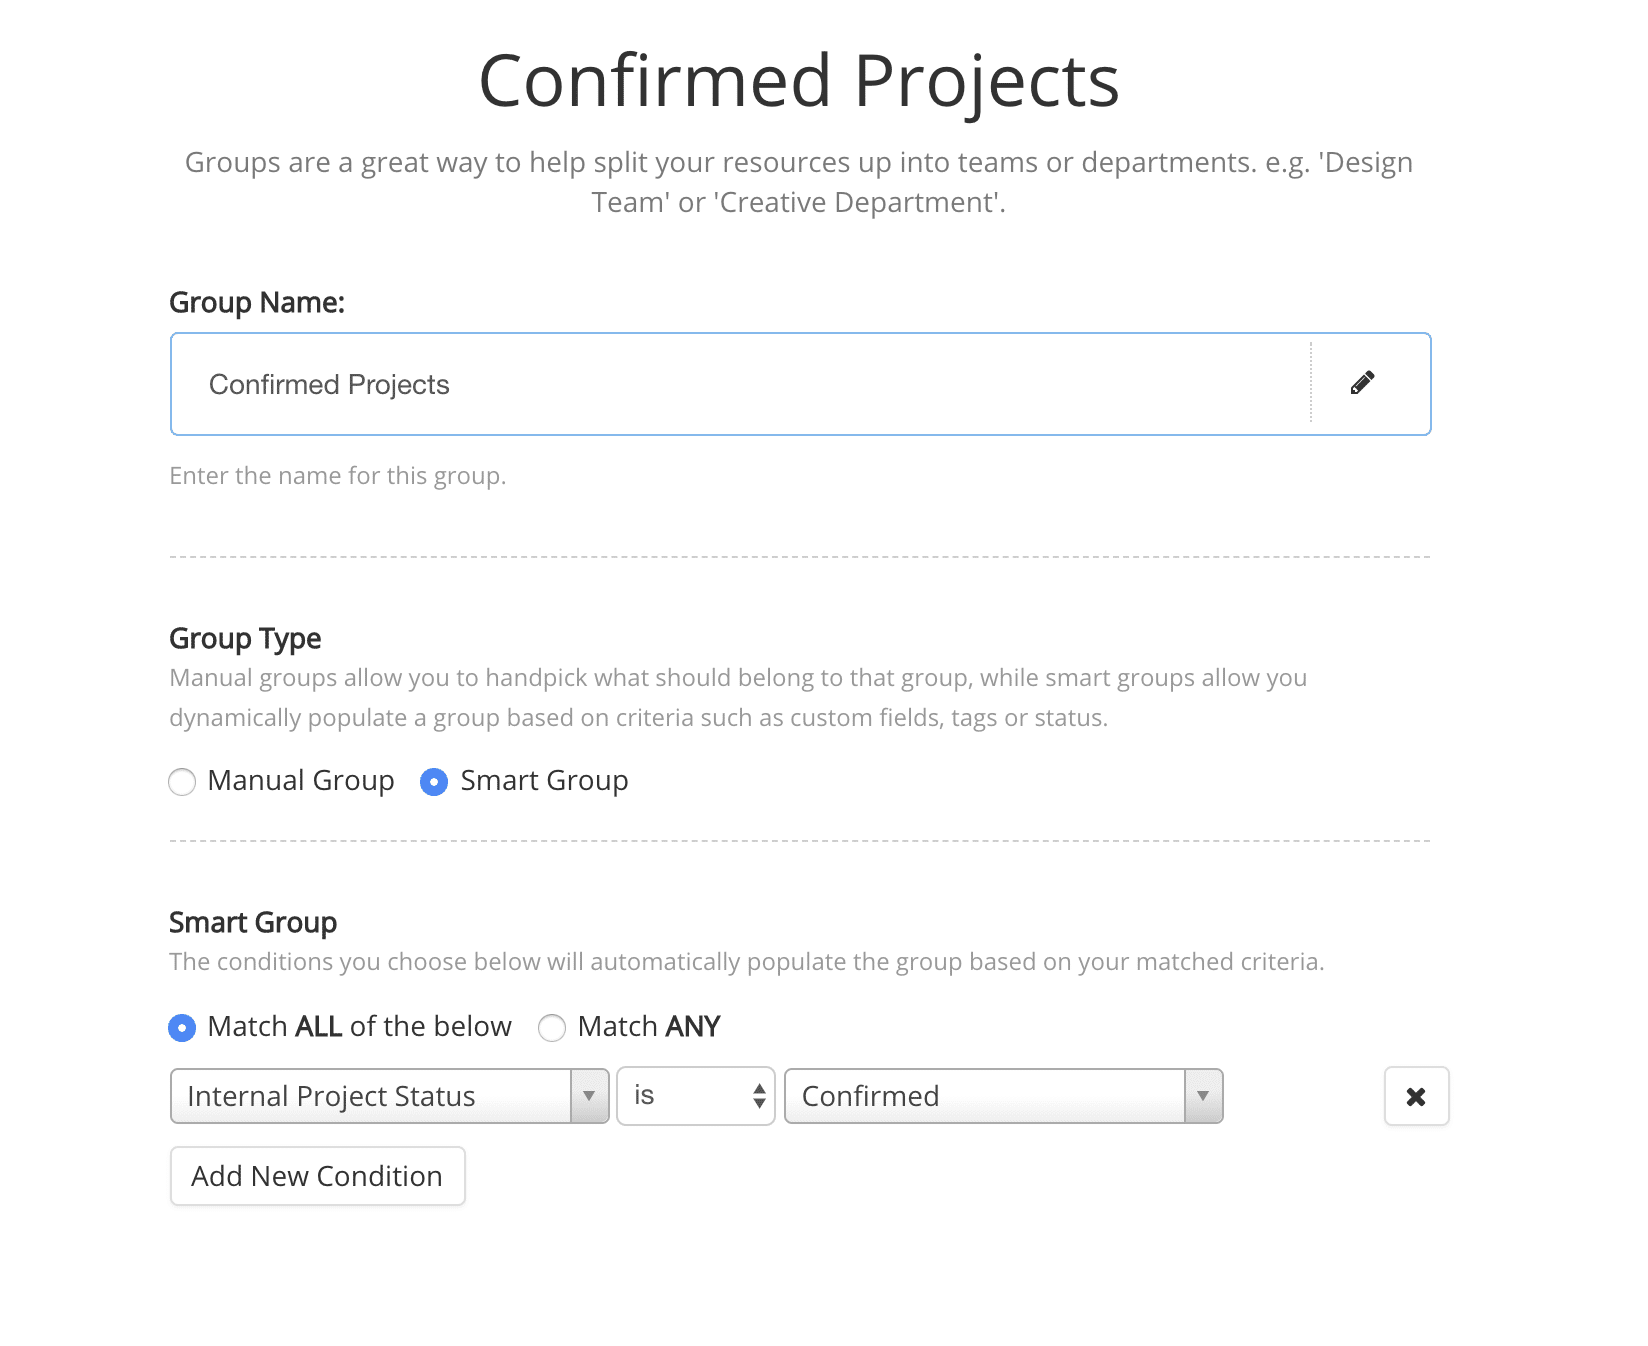
Step 2 – Add a New Resource Group
- From the Sidebar click Add New Resource Group where the modal will appear
- Enter Group Name
- Group Type, select Smart Group. The modal will alter to Smart Group mode.
Step 3 – Add a number of Conditions
- Group Type, select Smart Group. The modal will alter to Smart Group mode.
- Select to match All or Any of the conditions set
- From the Condition drop down list select your options from the Custom Fields or pre added conditions.
- Select ‘Add New Condition’ to create a new condition to the drop down listing.
- In the middle drop down, select whether the condition is or is not to meet the criteria in the next drop down list
- Select the criteria from the drop down list to meet *is* or *is not* *Condition*
For example,
- Select ‘Add New Condition’ – Select ‘Role’ from the drop down list.
- Choose ‘is’ for the match
- Pick ‘Contractor’ from the criteria
- Select ‘Add New Condition’ – Select ‘Tag’ from the drop down list.
- Choose ‘is’ for the match
- Pick ‘English’ from the criteria
- Select ‘Add New Condition’ – Select ‘Project Manager’ from the drop down list.
- Choose ‘is’ for the match
- Pick ‘True’ from the criteria
- Select ‘Add New Condition’ – Select ‘Tag’ from the drop down list.
- Choose ‘is’ for the match
- Pick ‘Europe’ from the criteria
- Select the blue ‘Add’ icon to create the new Smart Group.
- Note, to alter the smart group conditions and criteria it’s easy to add new ones or delete by clicking on the X
- Once added, the system will automatically navigate to the scheduler of the Smart Group.
- The Smart Group will be visible in the Sidebar
How to delete a Condition / Criteria?
Click the ‘X’ button at the end of each Condition / Criteria line
How to adjust a Condition in a Smart Group?
Either delete the condition and add a new one. Alternatively select the condition you wish to adjust by clicking on the drop down menu and reselecting the condition. Subsequently, continue to select the ‘is/is not’ followed by the criteria drop down list.
How to add a new Condition to my Smart Group?
- Select the Smart Group from the Sidebar.
- Click on the 3 dots and select ‘Edit Group’. The Smart Group modal will appear.
- Follow the steps to edit / delete / adjust the Smart Group accordingly.
- Ensure to select the blue button ‘Update’ at the end of the page
How to find the Smart Groups?
Smart Groups are located and visible within the sidebar. They are listed alphabetically.
I want to create a Smart Group of ‘Java’ Resources from ‘London’.
- Add New from the sidebar
- New Resource Group – resource group modal will appear
- Enter name for group ‘Java Developers London’
- Group Type – select ‘Smart Group’
- Match – select ‘All’
- Select Condition drop down menu – select ‘Tag’
- Match – select ‘is’
- Criteria – select ‘Java’
- Click ‘Add New Condition
- Select Condition drop down menu – select ‘Tag’
- Match – select ‘is’
- Criteria – select ‘London’
- Click ‘Add New Condition
- Select Condition drop down menu – select ‘Role’
- Match – select ‘is’
- Criteria – select ‘Team’
- Click the blue button ‘Add’
Now any resources who have any of the conditions you have set for your smart group will appear within the group schedule of ‘Java Developers London’.