Lets look at how to create, edit and manage Unassigned Work. How to set up cateogires, via the Scheduler or Settings. We also look at the Unassigned Work Modal that allows you to add categories to resource and project groups, billing rates, custom fields, as well as basic information.
Adding Unassigned Work Categories
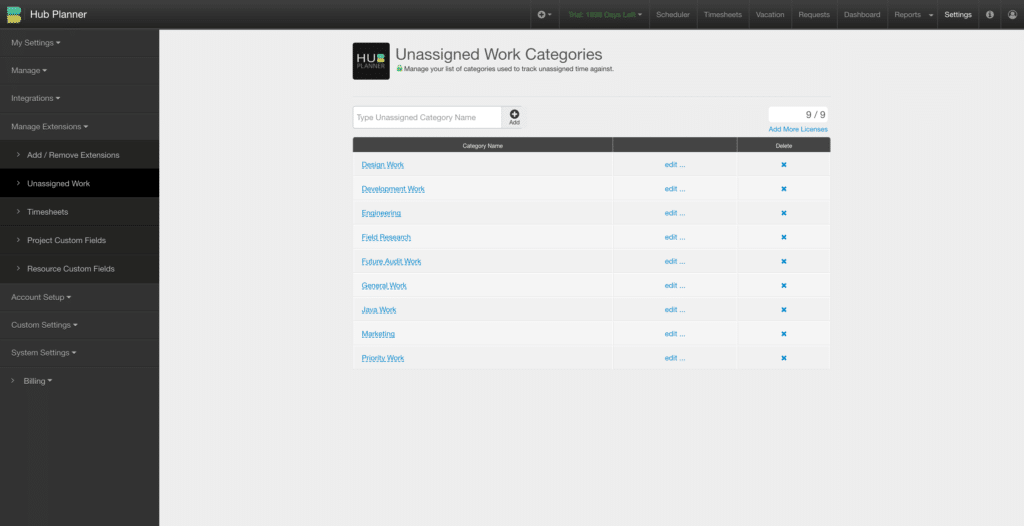
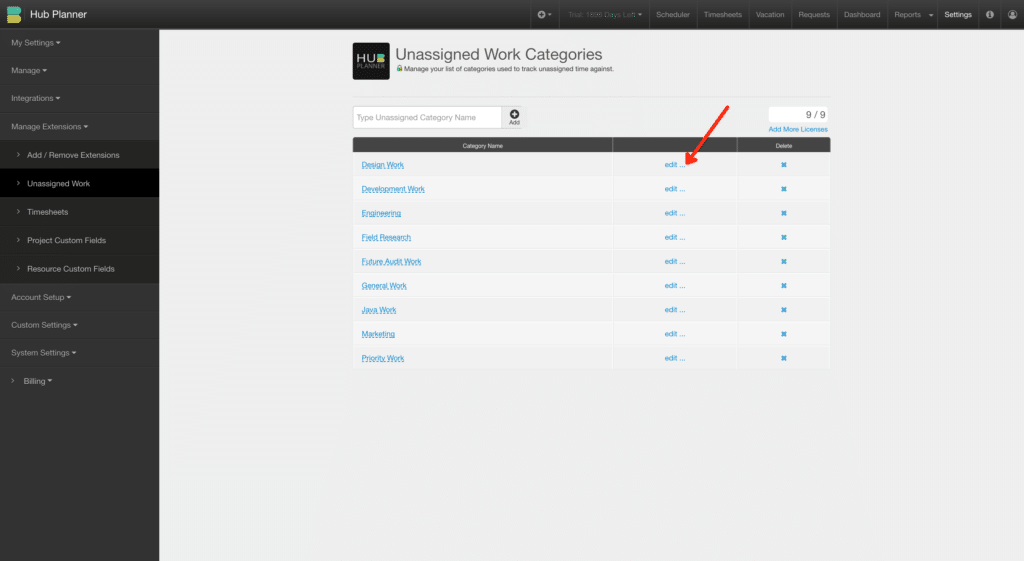
To add categories to the unassigned work extension. Login to your account, navigate to Settings and choose Unassigned Work from the sidebar. From here you will be able to add as many categories as allowed.
Manage Unassigned Licenses
Each category consumes 1 unassigned license. You can purchase licenses from the Unassigned Category page or when you are subscribing. To add or remove unassigned work licenses. Login to your account, navigate to Settings and choose Unassigned Work from the sidebar. Choose “Add More Licenses” and you will be presented with a pop-up allowing you to manage your licenses.
Deleting Unassigned Work
Choose the ‘x’ button located to the right of the category. Clicking it will show a modal which you need to confirm deletion. Deleting a category will free up a license. Please note, that deleting a category will delete all scheduled bookings on that category. If you are unsure, please create a new category as there is no undo.
Scheduling Unassigned Work
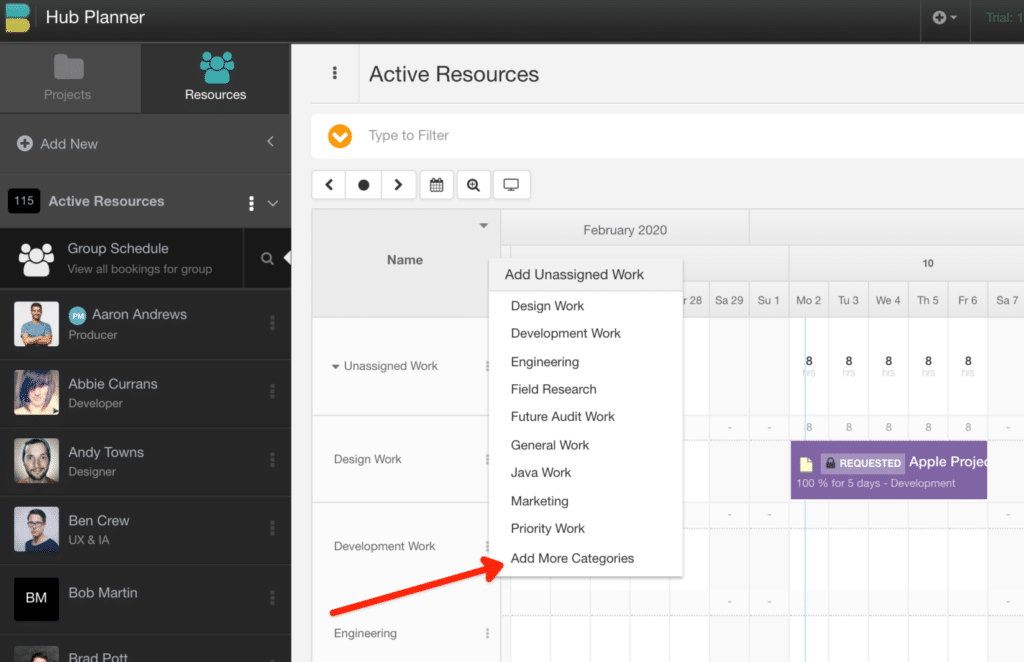
To schedule unassigned work, navigate to the scheduler. All unassigned categories should be visible at the top of the scheduler. If not, click the Unassigned Work Label on the left. Booking Unassigned work is easy. You can schedule them on the scheduler the same way you would schedule a Project.
Unassigned Work Menus
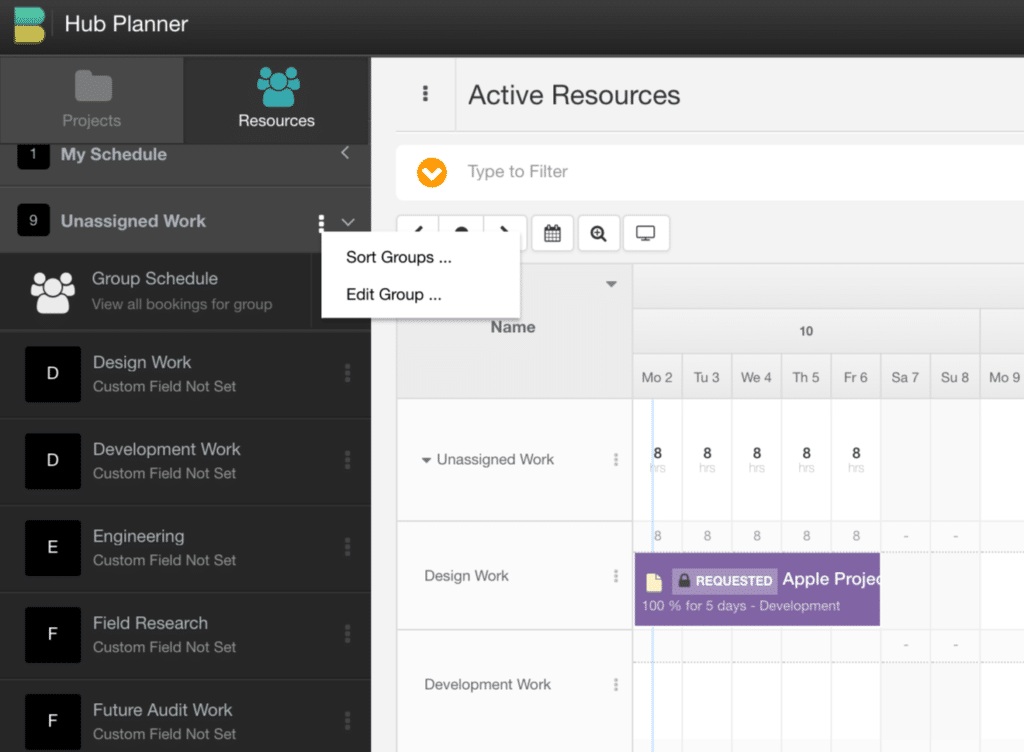
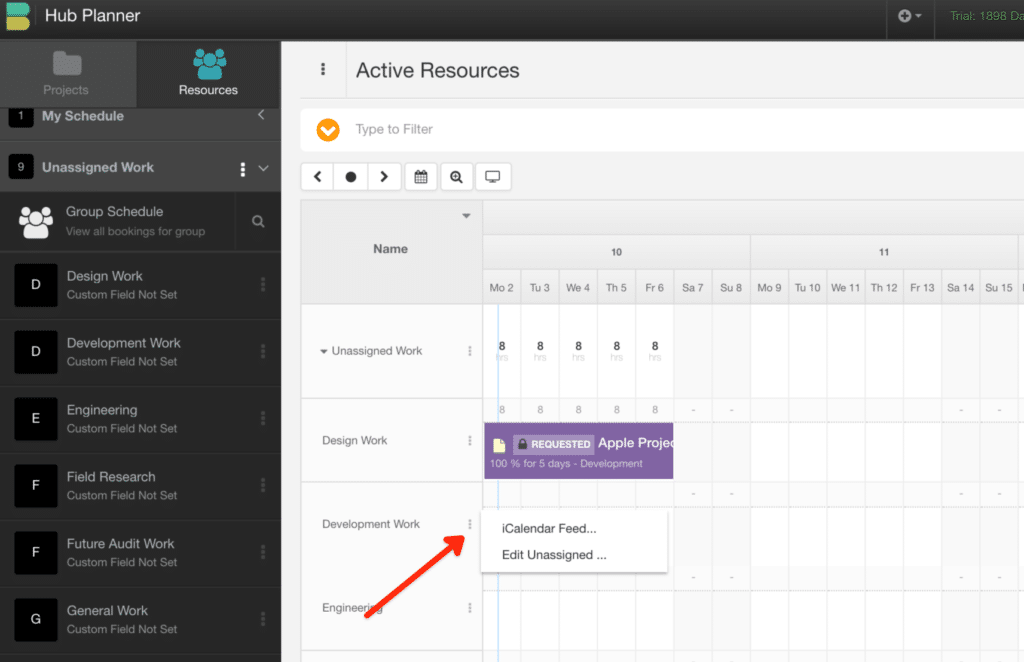
To the right of each unassigned work row, there is a menu which provides various options around Unassigned Work Rows.
Where to apply Unassgned Work?
Unassigned Work can be added to the following components within Hub Planner:
- Project.
- Project Group.
- Resource Group.
You cannot add an unassigned work row to a resource. You can add to a resource group.
Reports
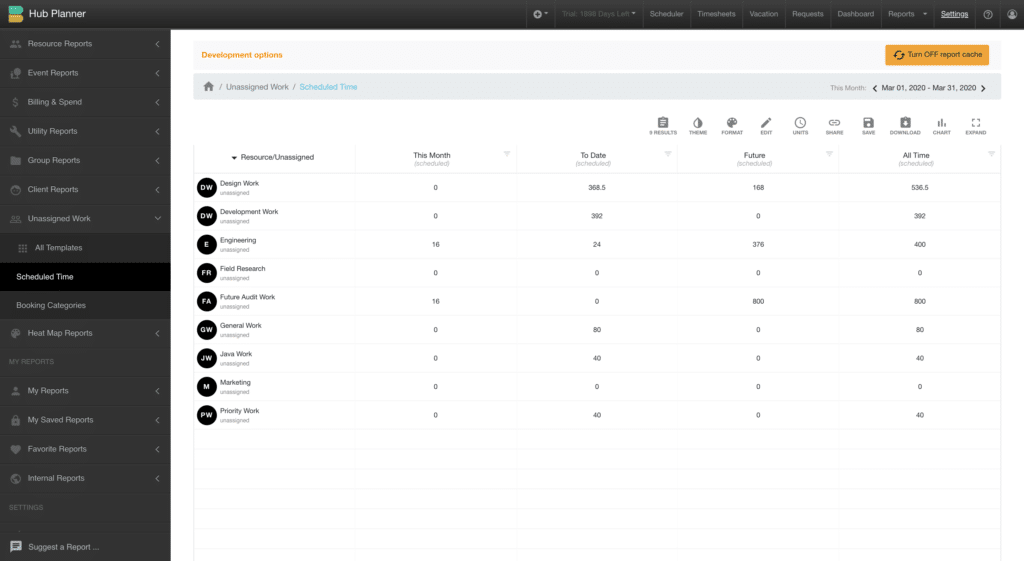
Unassigned Work reports can be generated from the report templates. There are two preformatted templates for unassigned work.
- Scheduled Time
- Booking Categories
To access, you can navigate to the Unassigned Work report folder. Alternatively scroll along the report sidebar and expland Unassigned Work. For more information on how to edit, filter, share and download reports click the Reports Link.
Role Permissions
You can set different role permissions for the Unassigned Extension Scheduling and viewing rights. As a Project Manager there is also an additional role setting for you to Schedule Unassigned and view Unassigned Work for the projects you are managing if you do not have global permissions to see all Unassigned.
Adding Unassigned Work Categories via the Settings Page
You can add categories to your “Unassigned Work” via the “Settings page” located in the top right header.
- Navigate to the “Settings” page in the top right header
- Under “Manage Extensions” in the left Sidebar, chose “Unassigned Work”
- Type the Category Name in the given field and click “Add
Editing Unassigned Work Categories via the Main Sidebar
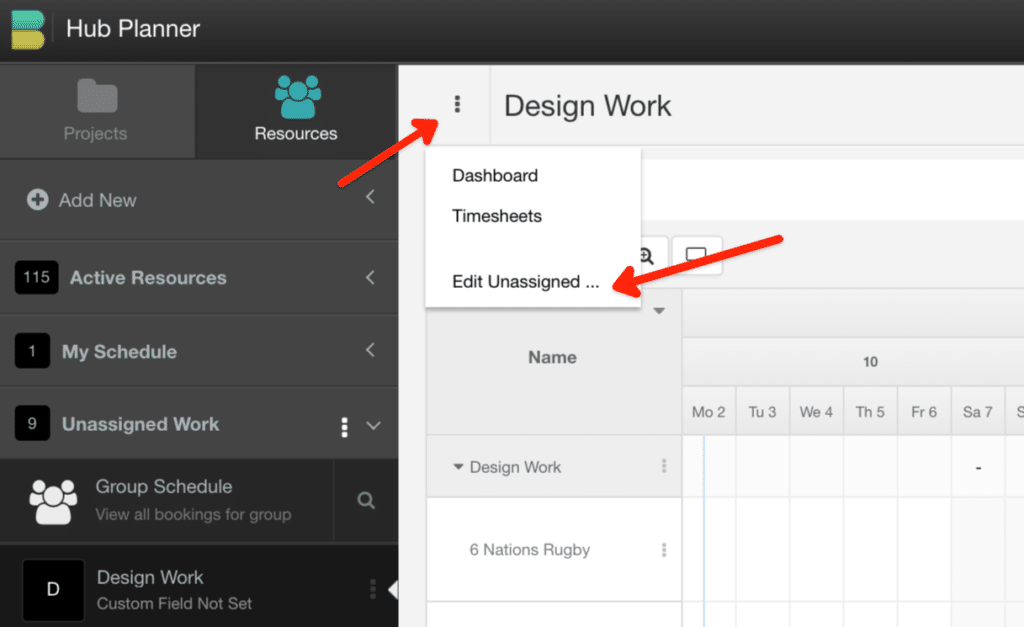
To edit Unassigned Work Cateogires via the left Main Sidebar:
-
Select “Resources” and subsequently “Unassigned Work” which lists your Unassigned Work Categories
-
Click on the small arrow sign to the right side of the Unassigned Work Category you wish to edit
-
Finally, chose “Edit Unassigned…”
Editing Unassigned Work Categories via the Scheduler Menu
To edit “Unassigned Work Category” via the Scheduler is simple:
-
Navigate to your scheduler and click on the three dotted sign located to the right of your Unassigned Work Category
-
Then just select “Edit Unassigned…”
Editing Unassigned Work Category via Right Click on Booking Cell
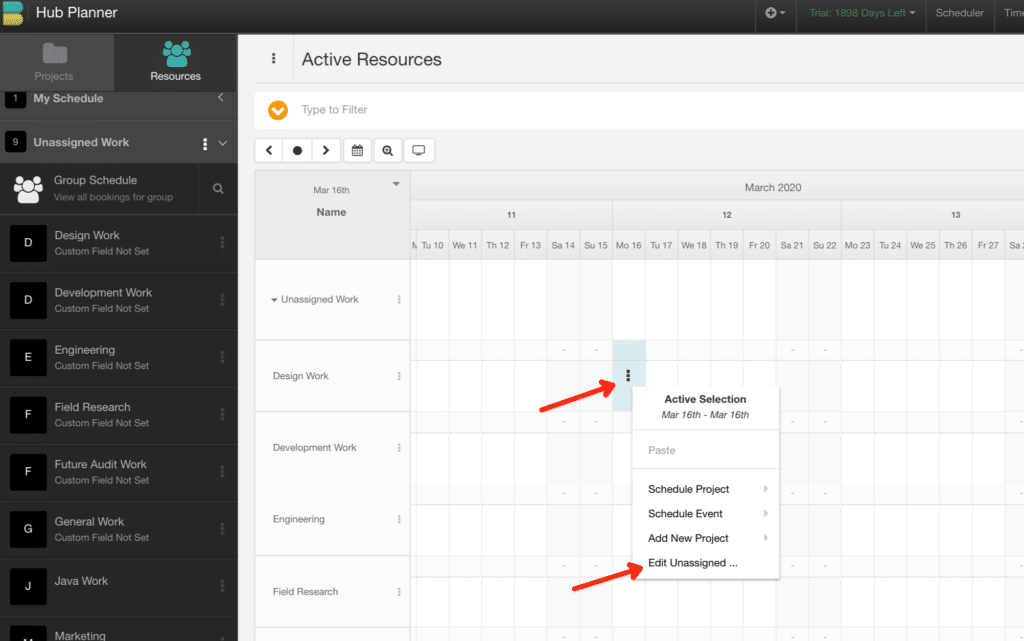
Alternatively, you can also edit “Unassigned Work” by a right-click on any Booking cell.
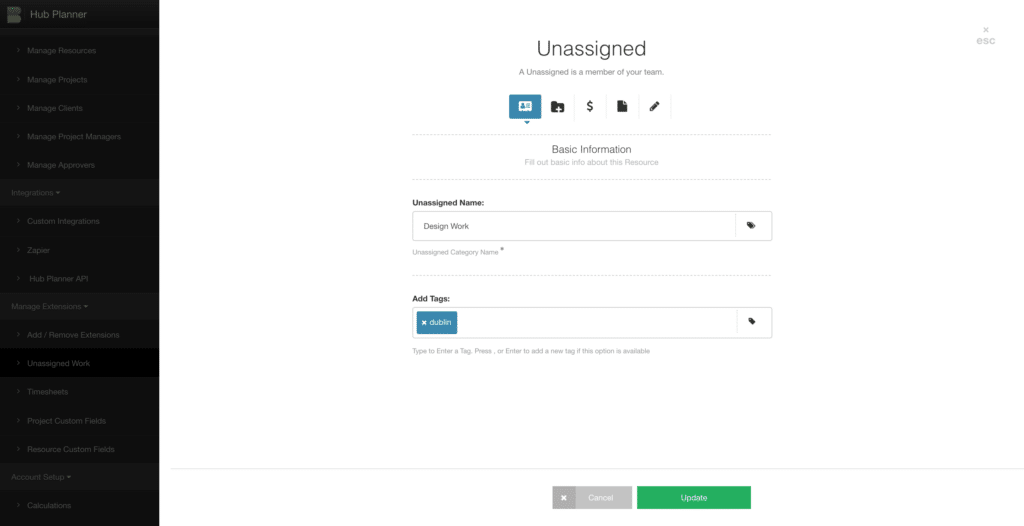
Unassigned Work Modal Basic Information
When adding or editing Unassigned Work, you will be redirected to Unassigned Work Modal where you can enter the Unassigned Work Information.
In Basic Information you can add:
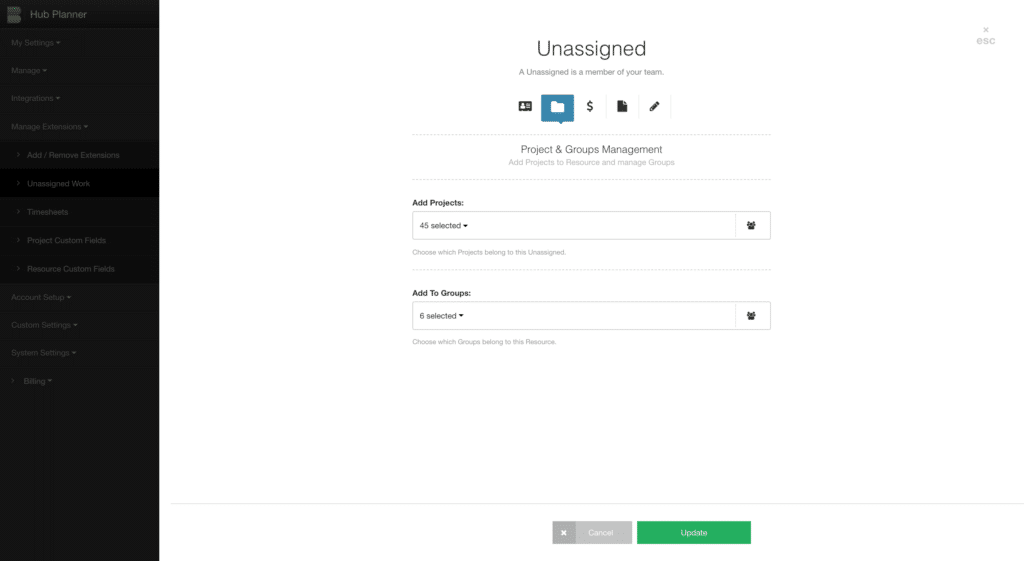
Unassigned Work Modal – Projects and Groups Management
In the Unassigned Work Modal you can add Unassigned Work to Projects and Groups.
However, to do so, you first need to create your list of Projects and Groups.
To add Unassigned Work to Projects and/or Groups:
- Click on the arrow icon in the entry field
- Check all the boxes you wish to add Unassigned Work to
- Finally, click “Update” at the bottom of the Modal
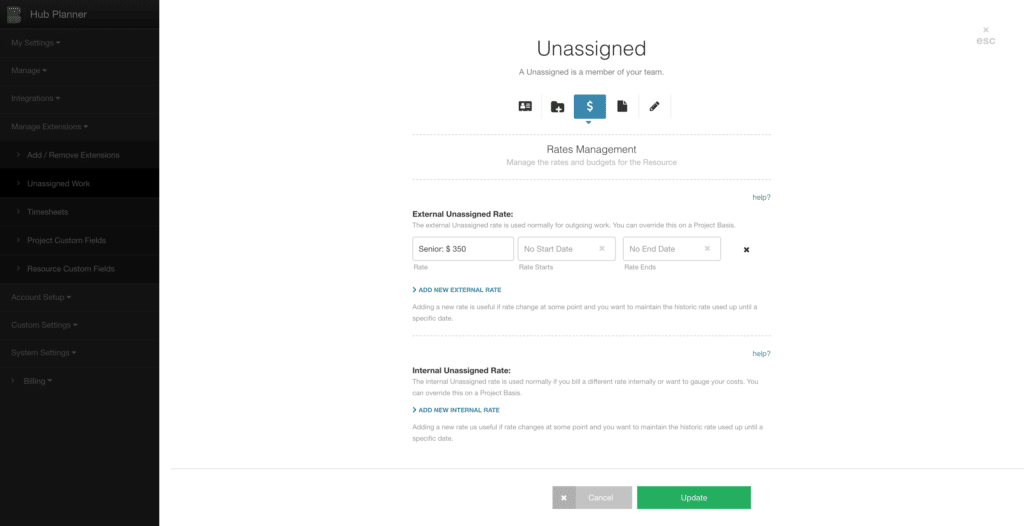
Unassigned Work Modal – Billing Rate
This setting of the Unassigned Work Modal allows you to set a Default Rate for an Unassigned Work Category. You can set a default rate at both External and Internal Rates.
About Rates
Take a look at Billing Rates for more information.
-
If Unassigned Work has a custom rate, we will use that for that Unassigned contribution to the project. This is useful if certain Categories are billed differently than what the project rate is. e.g. Senior Staff
-
If there is no Unassigned Billing Rate, then we will use the Project Rate which could either be custom or default
-
If there is no project rate set, we will use the company rate
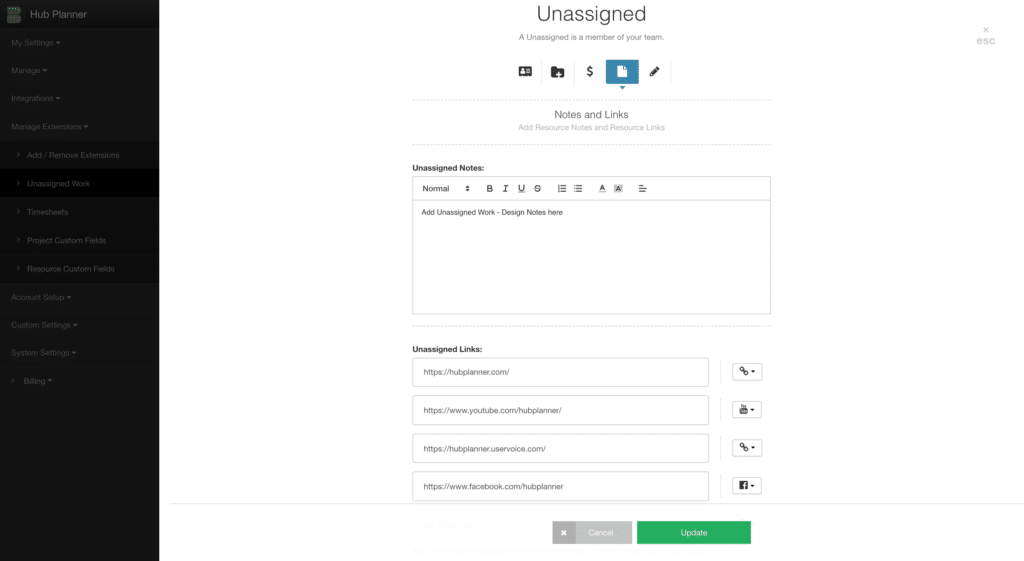
Notes and Links
Every Category can have notes associated with them. Notes can be added to the text area and will be available in the notes panel. Notes can be useful for sharing key information.
Unassigned links allow you to set up some hard coded links to other popular 3rd party softwares often used in conjunction with Hub Planner. For example, we have put in the following links:
Unssigned Work Modal – Custom Fields
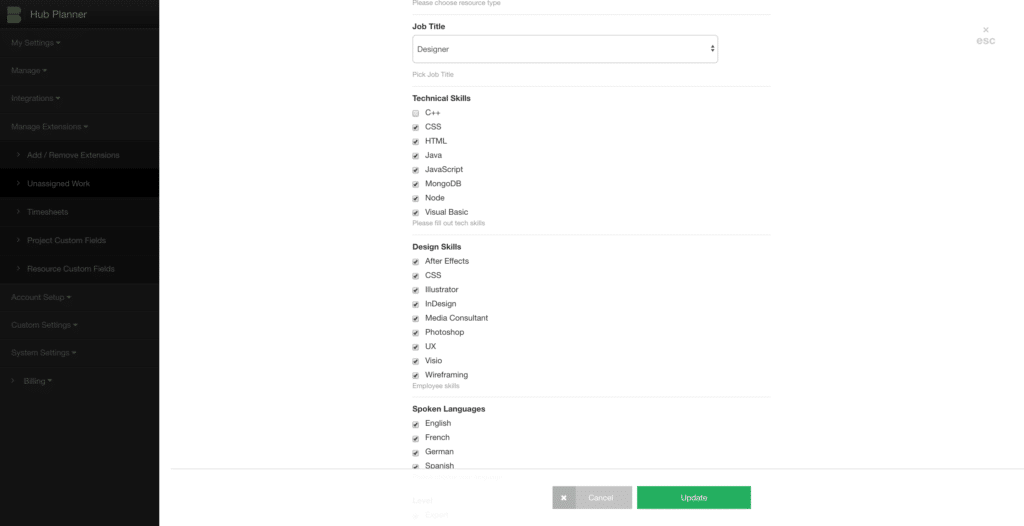
Add Custom Fields to the Unassigned Work Category.

