How to add a new a new user to your Hub Planner account? Already set up your resources? Let’s also look at how to invite a new or existing user to your Hub Planner account. These step by step instructions make it super easy in setting up your Hub Planner account.
How do I allocate a colleague to one of my licences?
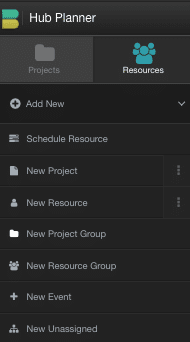
Add new User From the Scheduler:
- Click on Add New via the Sidebar
- Select ‘New Resource’
- The Resource Modal appears
Add New User From Settings:
- Navigate to Manage
- Manage Resources
- Click ‘Add New Resources’ button located on the top right hand side
- Add Single Resource
- The Resource Modal appears
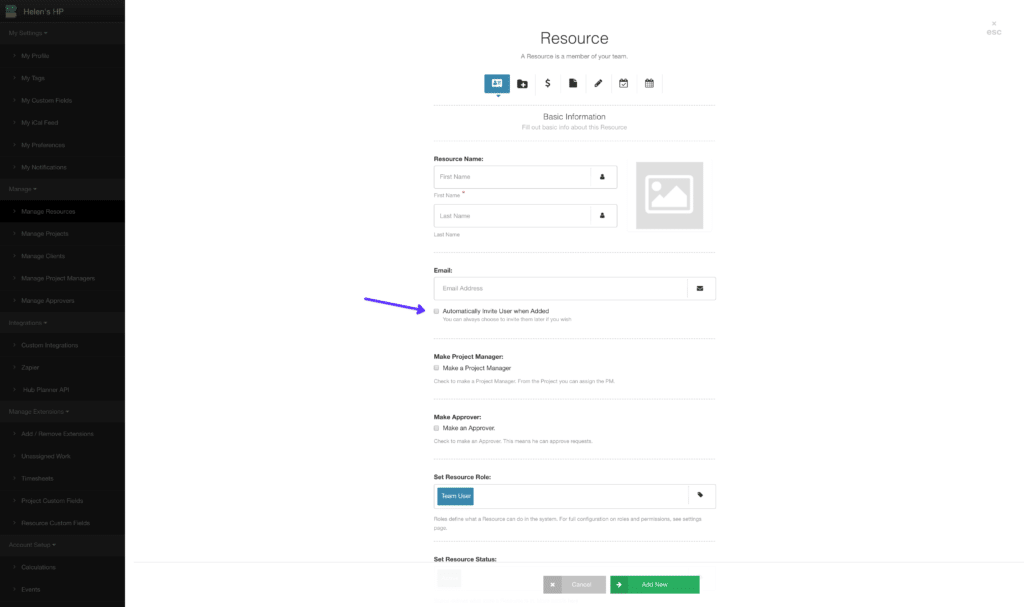
Completing the New User info in the Resource Modal
- New Resource Modal – Basic Information (first Tab)
- First Name (Required)
- Last Name
- Email Address
- Click ‘Automatically invite user when added’ (This will automatically invite the new resource to your account)
- Make a Project Manager (Optional – Making resource project manager of projects)
- Make an Approver (Optional – Approving other resources work requests and time entries etc.)
- Set Resource Role: (Admin, Acc Handler 1, Acc Handler 2, Team User, Contractor)
- Set Resource Status: (Active, Non-Bookable, Parked)
- Add Tags: (Add any tags you wish to apply to the resource such as skill sets, location etc.)
- You can select ‘Add New‘ now and the Resource will be allocated. However there are other tabs in which you can go through above. You can return to these options at a later time or carry on through them now prior to adding.
Once you have finished setting up the resource modal. The resource will shortly receive an email with a new link to invite them to login to your Hub Planner account.
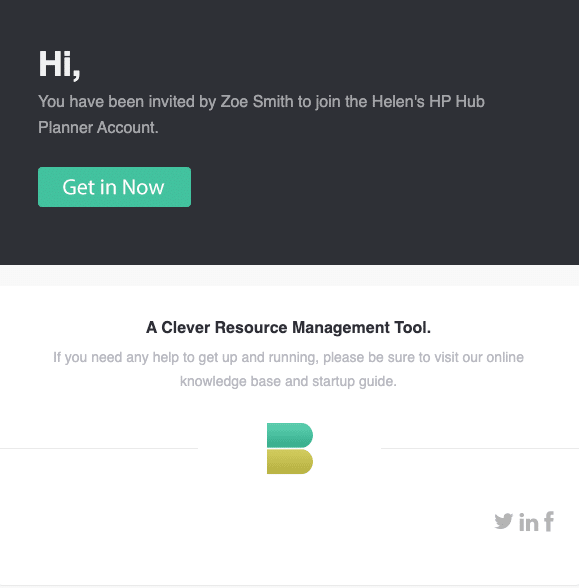
You have been invited to Hub Planner
Once the resource has been invited they will receive an email entitled “You have been invited to Hub Planner”.
They need to click the green ‘Get in Now’ button. This will take them to the Hub Planner Activation page (below) where they will create their user password and log in.
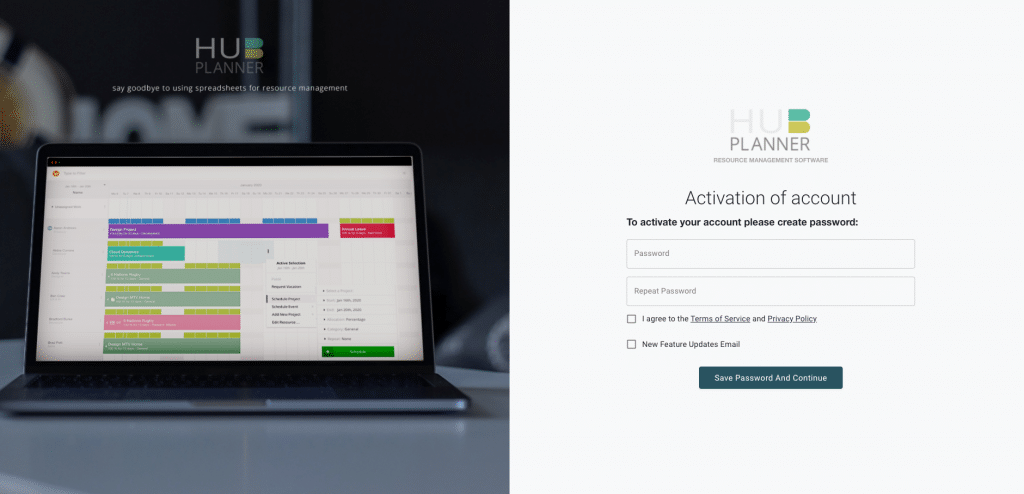
Activation of New User Hub Planner Account
- User creates their own password
- Repeat entry of Password to ensure they match.
- You will need to click to agree to the Terms of Service & Privacy Policy.
- Select if you want to be kept updated of new Hub Planner features.
- Click ‘Save Password and Continue’
- You’re in. This will bring you into your schedule on Hub Planner.
How do I invite an existing user to login to my Hub Planner account?
Via Settings:
- Settings
- Manage
- Manage Resources
- Select Resource
- Click the drop down arrow
- Select ‘Resend Invite Email’
The user will shortly receive an email with a new link to invite them to login to your Hub Planner account.
How do I resend the link to invite a user to login to my Hub Planner account?
- Settings
- Manage
- Manage Resources
- Select Resource
- Click the drop down arrow
- Select ‘Resend Invite Email’
The user will shortly receive an email with a new link to invite them to your Hub Planner account.
I received a link to sign up to Hub Planner, it says it’s expired?
The link to activate your account is live for 24hrs. Should you miss the timeframe, you need to contact your Account Owner to resend a new link to activate your Hub Planner account.
A user asked me to resend them the invite login link to Hub Planner?
This means that their activation link may have expired. Follow these steps to resend them an invitation email to login to your Hub Planner account.
- Settings
- Manage
- Manage Resources
- Select Resource
- Click the drop down arrow
- Select ‘Resend Invite Email’
The user will shortly receive an email with a new link to invite them to your Hub Planner account.
What if I see this message on logging in to Hub Planner?
“This link has now expired, please login. Alternatively, contact the Account Owner to resend a new link to activate your Hub Planner account.” N0 problem, the invitation link has expired. You need to contact your Hub Planner Account Owner who can organise to resend you an invite email.
How do I resend a user invite?
- Settings
- Manage
- Manage Resource
- Select Resource
- Click the drop down arrow
- Select ‘Resend invite’
Resource will automatically receive an invite email to their account.
Add more resources licences?
I need to add more licences to my count? I’ve ran out of licences? How to add more licences to your Hub Planner subscription? Plenty of help right here -> Manage Hub Planner Subscription
Via Settings:
- Settings
- Billing
- Billing
- Resource Count
- Click the number in the circle for a drop down of numbers. Select as necessary.
- Follow the onscreen instructions
I’ve signed up. How do I be a part of our company account?
You need to request the Account Owner to invite you to their account.
If they have already added you as a resource:
- Settings
- Manage
- Manage Resource
- Select Resource
- Click the drop down arrow
- Select ‘Resend invite’
Resource will automatically receive an invite email to their account. If they have not added you as a resource to their account, the Account Owner will have to add the new resource to their account first.
Force Sign in with Google?
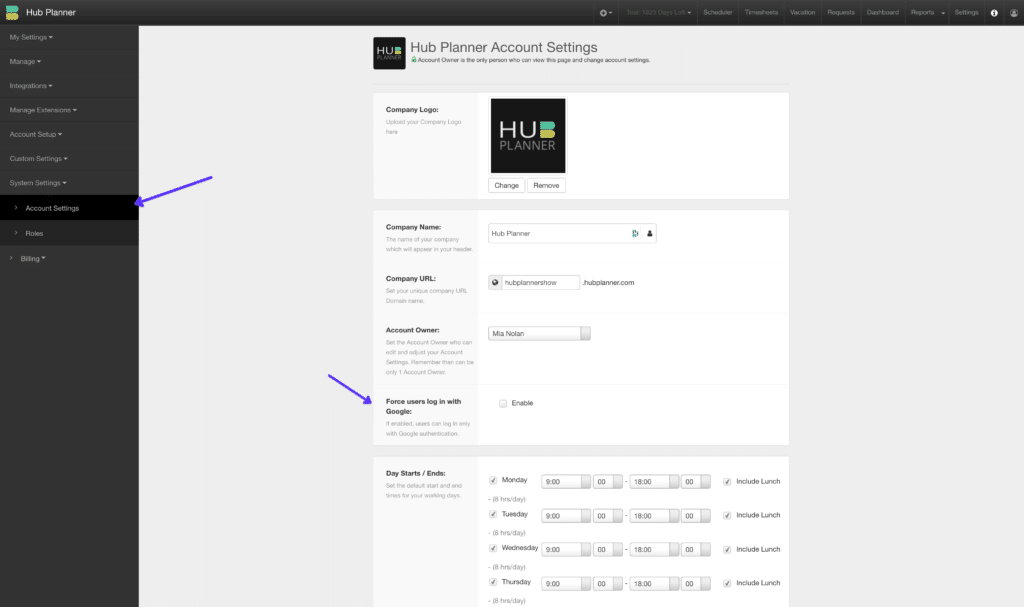
Account Owners can opt to force users to sign up/login to Hub Planner via Google only. To enable the forced Google sign in, Account Owners can navigate Hub Planner Account Settings. Users may see the below message if they are trying to use their own non google credentials.
Can I set my account for new users to sign up/login with Google?
Yes. Indeed you can. To do so, simply navigate to the System Settings -> Account Settings -> Force users to log in with Google -> Tick the box.
How do I retrieve a deleted resource?
Sometimes you might delete a resource by accident or they are no longer with the company. An option to reinstate or easily reutilize the licence to a new user is solved. Simply pop support@hubplanner.com to reactive the user.

