How do I set up SSO?
There are just 3 short main actions involved in setting up SSO with Hub Planner. See below for full step by step instructions. You will need an active subscription in both Hub Planner and your SSO Provider (Azure AD). First things first, you need to add the Premium Extension to your Hub Planner account.
1 – Install SSO Premium Extension to Hub Planner
2 – Configure Azure AD
3 – Configure Hub Planner
Add SSO Premium Extension
- Settings
- Manage Extension
- Add/Remove Extensions
- SSO
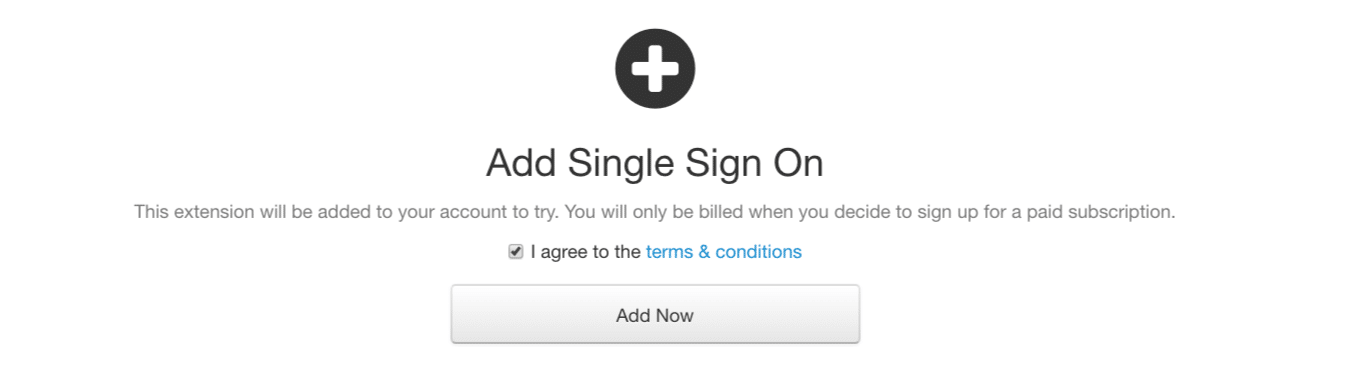
- Click ‘Try Free’
- Agree to T&C
- Add Now
- SSO Premium Extension will have successfully installed
Note SSO will be available free of charge to all Premium Subscribers. For Plug & Play users, please install and add SSO to your subscription.
Configure Azure AD
First, we need to add Hub Planner to Azure AD. Once added, we need to copy the Login URL and the Azure AD Identifier from Azure AD and paste into Hub Planner.
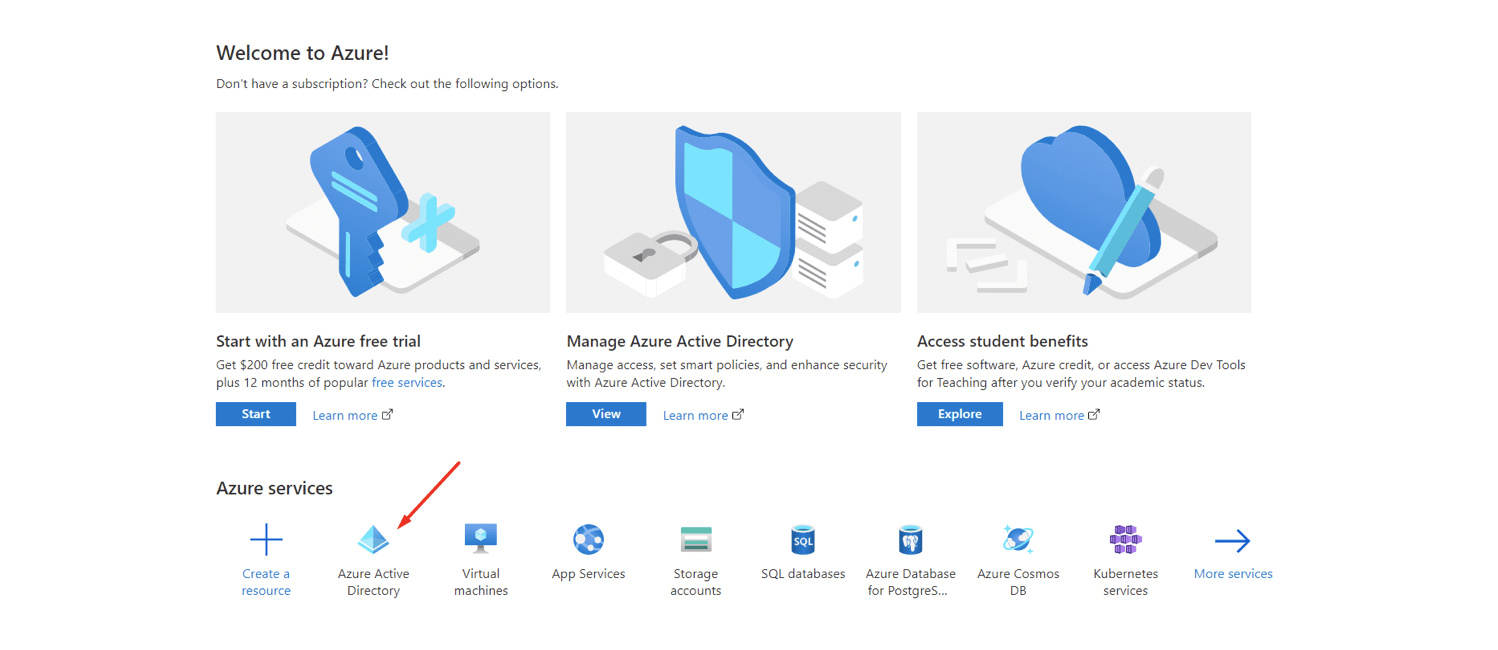
- Log into your Azure AD account Portal
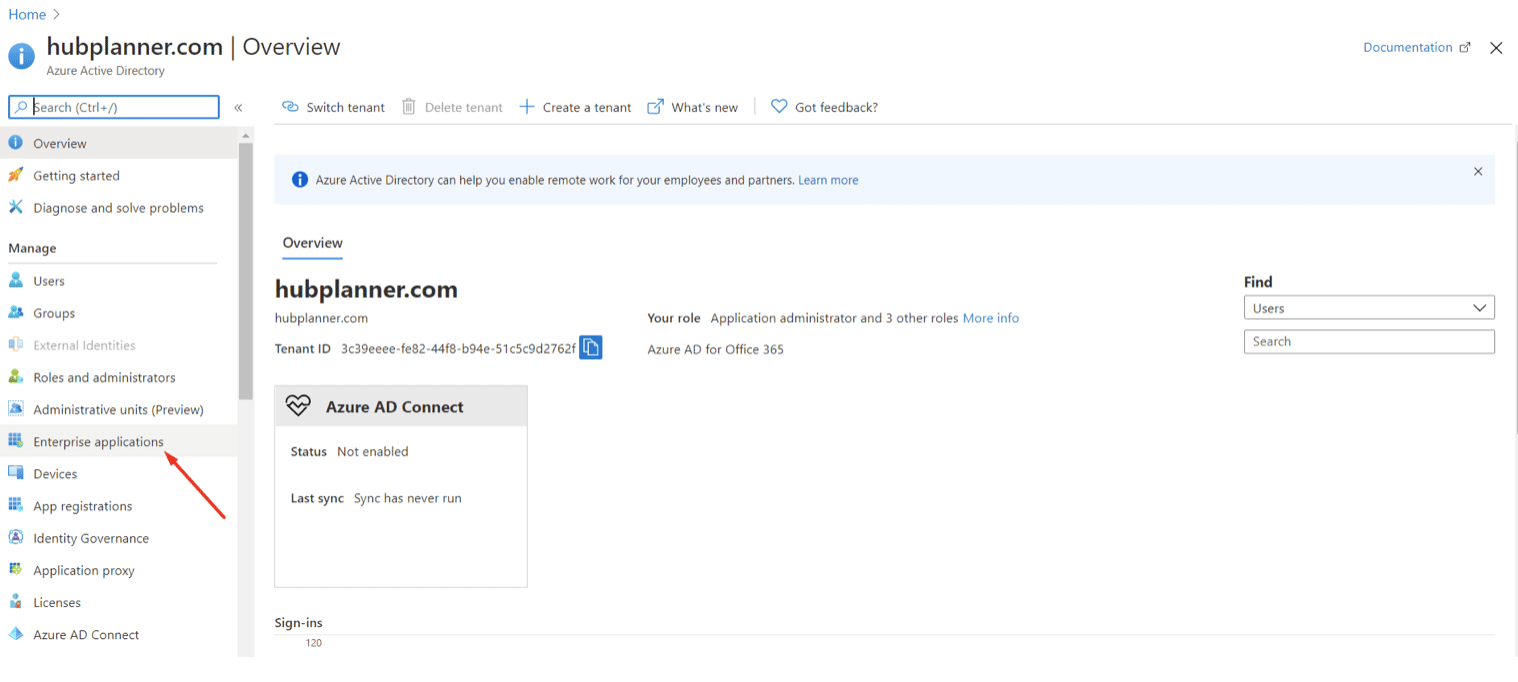
- Choose Enterprise Applications
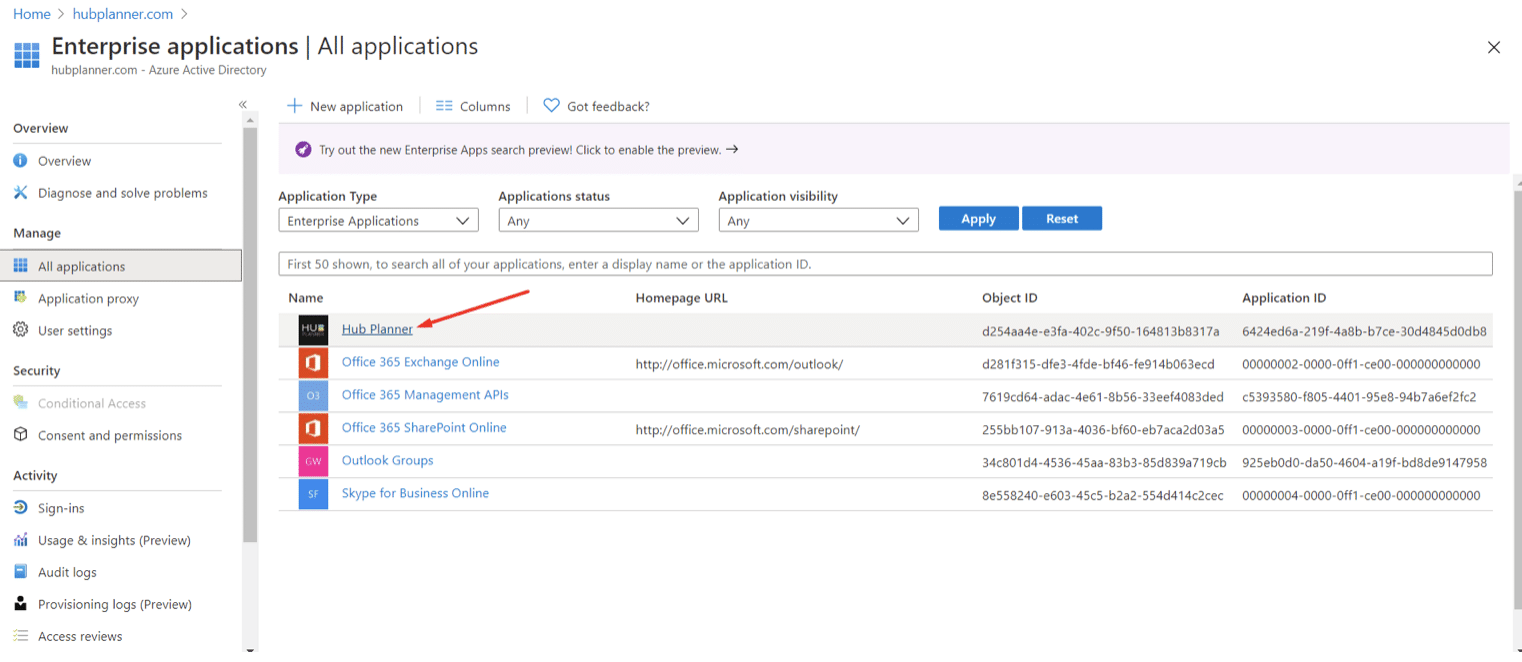
- All Applications
- New Application
- Search or Select ‘Hub Planner‘ and select from the results.
- Add Hub Planner
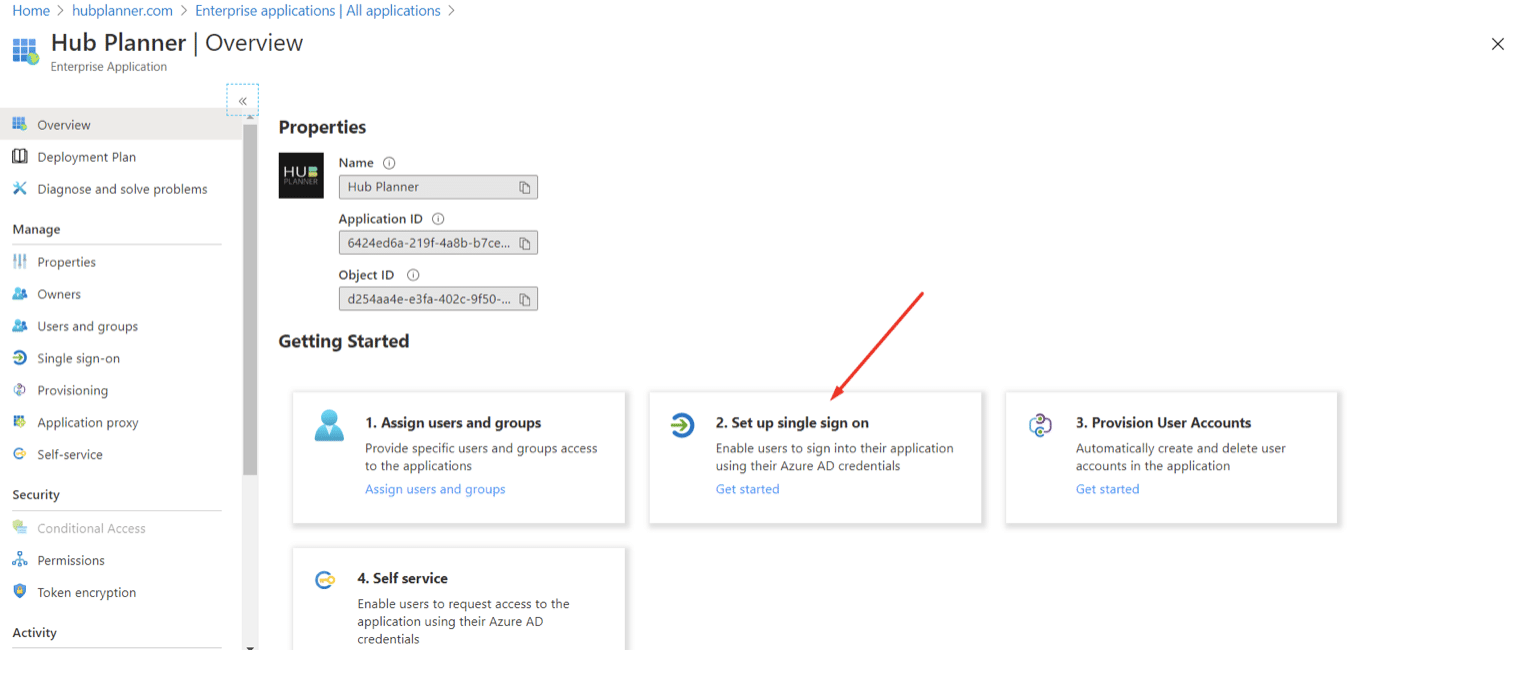
- Hub Planner Overview
- Select Option 2 ‘Set up Single Sign On’
- Select SAML
- Click Edit on Basic SAML Configuration and enter the following fields:a. In the Sign-on URL text box, type a URL using the following pattern:
https://.hubplanner.comb. In the Identifier box, type a URL using the following pattern:
https://app.hubplanner.com/sso/metadatac. In the Reply URL text box, type a URL using the following pattern:
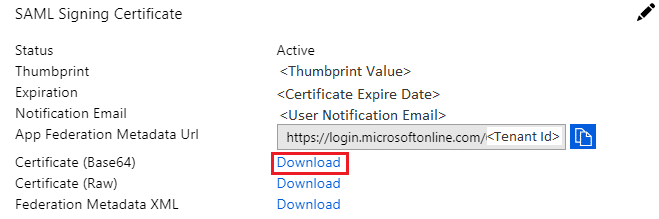
https://app.hubplanner.com/sso/callback - Scroll to SAML Signing Certificate
- Locate Certificate (Base64) and download to your computer. You will upload this to Hub Planner at a later stage (instructions below).
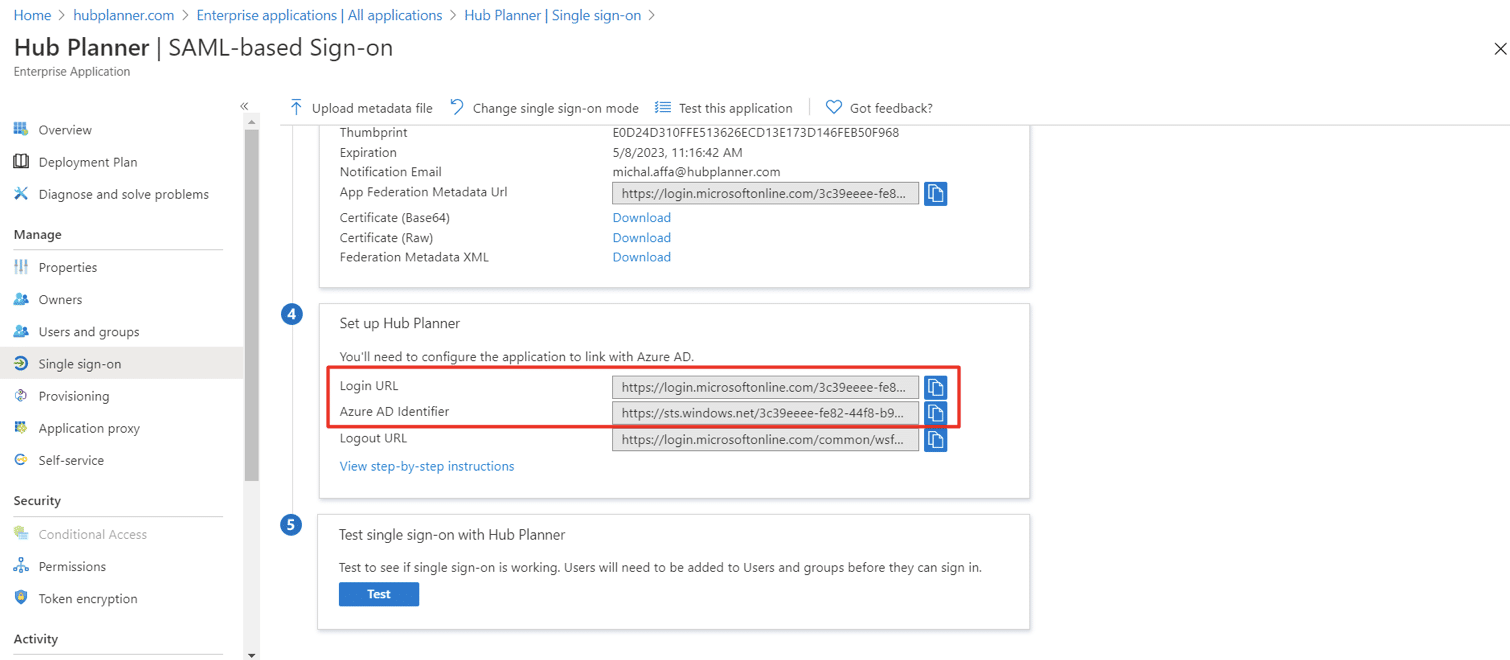
- Scroll to ‘Set up Hub Planner’ – you will copy and paste the URL’s to the Authentication SSO in Hub Planner (instructions below).
- Copy Login URL
- Copy Azure AD Identifier
Step 1
Login to Microsoft Azure, go to Azure Active Directory:
Step 2
Choose Enterprise applications:
Step 3
Search / Click Hub Planner
Step 4
Click ‘Set up Single Sign On’
Step 5
Basic SAML Configuration
a. In the Sign-on URL text box, type a URL using the following pattern: https://.hubplanner.com
b. In the Identifier box, type a URL using the following pattern: https://app.hubplanner.com/sso/metadata
c. In the Reply URL text box, type a URL using the following pattern: https://app.hubplanner.com/sso/callback
Step 6
Download Certificate (Base64) – You will need to save this to your computer and upload it to Hub Planner later on.
Step 7
Copy both Login URL and Azure AD Identifier and paste into the Authentication section in Hub Planner.
Configure Hub Planner
- Settings
- System Settings
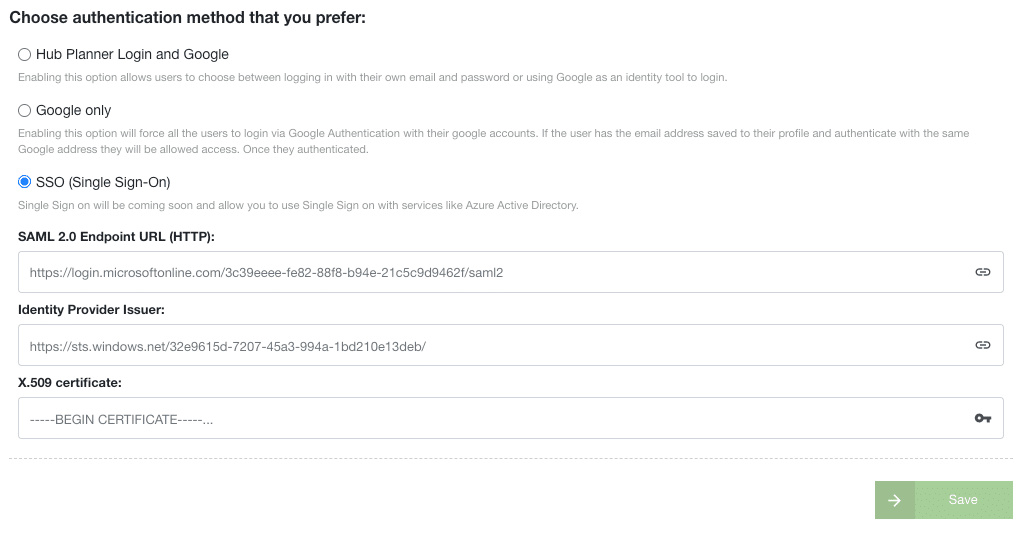
- Authentication
- SSO
- SAML 2.0 – Paste from Login URL in Azure AD
- Identity Provider Issuer – Paste from Azure AD Identifier
- Upload Base 64 Certificate from computer to X.509 certificate field
- Click ‘Save’ within Hub Planner – now it is possible to log in only with SSO (Account Owner will be able to log in with SSO,
password & Google)
What happens now that I’ve activated SSO?
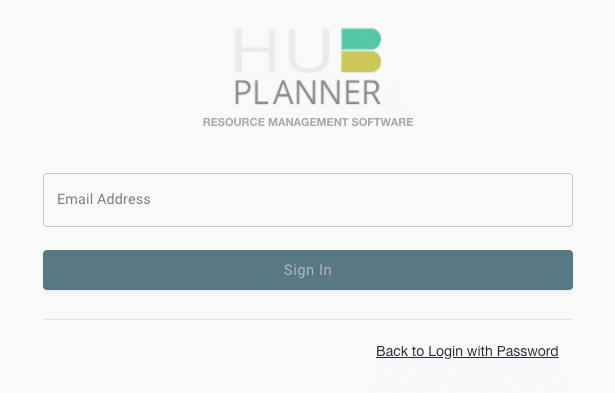
Login without Azure AD
- Enter email address
- A pop up will appear for you to choose your Azure AD account
Save domain for faster access
How to change my Hub Planner landing page?
- Settings
- My Settings
- My Preferences
- Start Page: Choose option
- Sub Page: Choose option
- Save
Is it just Microsoft Azure you have SSO on for now?
Yes. However, we will look to add some more options for users down the line. For now, Azure AD is the only SSO option for Hub Planner.
How can I add Hub Planner in Azure?
You need to add Hub Planner to your Azure AD. Follow this link for more help: Azure AD Marketplace.
Is there an Azure tutorial?
Yes, here are Azure AD instructions:Azure AD Hub Planner tutorial