How to Build & Download Entire Project Report of Resource Bookings
Let’s show you how we will use Hub Planner to build a project report and download (Excel) all the bookings for multiple resources for one specific project. In a mere few steps we will have a report ready to download. Let’s go through the steps.
Open Report Builder
We will use the Report Builder to create the report that we need. So, navigating to reports, open the report builder to build our project report.
Choose Report Type
We will choose Project as we want to select one particular project. Why choose projects instead of resources? Choosing a report type will determine what you will see in the next tab – data.
Select Single Project for Report
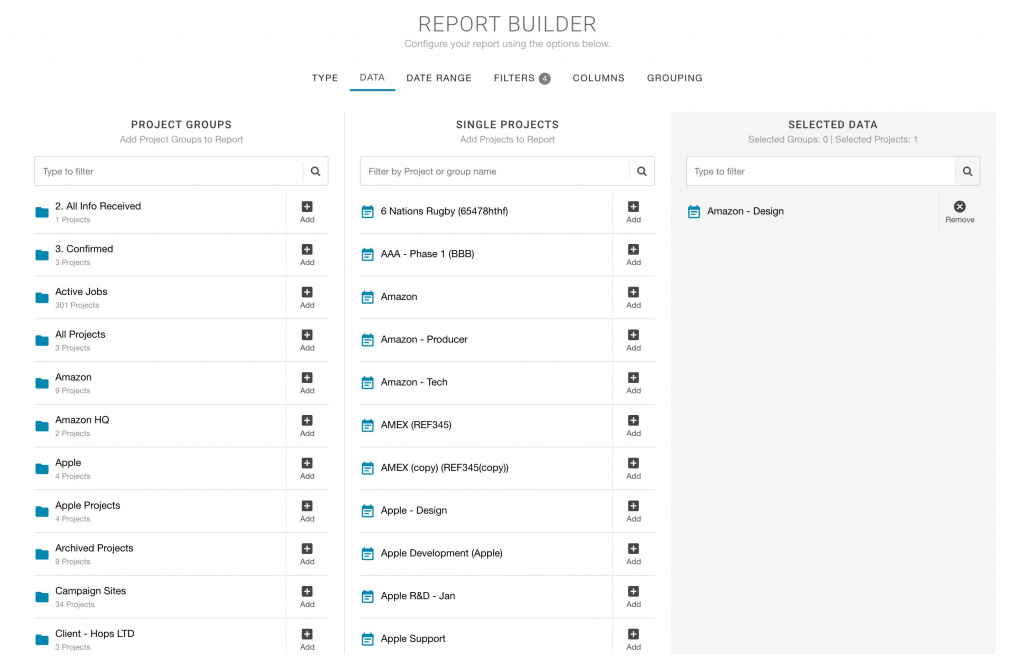
Within the data tab, we are going to remove all Projects from the selected column as we only want to view data of one project. Within the middle column single projects, select the project you wish to download the entire project report of resource bookings.
Input Date Range for Report
This is kind of important, we need to know the dates of the project. You can navigate to the project modal and you may have set the start and end dates. If you don’t know the dates, that’s ok. Once our report is published, we can simply click the RESULTS option from the Report Toolbar. From there, we will select the option to show data outside of the date range. However, for this example, we will choose ‘This Year’.
Apply Filters
We don’t need to touch for now. However if you need to, here you can set various options to configure the report results.
Select the Data Columns for the Project Report
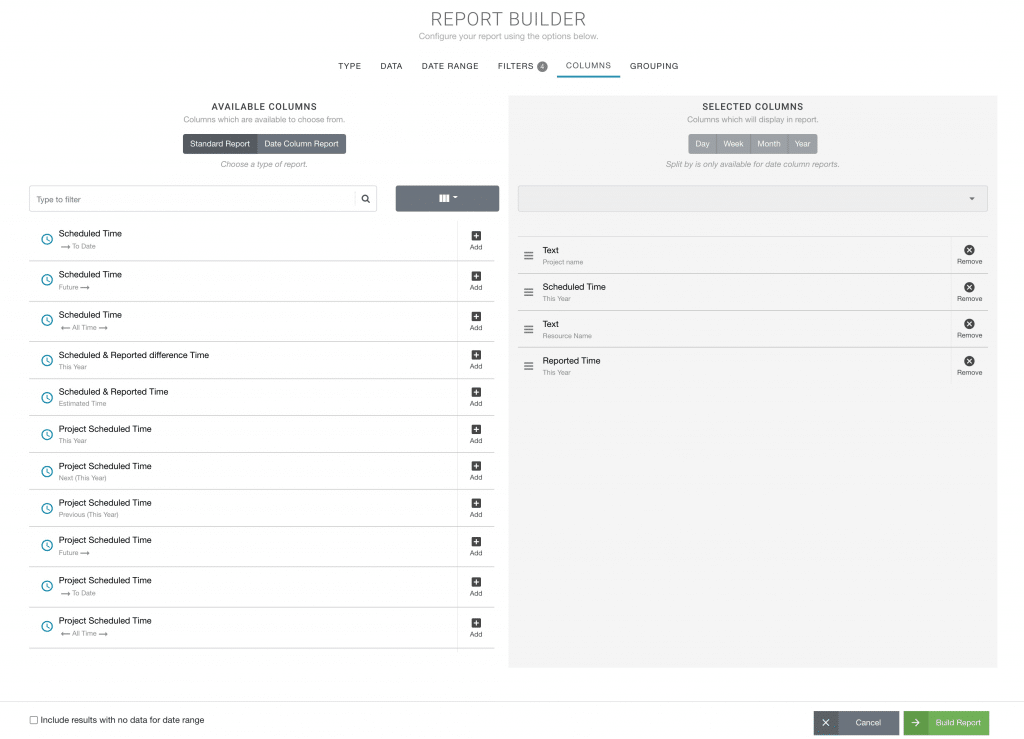
Here is what we will select to show on the project report. What do we need to see? You will note that that some data is already there for you.
- Date
- Project Name
- Scheduled Time (for date range)
- Report Time (for date range) If you use Timesheets to record your actual data. You can opt to just include this column.
- Resource Name
Grouping of Project Report
For this report we want a download of all the bookings for the project. With that said, we need to know the dates. We want the raw data. So, let’s tick the box that says, ‘Do not group results’. This will give us the day by day, line item breakdown of the project report data.
Build Project Report
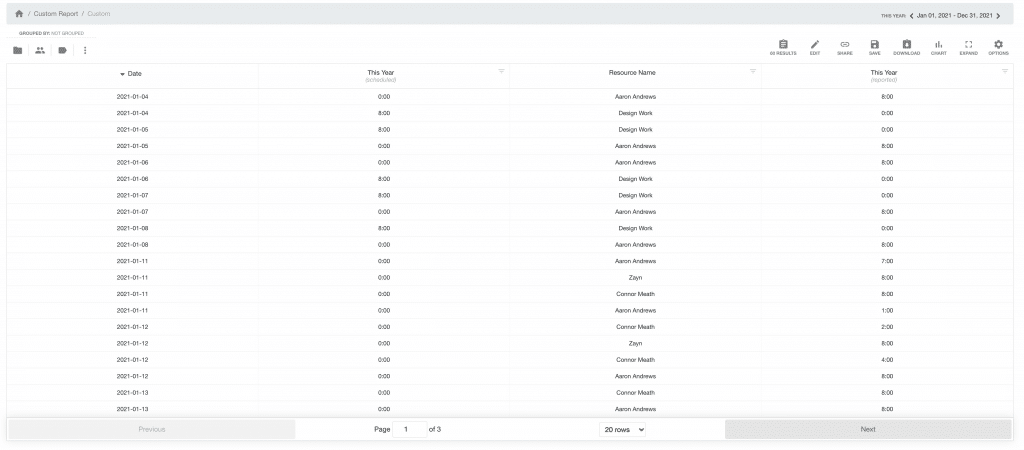
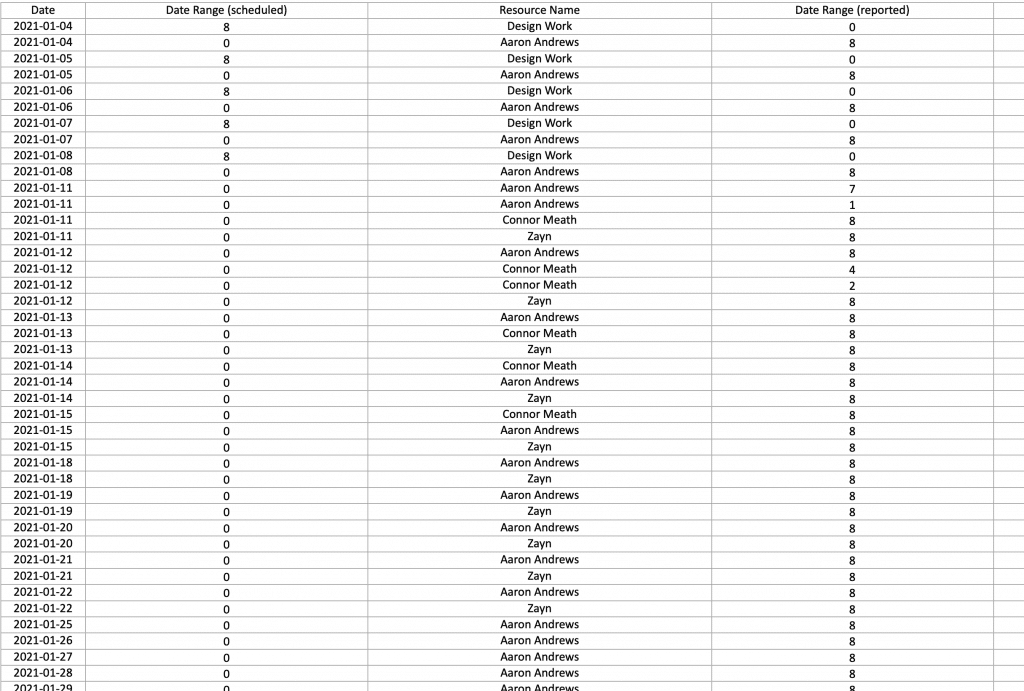
Once ready, select the big green button ‘Build Report’. You will see a breakdown of the data as shown in the example below. If you need to make changes or add or remove columns, you can easily do so. Simply select EDIT from the report toolbar. From there, select one of the relevant options to take you directly to the report builder tab.
Download Project Report
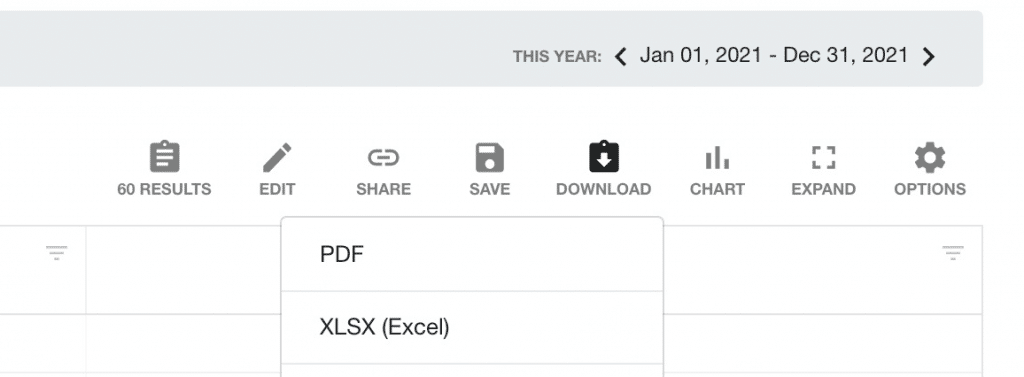
To download the report is very simple, all you need to down is click DOWNLOAD from the report toolbar. From there, select your desired option either PDF or EXCEL.
Download to Excel example:
Save Project Report?
Why not save the report for the future? Sometimes that can be handy if you need to switch out the project and view the data of another project. All the steps are ready to go. All you need to do is switch the project in the Data tab of the report builder.


