The Report Builder
Create and build your own bespoke reports using the Report Builder. Alter an existing template or produce one from scratch. Use the abundance of filters and options available to you within the Report Builder. Save and favourite your uniquely established report.
Let’s take you through the options of this integral feature of how to generate a customized report.
Creating a Report from Scratch using the Report Builder
Firstly we are going to take you through the steps of how to create a report from scratch. Later on, we will show you how to alter an existing template.
You can access the Report Builder from the Reports Home Page by selecting the folder. Alternatively you can select the icon at the top of the sidebar. Once you activate the Report Builder. A pop up modal appears.
Report Type
The first step within the Report Builder is to choose a report type. Choose a starting point of selecting what type of report you wish to generate from the Report Builder. Your options are pretty straight forward. Choose from Project, Report, Event or Unassigned. Selecting your report type will determine what appears in the next tab and step in the process. Note, this tab will be visible from the Report Builder. It will not be visible if you are navigating to the report builder from a pre formatted template.
Select Data you wish to Report by
OK, so depending on what type of report you have selected will determine what your options are here in the Report Builder. Taking the pre installed Hub Planner default options as an example. Let’s take report type Project first.
Project
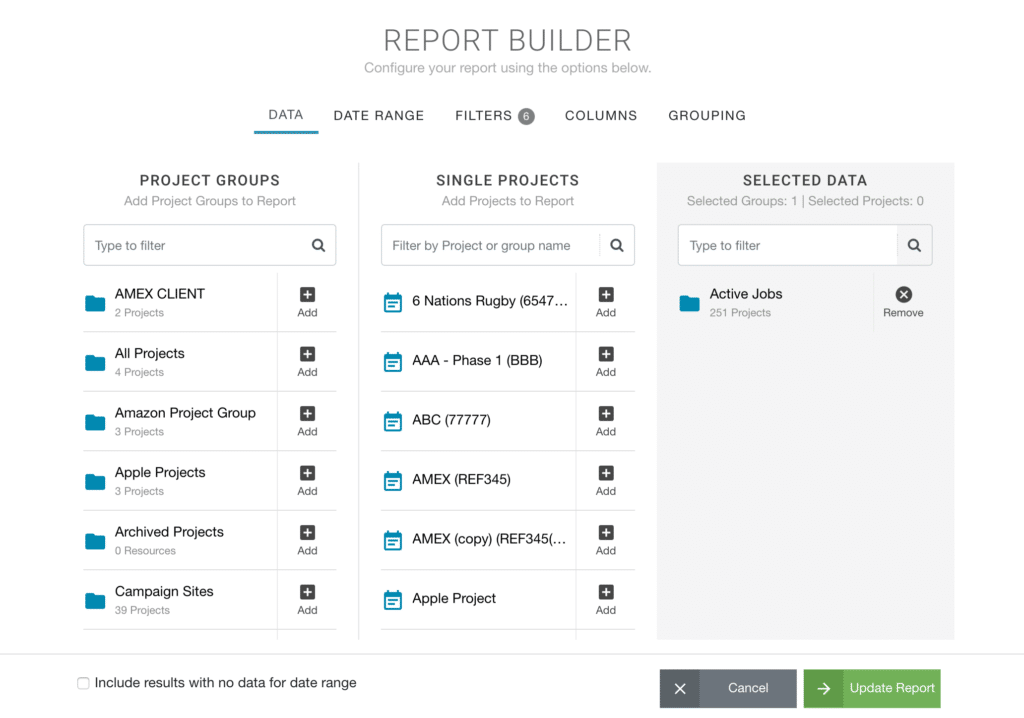
Your data options for Projects within the Report Builder are divided into three columns. The left hand side column is a breakdown of the Project Groups you have installed in Hub Planner. The middle column are single projects associated. When you select any of the project groups, and or single projects they automatically populated the Selected Data column. Now, you have the option to unselect ones you do not wish to include in the report.
Tip: Should you wish to include just a couple of projects in your report, an easy way to do so is Select the project group which highlights all corresponding projects. Subsequently unselect, and it will automatically deselect all projects. Scroll to locate the projects you wish to include and tick accordingly.
Resource
Working the exact same way as Projects in the Report Builder. Two columns represent the resource data options. Resource Groups on the left. Single Resources in the middle. Selected Groups and Resources as required to be including within your report which will appear in the Selected Data column.
Tip: Know the resource you wish to create a report for, use the search box to quickly locate.
Event
By default, Hub Planner Report Builder has installed 3 Events – Not Available, Sick Leave and Vacation. So for example, you might generate a report say on the amount of sick leave reported for last quarter. Of course you may have numerous event types which can be set in settings. Again you have a search field which is handy to locate the right event you need to report on. There are no columns within this data option.
Unassigned
Here you can generate a bespoke report on any unassigned categories. A great example is non billable work. Create a report for how many hours were non billable for last month. And generate one for what is expected for next month! This allows you to forecast and make strategic decisions.
Apply Filters from the Report Builder
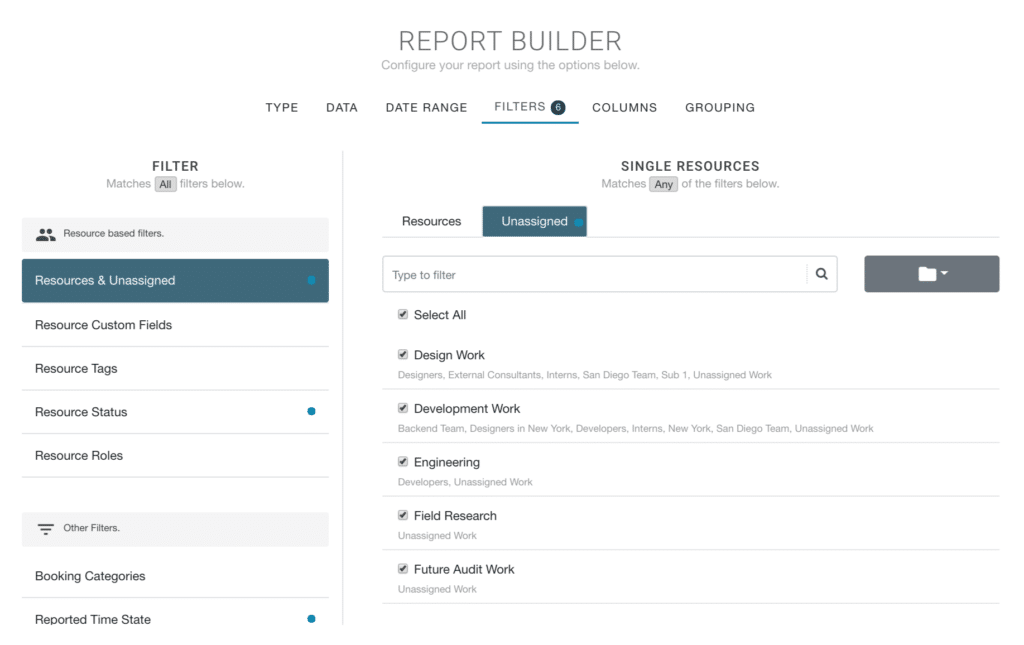
So, next we move to filters within the Report Builder. Again, the number and type of filters are predetermined by the initial report type. Apply as many or as little as you need to. Likewise, some options have two columns meaning what you select in the left hand column will create more options on the right hand side for you to choose from. With filters you really can delve into the nitty gritty of project data and how it affects so many different ways. From resource capacity, to finding out how much time you are spending on clients. What projects are you making most from. What booking category is taking the longest. Even to the simple things like forecasting when are we really busy? Do we need to hire on contractors?
For most filter types on the left hand side provides you with corresponding options that you can select and deselect on the right hand side. There are a couple of filter types that require more specific data requirements. For example, Choosing Project Budget as a filter type. You have some clever options that allow you to create a more specified report. Select the Budget Status from the drop down menu, followed by the Budget Range and then lastly you can enter the value amount. Now you have a configured detailed report defining when say you have a list of projects that were over budget by more than £1,000 and less than £2,000. You can get a sense of how valuable these reports can be to making informed decisions.
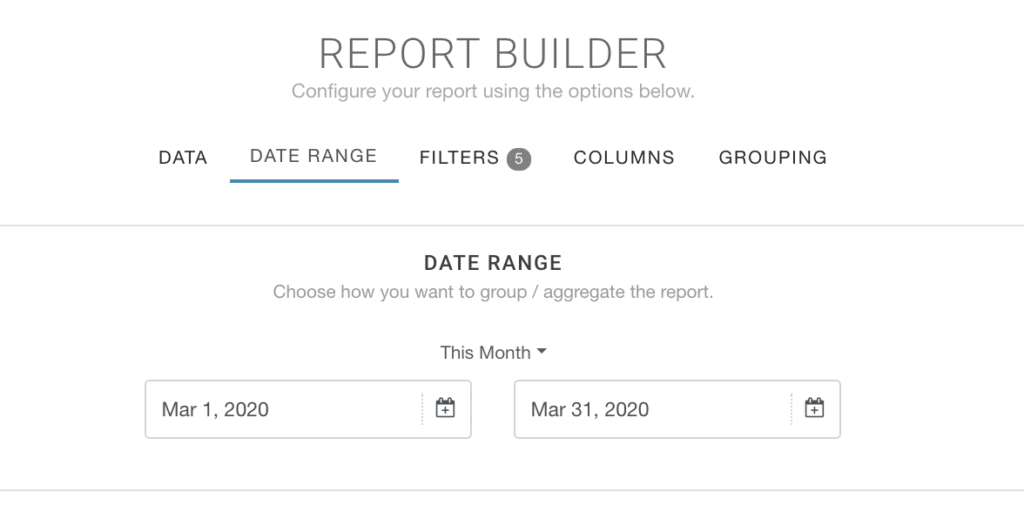
Another example being Project Dates. You can select to view data between specific dates. Again, great for reporting to the finer details of how projects are performing.
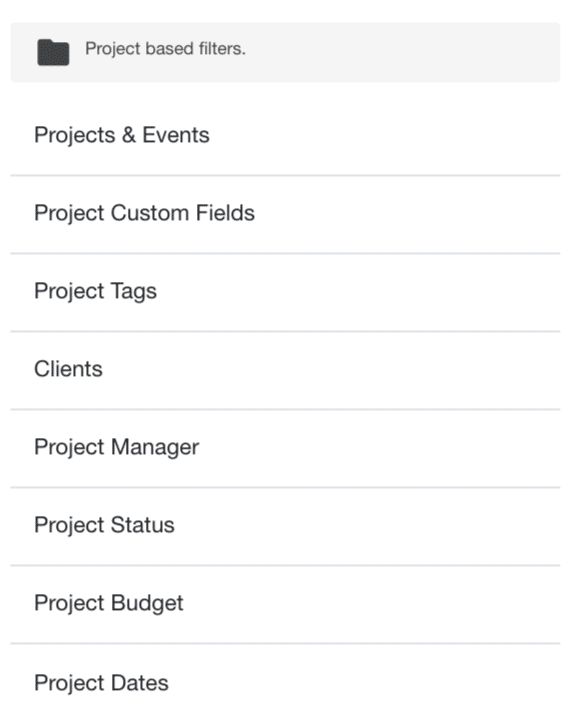
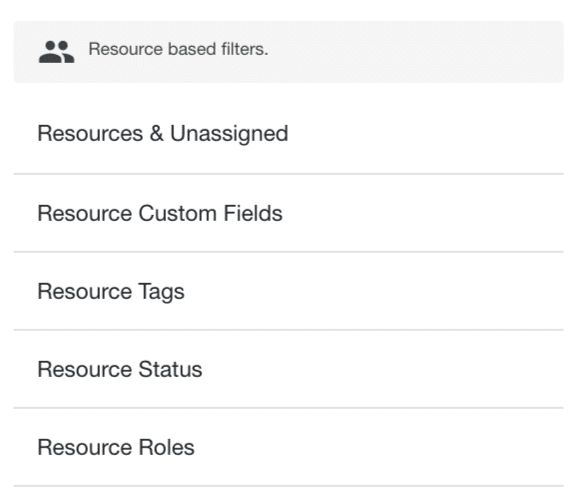
Filters are grouped into 3 sections: Project Filters, Resource Filters and Other Filters.
Project Filters
- Projects & Events. There are two tabs representing each of the two Projects and Events categories. Within each tab, you can select the projects and events necessary to your report you are building.
- Custom Fields. Select the project custom fields you wish to filter your report by.
- Tags. Similar to Custom Fields. Select the project tags associated with the
- Clients. Opt to filter by client or multiple clients.
- Project Manger. Option to select some or all project managers.
- Status. Choose to display results to include Active, Archived, Planned, Pending and Floating projects.
- Budget. This is a great filter to show projects that are over budget defined by a certain amount.
- Dates. Show project results defined by a particular date range.
Tip! Don’t forget to save your report for future instant access to the filters you have defined.
Resource Filters
- Resources & Unassigned. There are two tabs representing each of the two Resources and Unassigned categories. Within each tab, you can select the resources and unassigned categories necessary to your report you are building.
- Custom Fields. Select the resource custom fields you wish to filter your report by.
- Status. Choose between Active, Archived or Non-bookable.
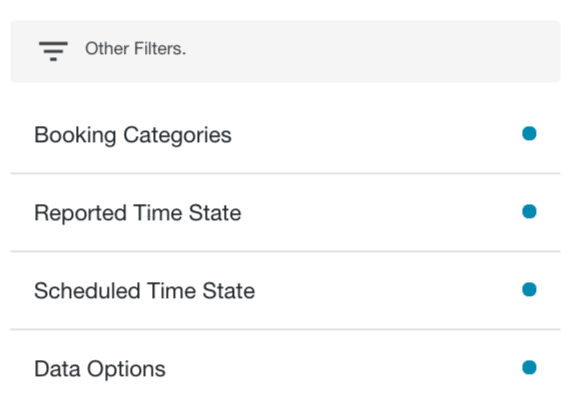
Other Filters
- Booking Categories. Opt to filter via chosen booking categories.
- Reported Time State. Set according to the Global Calculations you have set. Switch to include either time states.
- Scheduled Time. State. Again, set in accordance with the Global Calculations you have set. Switch to include either time states.
- Data Options. Opt between the default options with regards to Data for the date range, event and unassigned time.
Clever Prediction
What I really like is that while there are many filter options within the Report Builder. The report type and data you select will automatically navigate you to what Hub Planner predicts your next step. Clever right? Say you choose Unassigned and then Non Billable work. When you select Filters, you will be automatically navigated to Booking Categories as a default which would be the natural flow in the process.
How do I know what filters are active on my report?
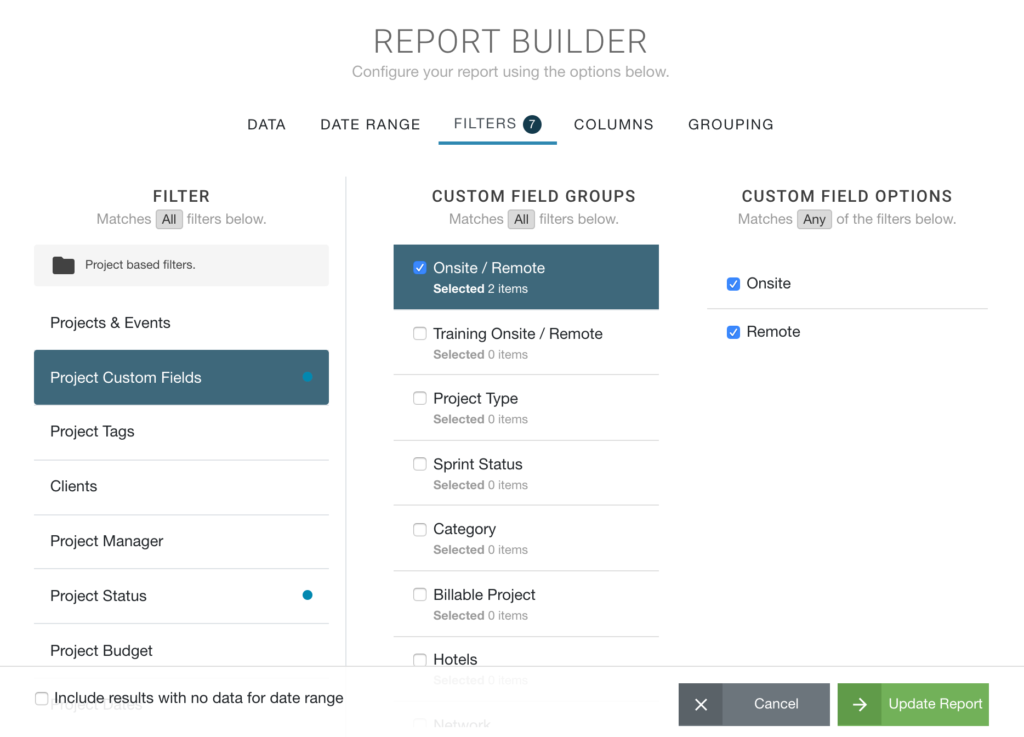
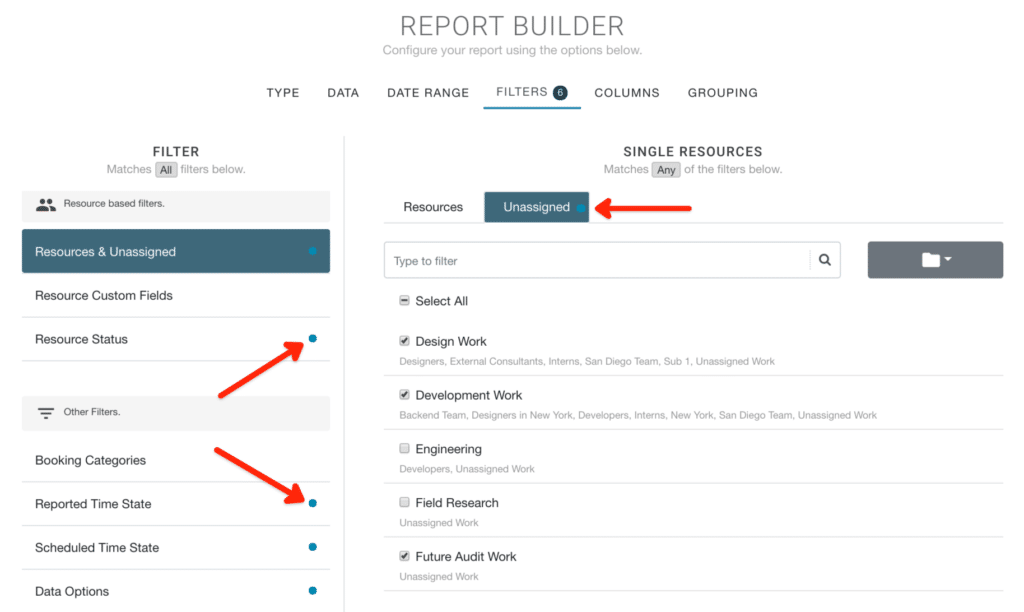
Active Filters are highlighted by a blue dot. To check which filters are active, you need to open the report builder. From the report toolbar, click Edit and select Report Builder. Navigate to the Filter tab. Any active filters are highlighted by a blue dot as show in the below image.
Can I Cross Filter?
Yes. So what this means is whether you can filter reports regardless of report type.
What is Cross Filtering?
Cross filtering goes that one step further and allows you to filter regardless of report type. For example, Project Scheduled Time filtered by Resource Custom Fields. Filters do not need to be the same report type. I am not restricted to filtering for like with like. Project reports to Project filters, Resource reports to resource filters, etc.
Use the Report Builder to alter Columns
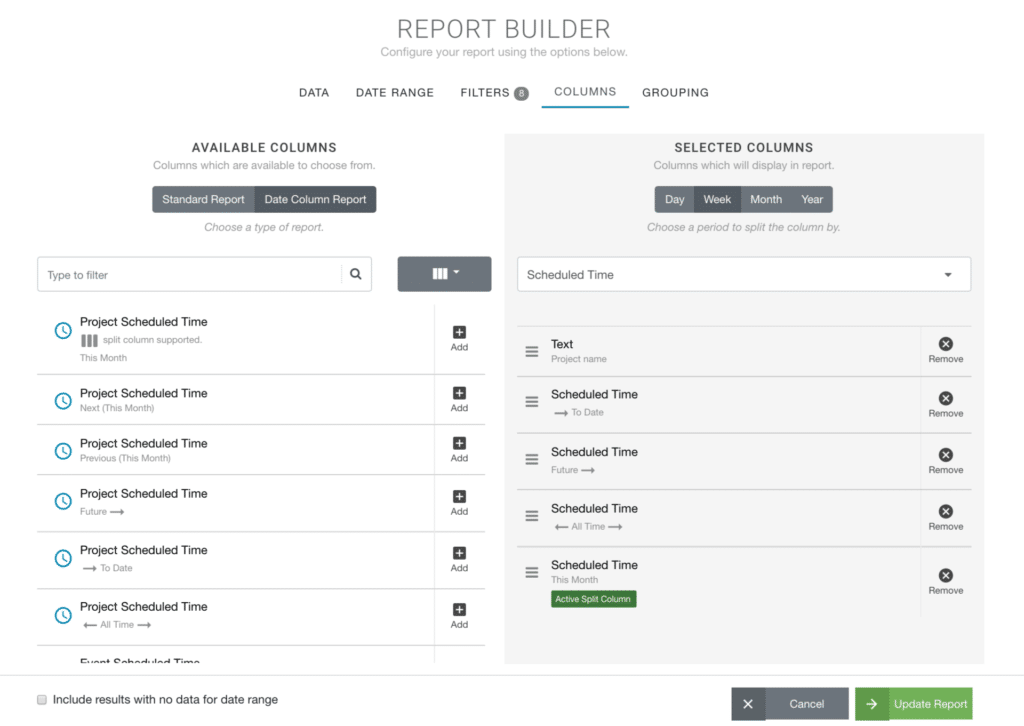
Next up is Columns. These are data headers that you can select to appear in the report. Columns – With over 70+ option to choose from. Click on Dynamic Columns or Date Columns to filter through your column options. Also use the drag and drop facility to organise the layout of the columns. Should you choose ‘Date Columns’ from the available columns options. You can opt to display the results by Day, Week, Month and Year. Drag and drop the order in which you wish for the columns to display the data.

How to Remove Columns
Simply ‘X’ the unwanted Columns. They will automatically remove from the Selected Columns section and be replaced within the Available Columns section.
How to add Columns
From the Available Columns section, simply click the ‘Add’ button. They will automatically appear in the Selected Columns section.
Add/Remove Columns Example
See below example of removing columns and adding columns.
Date Column Report
Within the Columns tab, there are options to create a date column report. A date column report is a little like a heat map report. So it’s producing a report with the data presented broken down by date format. How to create a date column report is pretty easy. There are just a few simple steps to follow. You can either alter an existing template or create a report from scratch using the report builder.
Once you navigate to the Columns section of the report builder. You have two columns: Available Columns and Selected Columns. We naturally select the columns we want from the Available section that will populated into the Selected Columns sections. Bear in mind to remove any unwanted data columns from the Selected Column.
Step 1: Select Date Column Report
Under the title of Available Columns. You have the option for a Standard Report or a Date Column report. We will choose Date column report. Note as soon as we select the Date Column report, the Selected Columns becomes active highlighting the active split column in green.
Step 2: Select a period to split the columns
Next, we select the frequency of how you want to split the dates. Choose from Day, Week, Month or Year.
Step 3: Select the Active Date Column
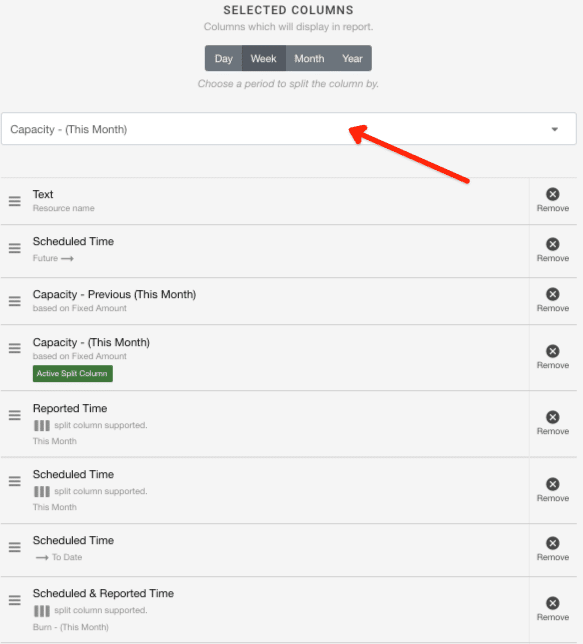
You can pick to choose which column you with to activate the heat map reporting from. There is a drop down on ‘Selected Columns’. Available columns to split will show here. Note not all columns are available to be split. You can identify the available columns to split by the left ‘Available Columns’. Note, the columns available will be identifiable by 3 vertical block lines. Feel free to switch the selected column.
How do I know which column the report will split by?
The column will be identifiable by a green ‘Active Split Column’ within the Selected Columns panel.
Can I add any other columns to the date report?
Yes.
- Add the Available Columns to appear in Selected Columns
- Note that the green “Active Column Split” will highlight which data contains the date breakdown.
- Opt to move the non active columns to the start or end of the report by clicking and dragging. (Suggest to put the non active rows to the front of the report so it’s easy to see).
Step 4: Build Report
Last step, click ‘Build Report’ or ‘Update Report’ if you are editing an existing report.
Grouping using the Report Builder
Lastly is the grouping option of the Report Builder. Here you have the ability to report by a nominated group from the drop down list. Options include everything from Project Status to Custom Fields. And Hub Planner is clever again by pin pointing if the grouping category will produce data or not.
Grouping can be useful for breaking a large amount of data into manageable chunks or for collapsing data into expandable groups. By default, the report template will be grouped by a pre selected option like Resource or project for example. This will be the starting column A. What you base your primary reports results on.
There is a whole section on Primary and Secondary Grouping, which you should check out, it’s very helpful: Double Grouping in Hub Planner Reports
Alternatively opt to remove the grouping filters of the report. By doing so allows you to see the raw data of the report which removes all filters for line item views. Suggest to subsequently add in new data columns that will best reflect the line item data.
For example, using Resource Scheduled Time. After ungrouping results we have line item data for the month. From here, I can now add in the Project Name and Resource Name together with any other column data that might be relevant.
For more information on the benefits of non grouping of report results, click here or navigate back through to the reports help centre.
Once you’re ready to go. Click Generate and your report will appear. Before we move onto the report deliverables, let’s show you how to alter an existing report template.
Alter an Existing Report Template
So you have generated your report from one of the templates. Or you have created a customized report but need to change it. No problem. There are a few ways in which you can access the report builder to make required changes.
- Select the settings cog from the report template on the sidebar
- Click on EDIT from the report toolbar
- Click on COLUMNS from the report toolbar
From here you can access the Report Builder and alter the data fields by taking the same steps as above.
Select the varying data to be included. For example, you wish to include all active, planned, floating projects but leave out archived and pending ones. There are copious filters to choose from. Following on from filters you then can choose the columns displayed. You can simply click as you go as well as manoeuvring the columns in order of preference. Lastly, configure per group.
Click on the green Generate and your newly customized report will display. Share, print or download the report as needed. Go back in and change some filters to generate subsequent reports. Lastly, should you wish to avail of this report in the future, you can simply save the report and it will appear in your ‘Saved Reports’.
Further Reading
- Reports Feature Page
- Reports Press Release Blog Post


