How to Build a New Smart Schedule in Hub Planner? + FAQ’s
A quick step by step guide on how to build and save a new smart schedule in Hub Planner.
One of the core competencies of Hub Planner is helping teams schedule the right resources on the right projects at the right time. Installing the Premium Extension Smart Schedules, will bring an added feature of being able to build and save new schedules. This allows teams to have quick access into saved scheduler templates with pre defined filters which helps to plan and schedule more efficiently, and a lot quicker.
What does ‘New Schedule’ mean exactly?
A New Schedule means that you can set and save a schedule with assigned filters. You can build a project or resource based schedule. Save it for future access. To build and save a smart schedule, you will need the Smart Schedules premium extension installed. To add a new schedule, navigate to the sidebar and select ‘Add new’. Scroll and select, ‘new schedule’. This will open the schedule builder.
Applying filters to a New Schedule
There are a number of filters you can apply to a schedule. See table below showing the 3 types of filters that we can apply.
| Row Filters –
Resource / Project |
Booking Filters | Smart Filters |
|---|---|---|
| Custom Fields | Booking Categories | Date Range |
| Clients | Status | Utilization Rate |
| Roles | Availability | |
| Status |
A Quick Summary, Step by Step, How to Build a New Schedule in Hub Planner?
A quick step by step list of how to build a new schedule in Hub Planner.
- Scheduler
- Sidebar
- Add New
- Add New Schedule (opens the Scheduler Builder)
- Choose Schedule Type – Manual or Smart
- Row Filters – Apply as necessary
- Booking Filters – Apply as necessary
- Smart Filters – Apply as necessary
- Build Schedule
Step 1 – Install the Smart Schedule Premium Extension
Make sure you have the Smart Schedule extension installed. How will you know if it’s installed? You will see Schedules group on the sidebar of your Hub Planner Schedule.
If you see Smart Schedules faded out with an orange circle, this means that it’s not installed. How to install the Smart Schedule extension? Click on the Smart Schedules and follow the link. Alternatively, follow these quick steps below:
- Settings
- Manage Extensions
- Add/Remove Extensions
- Smart Schedules
- Try Free
Step 2 – Add New Schedule in Hub Planner
- Sidebar
- Add New
- New Schedule
Step 3 – Choose a Manual or Smart type of Schedule?
Create a single schedule view based on teams, filters and availability. Perfect for the snapshot go to schedule. You can opt to create a manual schedule by selecting individual data. Pick the Resources that you want to collect into 1 schedule, e.g Developer Schedule, while a smart schedule allows you to dynamically create schedules based on filters, e.g. Available Resources this week.
Step 4 – Apply Row Filters
Select the filters you wish to apply to the schedule. For a resource type of schedule, feel free to apply some custom fields, tags, select from varying resource status options etc.
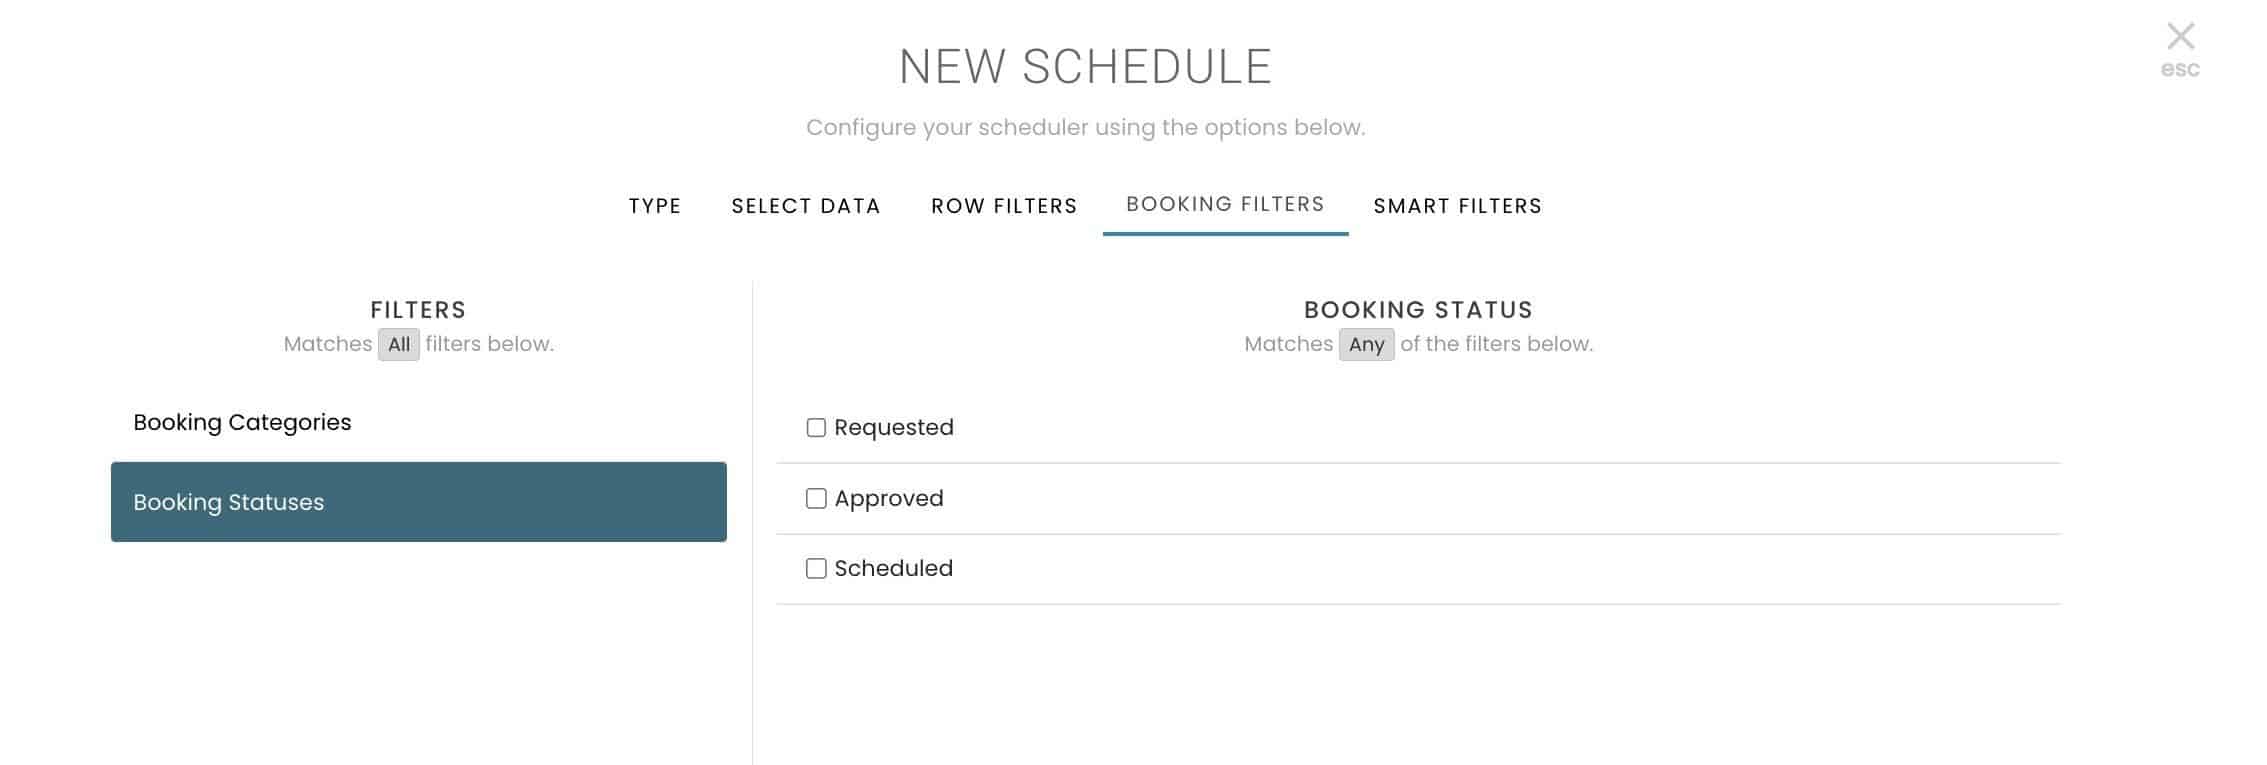
Step 5 – Apply Booking Filters
Select the booking filters you wish to apply to the smart schedule. Here, you can opt to include specific booking categories or booking status options. Please note you will need to have the Request & Approval Workflow / Vacation extensions installed for the booking status options of Requested and Approved.
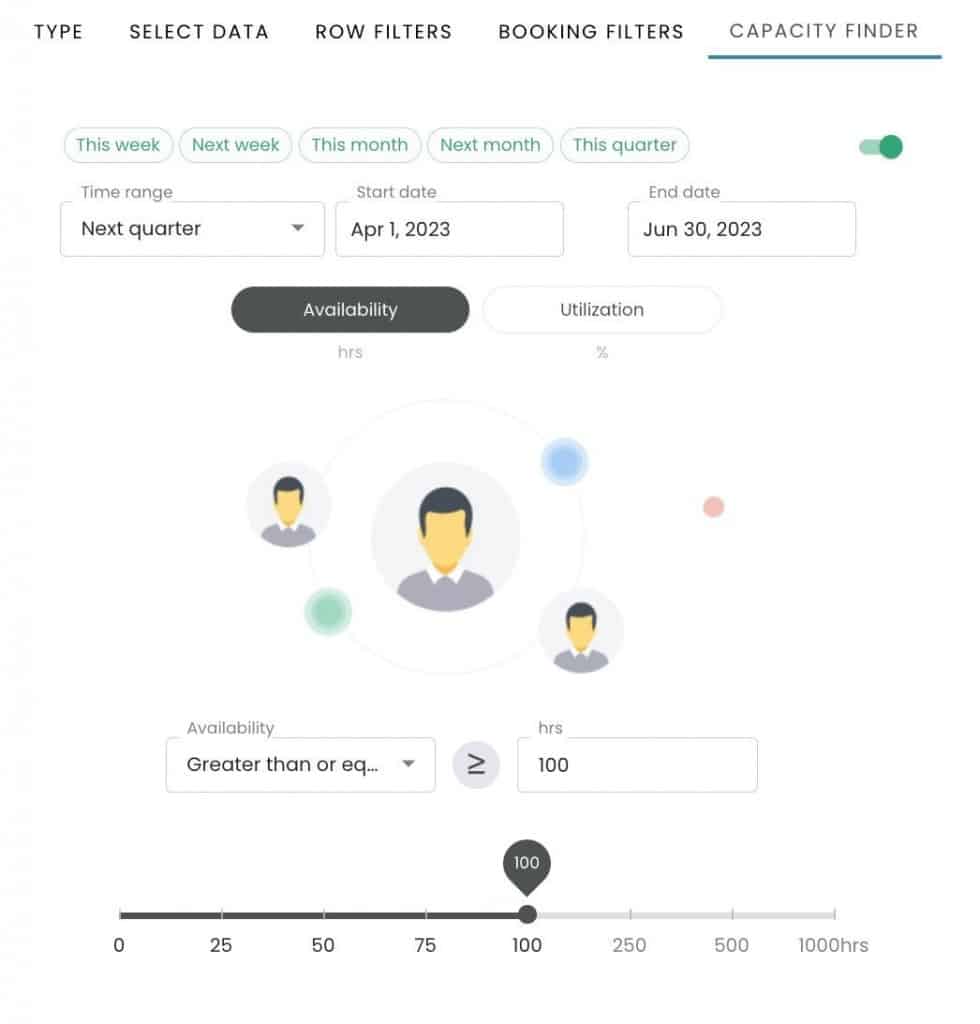
Step 6 – Apply the Capacity Finder
Activate the capacity finder. Note this will need to be installed as a separate extension. Go that one step further in scheduling with the capacity finder. Apply availability or utilisation filters directly to your schedule. You can opt to target specific availability and utilization rates to be applied.
- Choose availability or utilization
- Activate the filter clicking the on/off button
- Select date range
- Apply the availability/utilization configuration
- Enter amount of hours/percentage or use the dynamic scaling option. Or by entering the amount directly into the field.
Step 7 – Ready to Save the Smart Schedule
There are two ways in which you can save a new schedule in Hub Planner.
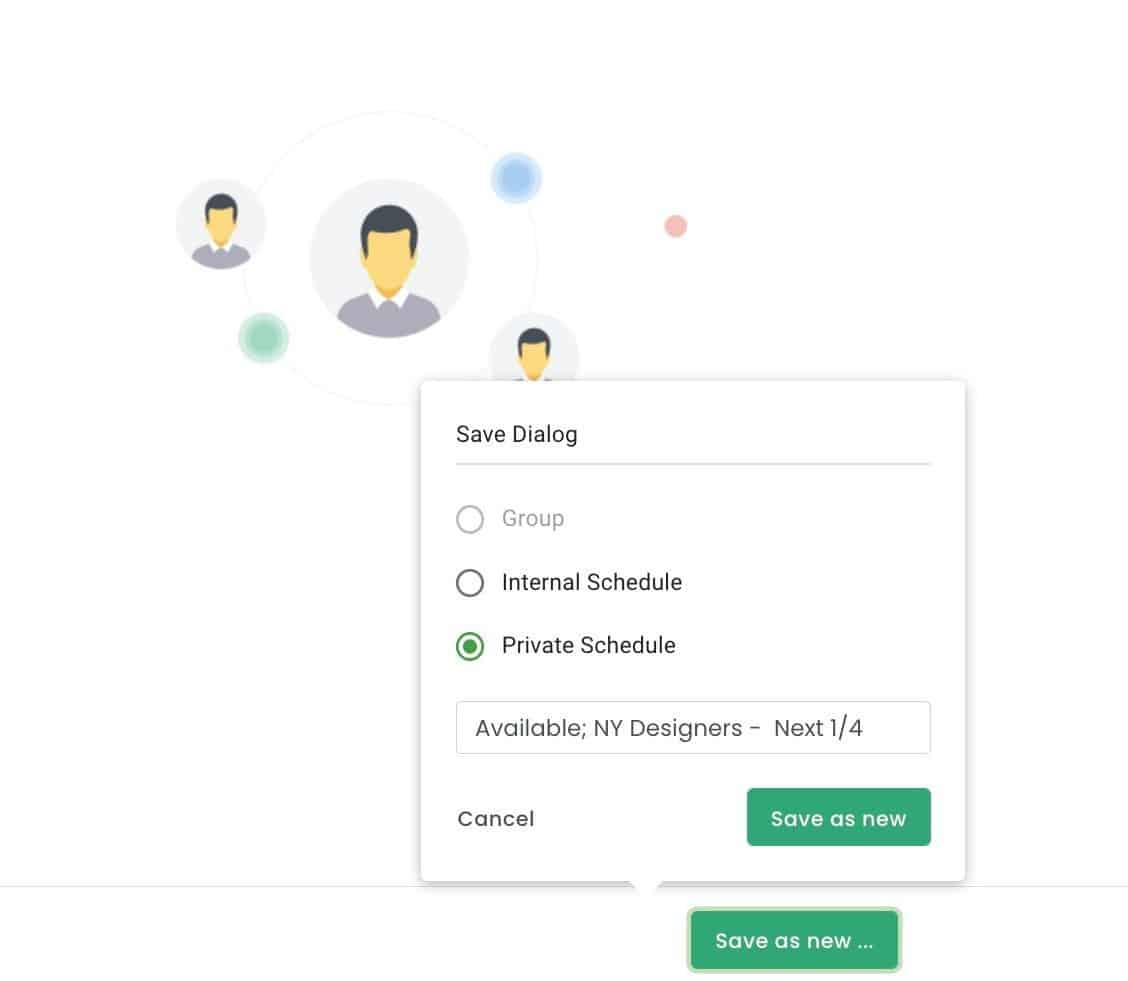
Save within the Schedule Builder
- Before building the schedule, you have the option to save before you create.
- Simply click the green ‘Save As New’ button at the bottom right of the scheduler builder.
- A pop up will appear asking you to save either internally (visible to company) or privately (visible to you only).
- You also have the option to rename the new schedule you will save.
- Once ready, finish with clicking the green button ‘Save As New’.
Save within the Scheduler
- Click the save icon located at the top of the page above the new schedule.
- A pop up will appear asking you to save either Internally (visible to company) or Privately (visible to you only).
- You also have the option to ‘Save as New’ or ‘Update ‘the existing schedule.
- You can also opt to save as a schedule or a group.

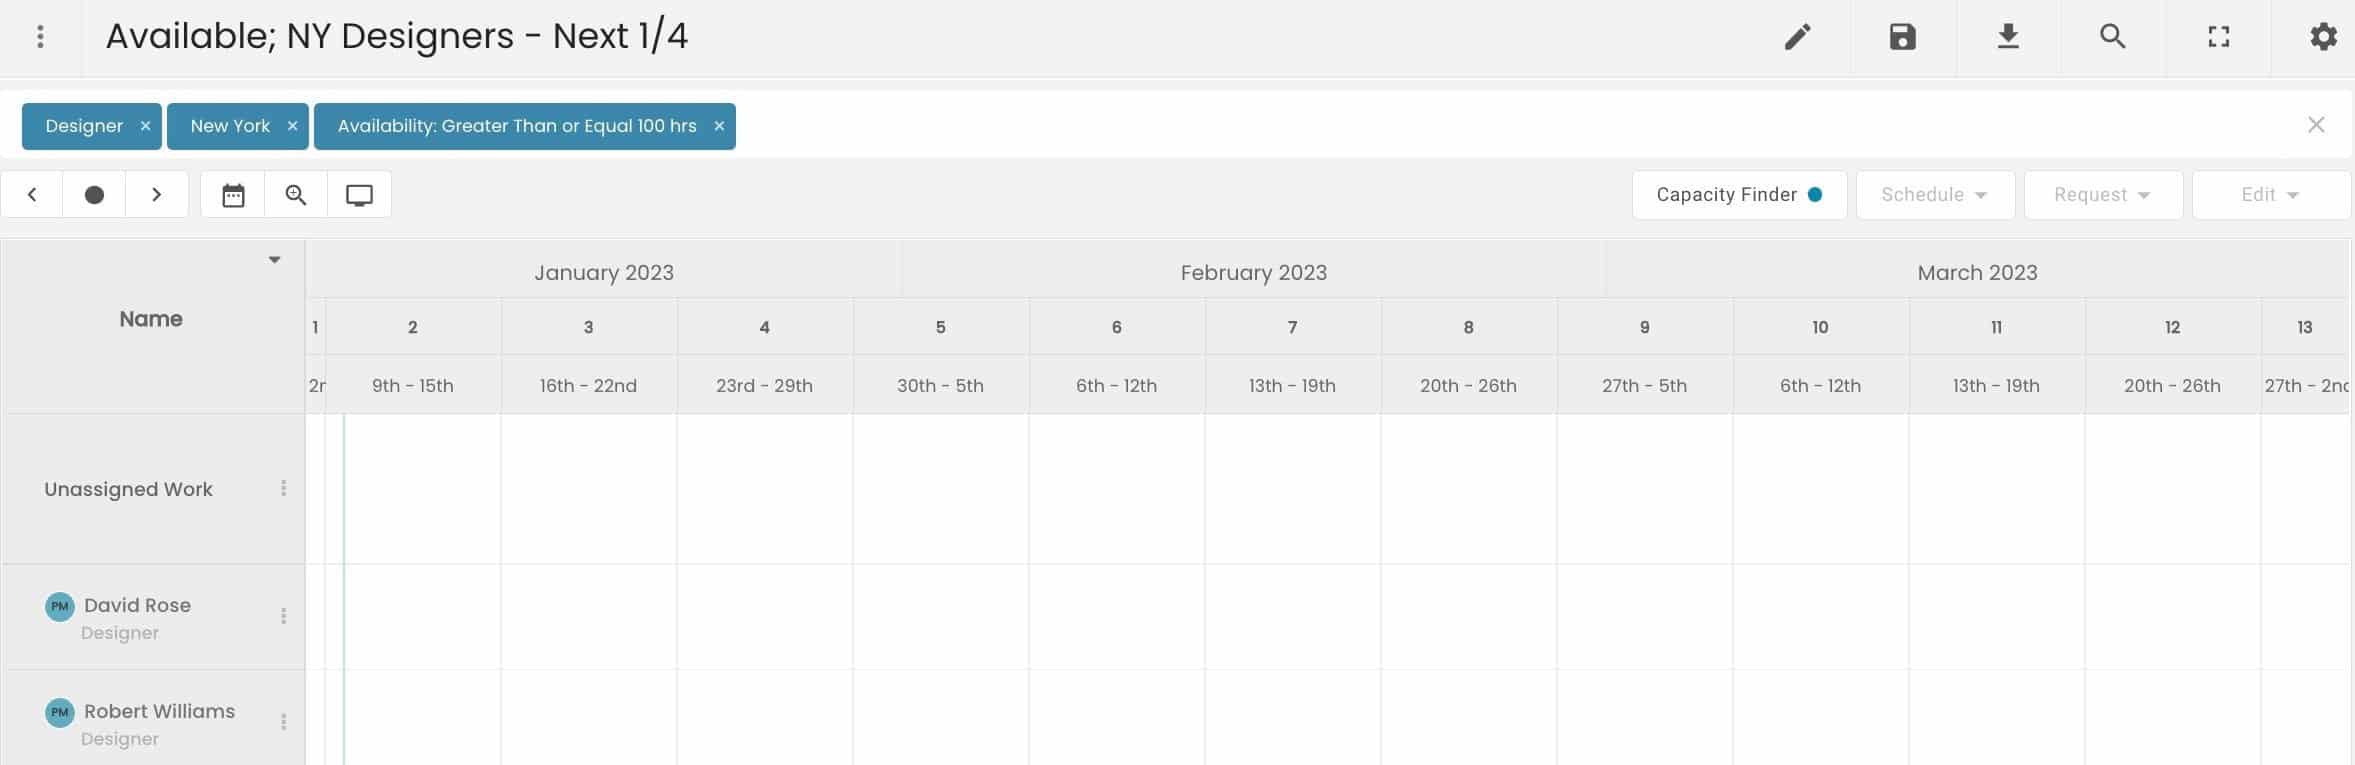
My New Smart Schedule!
And that’s it, as simple as you like. You new schedule is ready for viewing and is also saved for future access.
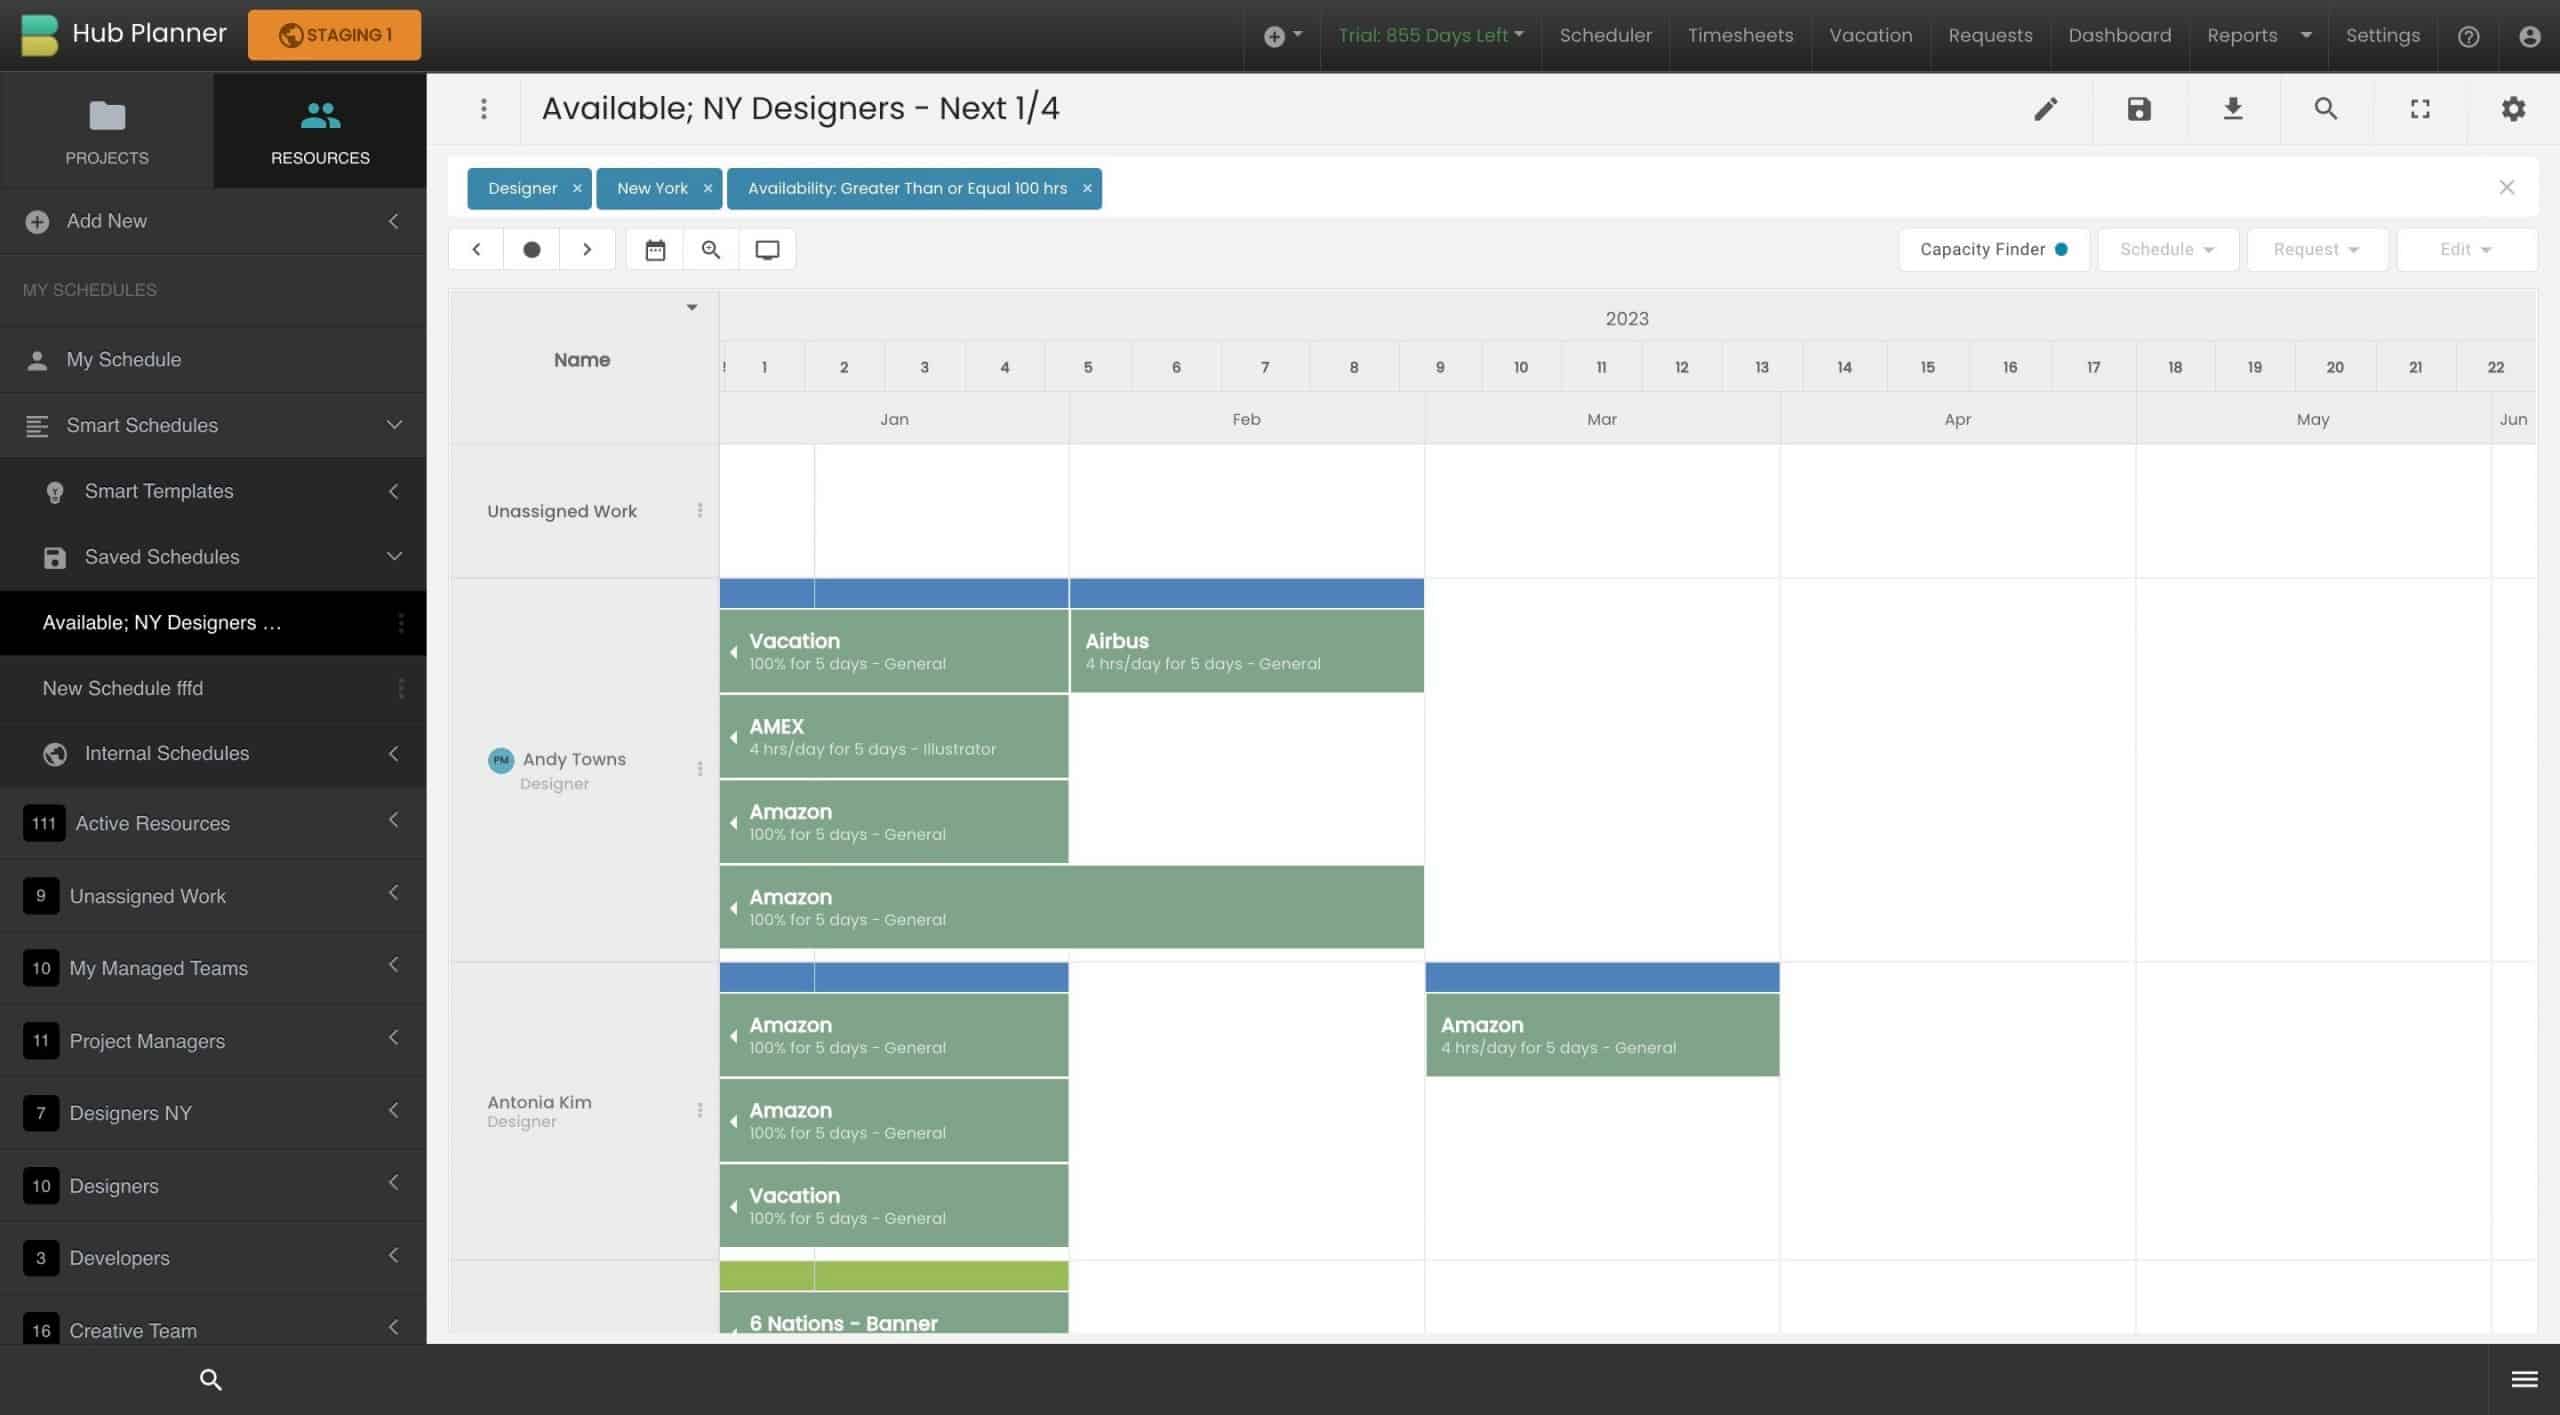
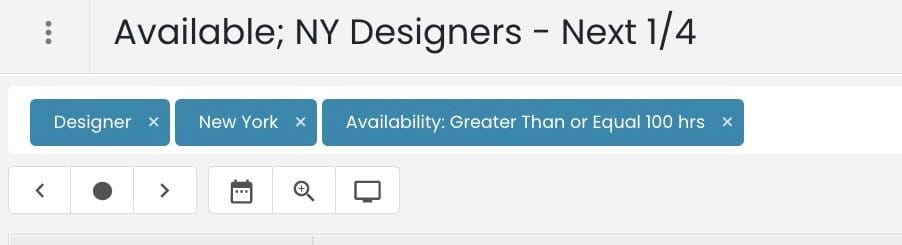
You can see all the filters you applied are detailed in the search bar. Feel free to add some more or take some away. You will note your schedule adjusting.
FAQ: Can I Edit my New Smart Schedule?
Of course. You can easily edit the schedule if you need to by clicking the Pencil icon which will open the Scheduler Builder.
Navigate through the tabs to adjust the smart schedule as required.
When you’re ready, you can either save as a new schedule or update the existing one you had originally saved.
Tip: Quick edit Smart Schedules using the search bar.
You can also quickly adjust the smart schedule using the search bar. For example, I want to now add one more skill set called Photoshop.
FAQ: Where do the new smart schedules save?
- Internally – visible to company will save under Smart Schedules -> Internal Schedules
- Private – visible to me only will save under Smart Schedules -> Saved Schedules