How to add a project group
From the Hub Planner Scheduler navigate to the sidebar.
- Projects
- Add New
- Project Group

A project group modal will appear. Enter the following details:
- Project Name
- Choose Manual or Smart group (Smart Group you need Smart Group Extension installed)
- Add Projects to Group
- Click Add

- Project Name
- Choose Smart group (Smart Group you need Smart Group Extension installed)
- Add Conditions to Project Group which are based from Custom Fields and Tags. (for example)
- Project Type = Local
- Status = In Progress
- Project Type = Tech Ops
- Click Add

How to edit a Project Group
From the Project Sidebar:
- Navigate to Group
- Click on 3 vertical dotes
- Edit Group
- Make changes
- Add
How to add a Resource group
From the Sidebar within the Scheduler:
- Resources
- Add New
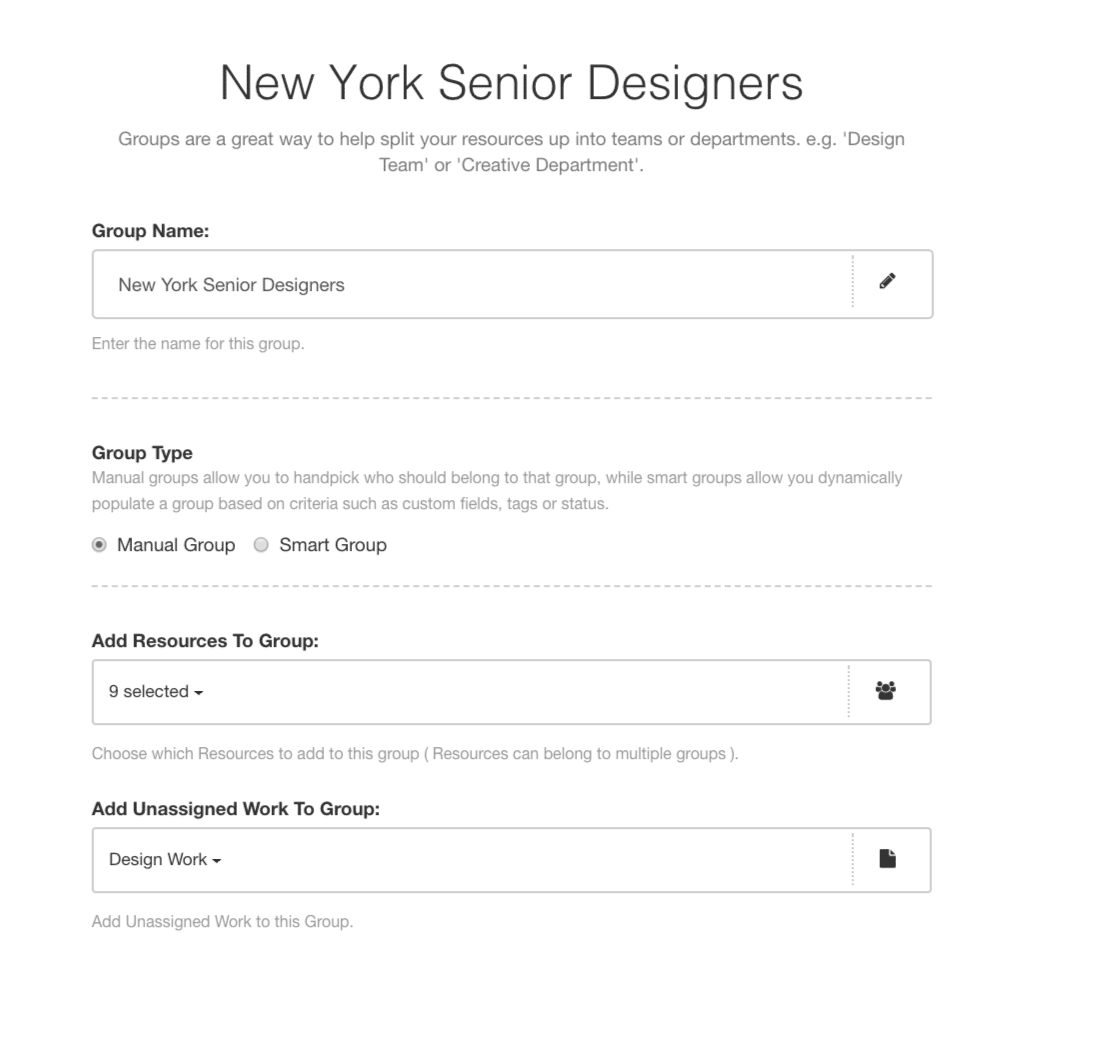
- Resource Group
- Resource Group Name
- Manual or Smart group (Smart Group you need Smart Group Extension installed)
- Add Resources to Groups
- Add Unassigned Work to Resource Group if required (Unassigned Work Extension Required)
- Click Add
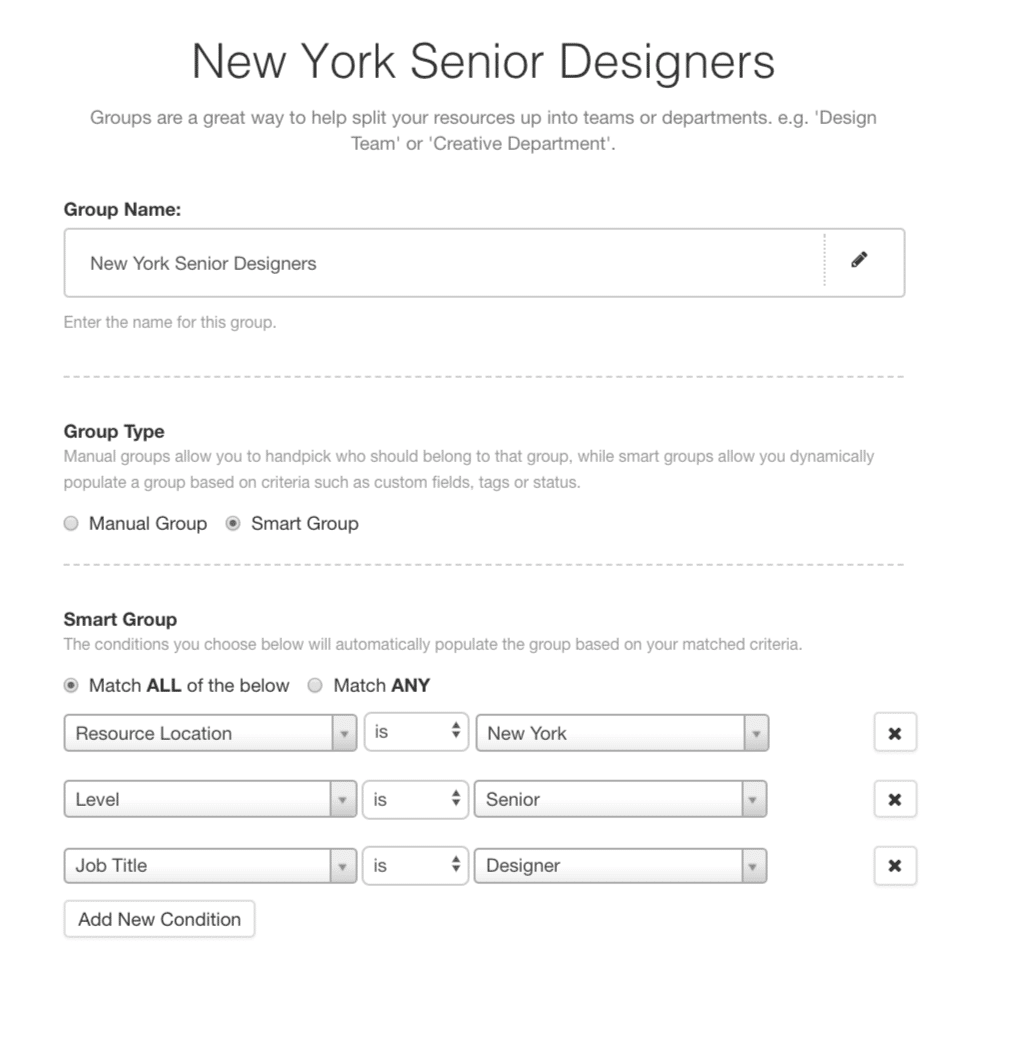
- Resource Group Name
- Choose Smart group (Smart Group you need Smart Group Extension installed)
- Add Conditions to Project Group which are based from Custom Fields and Tags. (for example)
- Resource Location= New York
- Level = Senior
- Job Title = Designer
- Add
How to Edit a Resource Group
From the Resources Sidebar:
- Navigate to Resource Group
- Click on 3 vertical dotes
- Edit Group
- Make changes
- Add
How to add / remove resources from Projects and Groups:
From Side bar navigate to Active Resources
- Click Drop Down
- Select Resource
- Click on 3 vertical dots
- Edit Resource
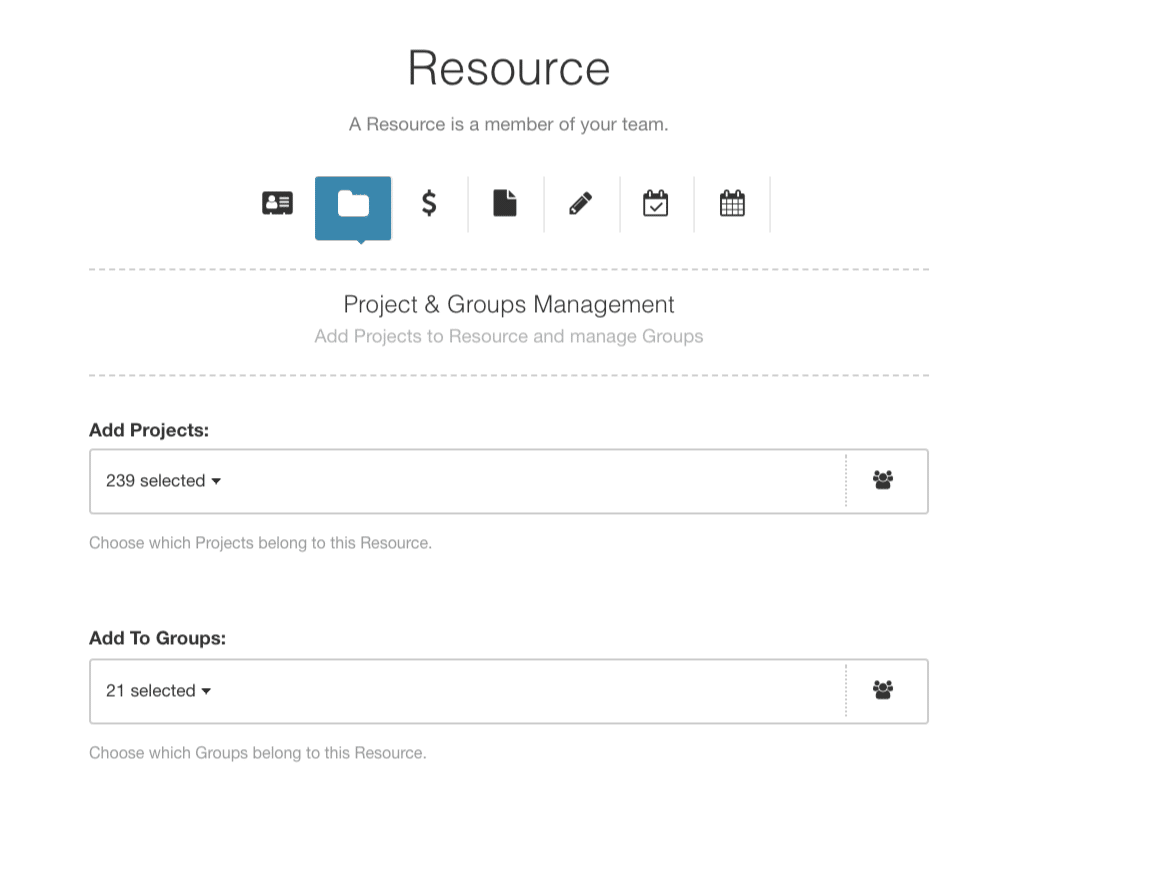
- Navigate to the 2nd Tab – Project and Groups Management
- Projects – Add or remove resource from projects
- Project Groups – Add or remove resource from project groups
- Update
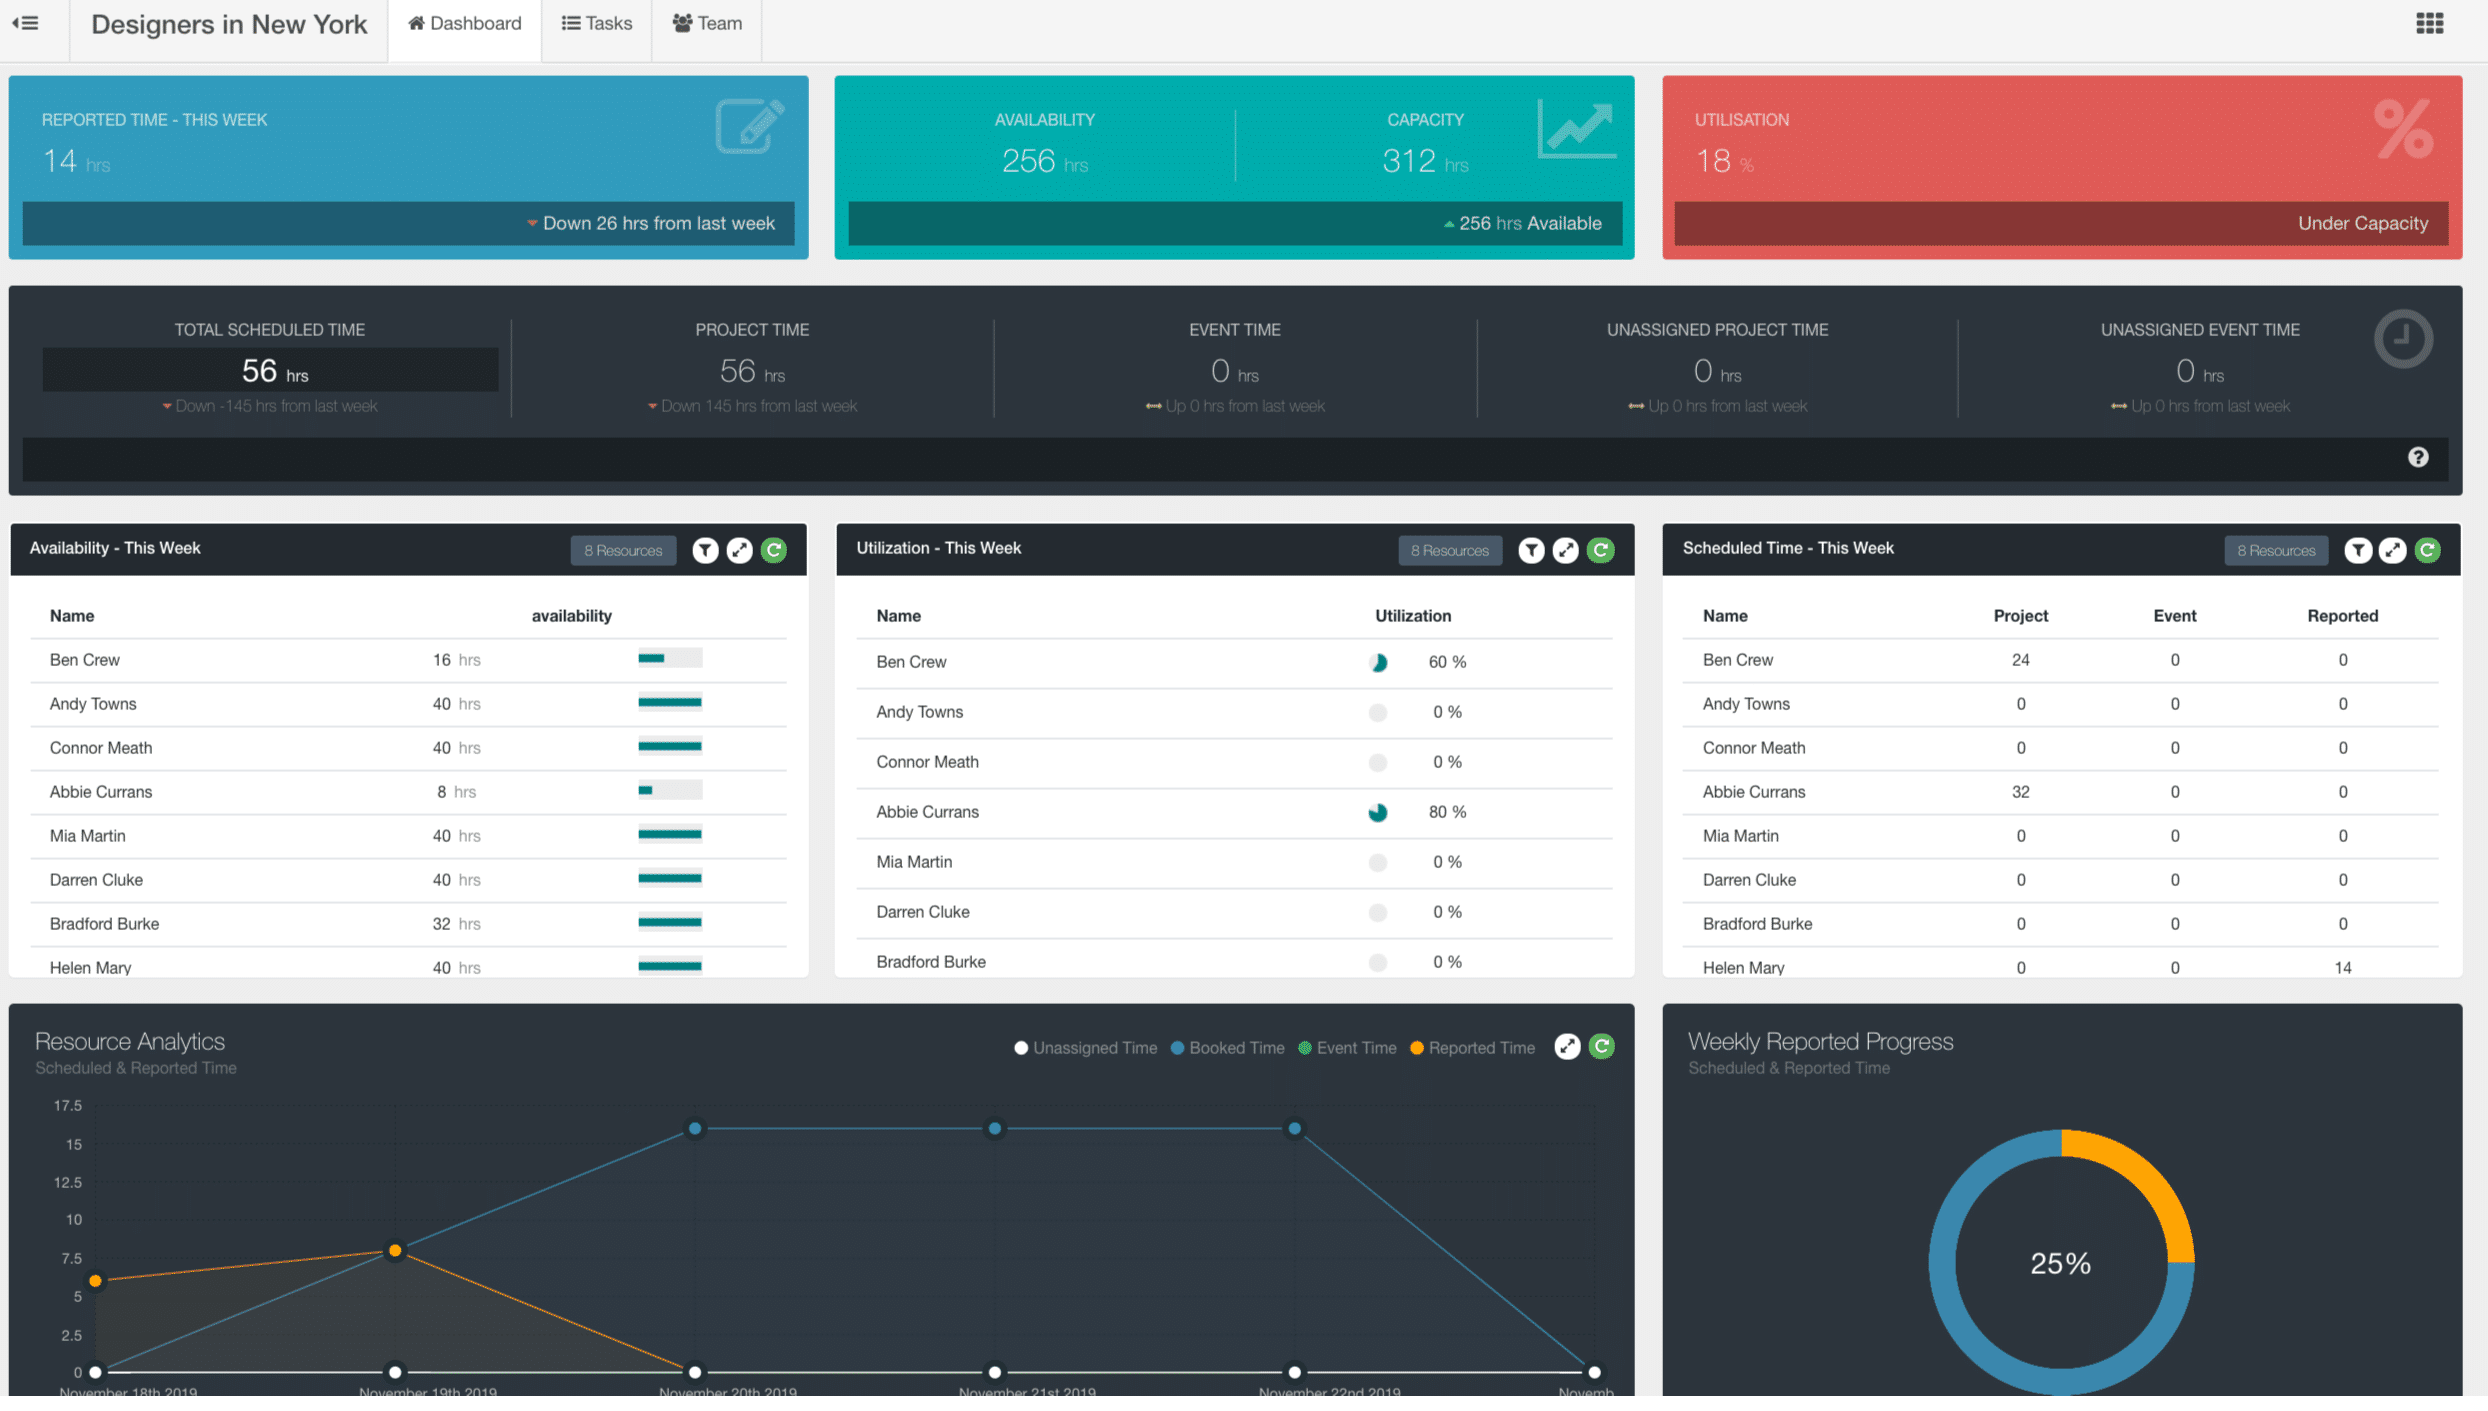
View Group Dashboard
- When within the Project / Resource Group Scheduler
- Click on 3 vertical dots at the top left hand side
- Select Dashboard
Sort Groups within the sidebar:
- Group
- Sort
- Choose Ascending / Descending / Manual Drag & Drop
Edit Project Role Settings
- Settings
- System Settings
- Roles
- Edit Resource Rights
- Add or Remove Resource Groups (Choose who can edit – Account Owner / Admin Manager / Ac Handler 1 / Ac Handler 2 / Team / Contractor)
Edit Resource Role Settings
- Settings
- System Settings
- Roles
- Edit Project & Events Rights
- Add or Remove Project Groups (Choose who can edit – Account Owner / Admin Manager / Ac Handler 1 / Ac Handler 2 / Team / Contractor)