Schedule Booking Menu
The schedule booking menu is packed full of smart options to assign a booking to a resource. The Booking Menu will be available for access when highlighting a group of cells on the scheduler to activate a booking. You can also click into a booking for access to the fully loaded menu.
Highlighting Cells on Scheduler – Schedule Booking Menu
Creating a new booking on the scheduler, what will you see?
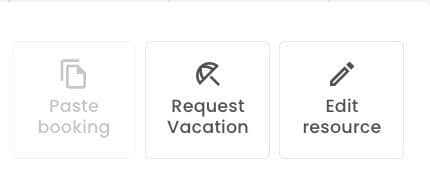
Top line
- Paste Booking (not selectable unless you have a booking to paste)
- Request Vacation
- Edit Resource
Dates
Highlighting cells on the scheduler will automatically populate the dates on the booking. You can adjust the Start Dates and End Date of the booking directly within the booking menu. Alternatively you can opt to use the drag and drop functionality of the scheduler.

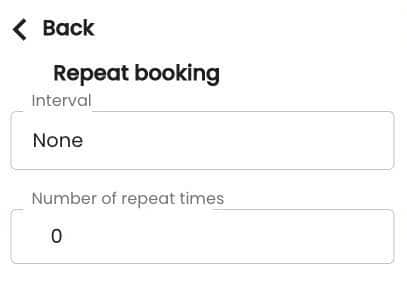
Repeat
Click the repeat icon adjacent to the date fields. This will open a sub menu with the “Repeat Booking” options.
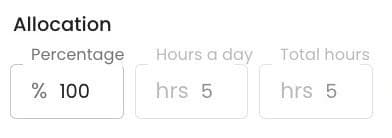
Allocation
Percentage | Hours per Day | Total Hours
There are three options you have when it comes to allocating time to a resource.
- Percentage – Allocate a percentage of the Resources capacity.
- Hours per day – allocate how many hours / day of the Resources capacity should you assign.
- Total Hours – allocate the total amount of hours for duration of booking.
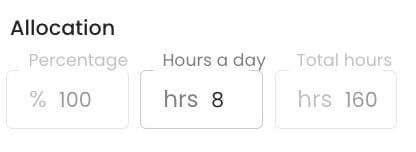
You can set your default option via Settings -> Custom Settings -> Customization -> Default Allocation Type -> Percentage | Hours per Day | Total Hours.
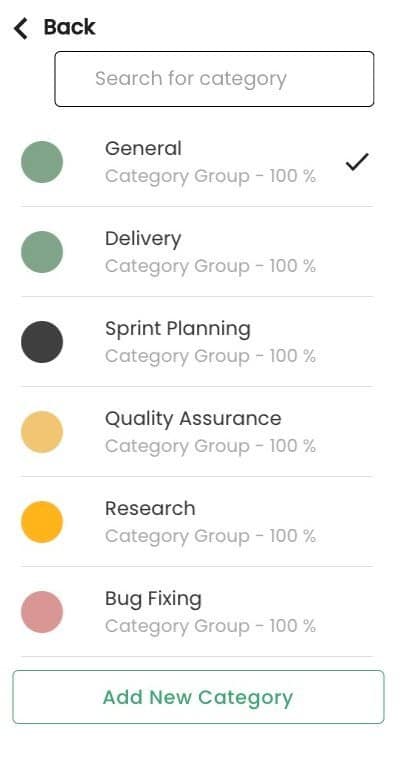
Category Group
Choose which booking category you wish to apply to the booking. Clicking on the category group will activate a side pop out and list of available options to choose from. Should you have the premium extension booking category groups installed, you will have access to set different groups to projects. Of course, you will always have the default category group should you not have the premium extension installed. You can also add a new booking category there and then too. To set up your booking categories, navigate to the following: Settings -> Account Settings -> Booking Categories. For more help on Booking Categories, you can take a look right here: Everything Booking Categories

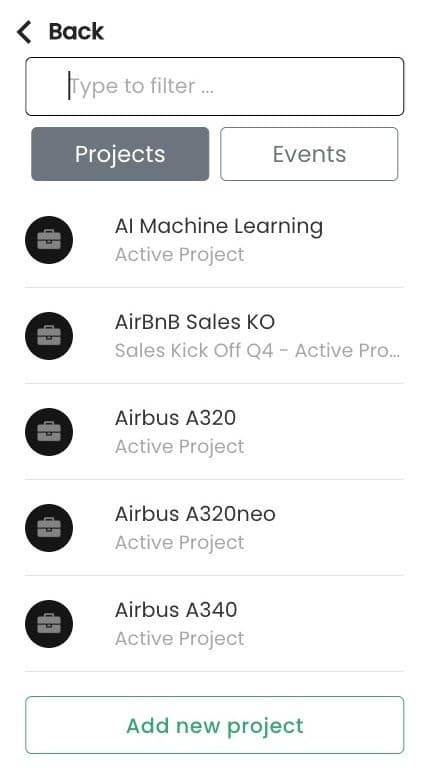
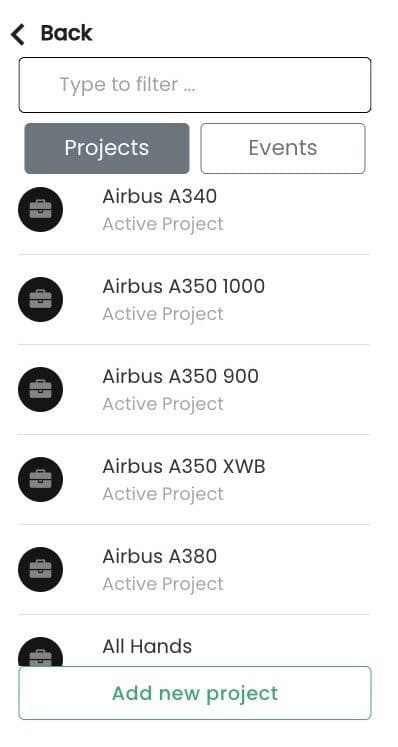
Choose Project
Here you can select a project to apply the booking to. Clicking the choose project option, will activate a side pop out and list the available projects you can choose from. There is a search filter available should you decided to type and search for the project of choice. If it’s an event you are looking to schedule, click the events button to access the list of saved events you have. Scroll to the bottom of the menu. You can also add a new project there and then too.
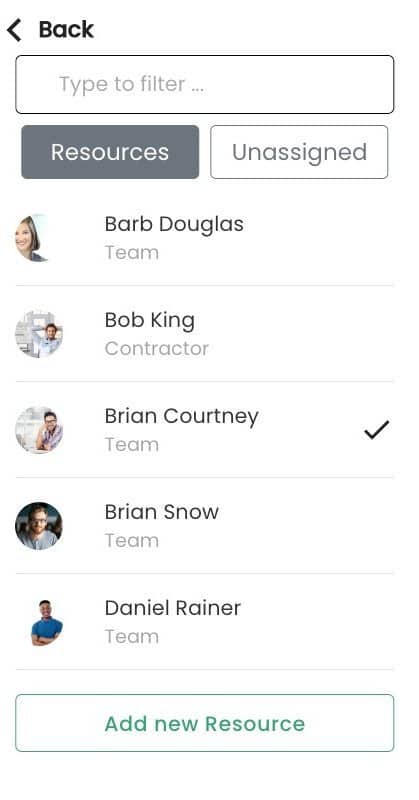
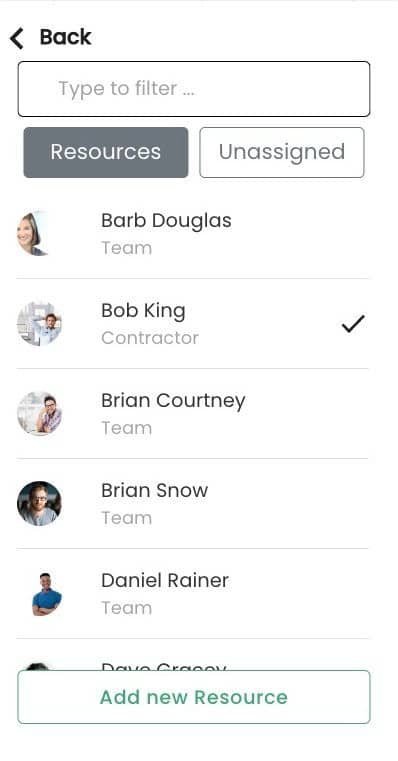
Selected Resource
Having highlighted cells upon a resource, the name of the resource will appear. You can opt to change that by clicking on the option. Again, a side pop out will appear and scroll or type to search for a resource. If you have unassigned work installed, click the button to access the list of categories you have access to. Note if you scroll to the bottom of the menu, you can add a new resource there and then. Bearing in mind you need the role right to have access to this option.
Schedule or Request
Two options are available for you. Firstly, you can opt to schedule. The booking will then be scheduled to the resource and project. Alternatively, if you have the Request & Approval workflow installed, you can opt to place a request to schedule the resource booking.

Existing Booking – Schedule Booking Menu
When there is a booking already existing, your menu will change ever so slightly. The menu will be pre-filled with the details of the existing booking. You can opt to change some of the booking elements as you need to.
Schedule Booking Menu
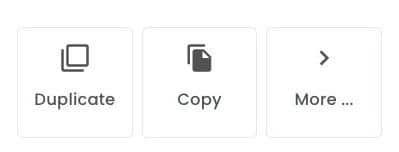
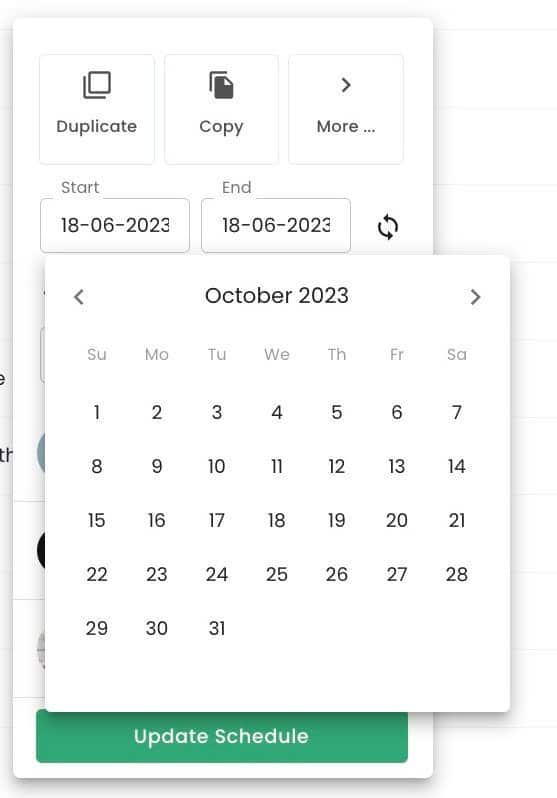
Top Line
Three quick access buttons to help you with quick scheduling.
- Duplicate – will duplicate a copy of the existing booking. The booking will duplicate over the exact same dates, project, allocation and resource etc.
- Copy – the copy options allows you to paste the booking elsewhere on the schedule.
- More – provides you with secondary menu of options to choose from. See below for more details.
Dates
Opt to alter the dates of the booking or update the repeat booking option. The date of the booking created will pre populate. You can either drag and drop the booking to change the date. Or, you can adjust from the booking menu. Simply click on the Start and end field to activate the drop down calendar.
Repeat
Click to activate repeat options available. Set the booking to repeat on a set interval and number of times. For example, every week on a Tuesday we will have a team meeting for 1 hour. To repeat 52 times for the year.
Allocation
Update the booking allocation choice and or amount. Switch between allocation by either the percentage, hours per day or total hours. Some people might work better in percentages whilst some projects may work best in total hours or hours per day. You can mix and match. If you wish to use more or less the same one, choose that for your default option which saves you some time. Whilst there is the default, you’re not tied down to use it. You can always switch, unless you company decides to do so.
- Percentage = based on the users capacity. How much percentage of their time do you want to allocate to them?
- Hours per day = how many hours of the resources day do you want to allocate?
- Total hours = handy for giving the resource free riegn over the time they complete the set amount of hours assigned.
Category
Update the booking category assigned to the booking.
Project
Update the project the booking should be assigned to.
Resource
Opt to change the resource of the booking.
More
The more menu is packed full of options to choose from. The top 3 icons are:
Back | Delete | Cut
- Back – brings you back to the previous menu
- Delete – will delete the booking
- Cut – will allow you to take the booking and paste it elsewhere on the schedule.
Next is a list of actionable items as follows:
- Edit Title – Change the name of the booking.
- Bulk Move – activates the bulk move options.
- Notes – will open the notes section. Here you can create and updates notes to the booking.
- Tasks – will open the Tasks menu. Create and mark off tasks completed.
- Assign to All in Group – This will assign the booking to each resource within the current group you are present.
- Split – Choose a date to split the booking in two.
- Edit Booking | Project | Resource – opens the respective modal where you can make changes.
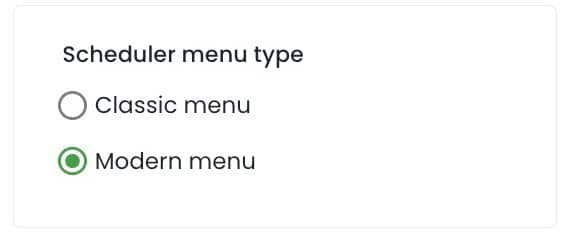
Classic Menu
There is an option for customers to switch back to the old classic menu. This is a more text based menu but still has the same features and functions of the scheduler booking menu. To access the classic menu, navigate to the scheduler tab. Activate the Scheduler Customization options by clicking the gear cog at the top right of the page. A pop out will appear. Scroll to the menu options where you can click “Classic Menu”. You can always switch back to the new menu using the same steps. If you don’t see this option, there’s a reason. We have kept the classic menu for all existing customers. Any new customers will see the new more modern menu only.