In this article we will take you through step by step instructions of setting up OneLogin SSO with Hub Planner.
Add Hub Planner to OneLogin SSO
- Log into OneLogin
- Applications
- Applications
- Add App
- Search for Hub Planner
- Connectors: Make sure SAML2.0 is ticked
Hub Planner will be automatically added to the default role. All resources with the default role will have access to the apps in the Company section of OneLogin.
Configure Hub Planner in OneLogin to activate SAML SSO
- Login to OneLogin
- Apps
- Company Apps
- Click Hub Planner
- Select ‘Configuration’
- Click SAML2.0
- Click ‘Save’
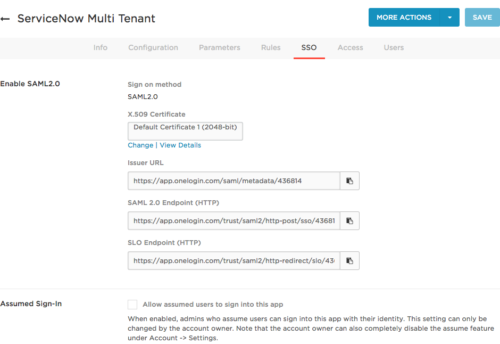
Next, navigate to the SSO tab.
You will need to copy the below and paste into Hub Planner SSO (instructions below).
- X.509 Certificate -> To copy the X.509 certificate, click View Details. Then, click the Copy to Clipboard icon for the X.509 Certificate.
- Issuer URL
- SAML 2.0 Endpoint (HTTP)
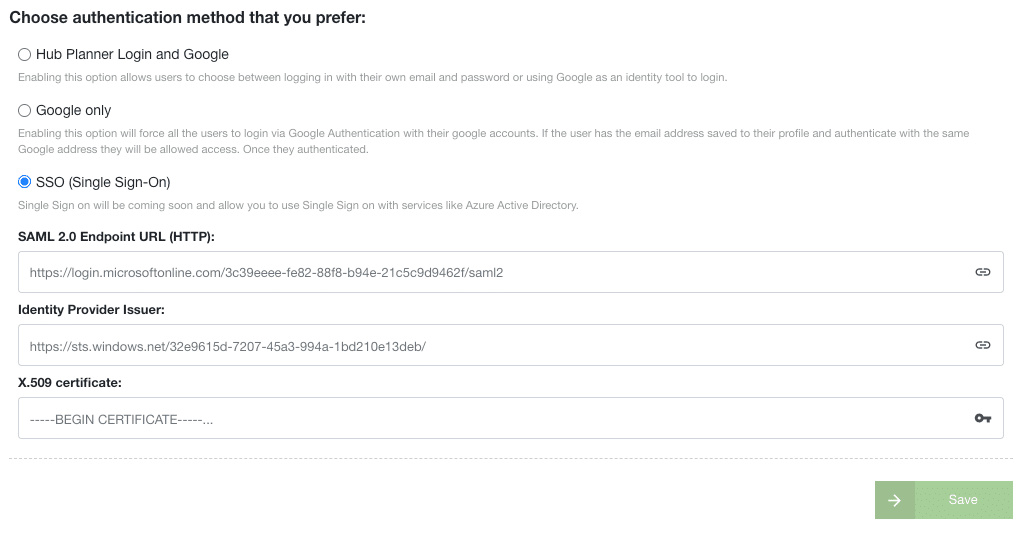
Configure Hub Planner
Pasting details from OneLogin SSO tab (instructions above).
- Settings
- System Settings
- Authentication
- SSO
- Paste SAML 2.0 Endpoint URL
- Paste the Identity Provider Issuer
- Upload or paste X.509 certificate
- Click ‘Save’ within Hub Planner – now it is possible to log in only with SSO (Account Owner will be able to log in with SSO,
password & Google)
What happens now that I’ve activated SSO?
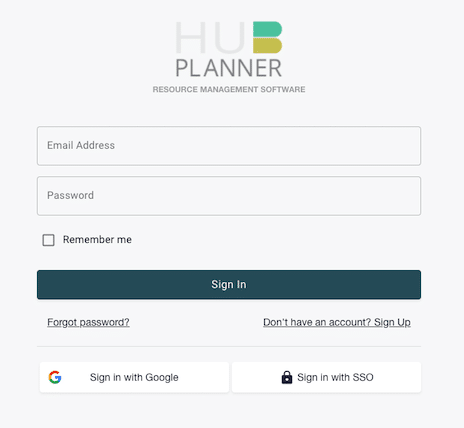
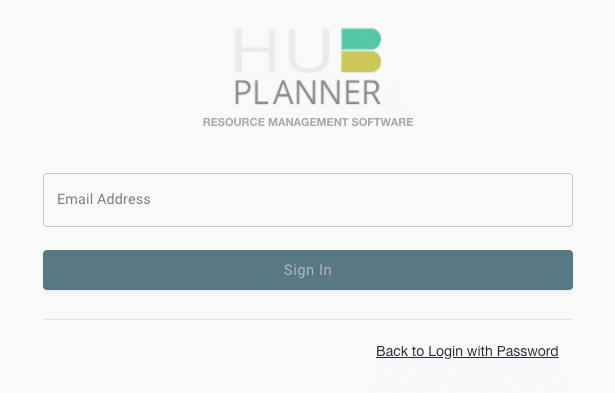
Login without OneLogin
- Enter email address
- A pop up will appear for you to choose your OneLogin account
Save domain for faster access
Save your Hub Planner URL as a bookmark. Once you do, this will then take you directly through to your homepage. Meaning you don’t have to enter in your email address.