An Early Christmas Present for Resource Management
With the festive holidays only a few short days away, you may be starting to wind down the resource management efforts, grabbing some last minute Christmas presents. Passing the Secret Santa office gifts and hopefully a Christmas celebration or two. But here in Hub Planner, we’re busy developing new and exciting features to enhance your resource mangement experience. We couldn’t wait to deliver an early Christmas present. Just a small one for now, but we will be releasing some very exciting new updates next year which you can read about soon.
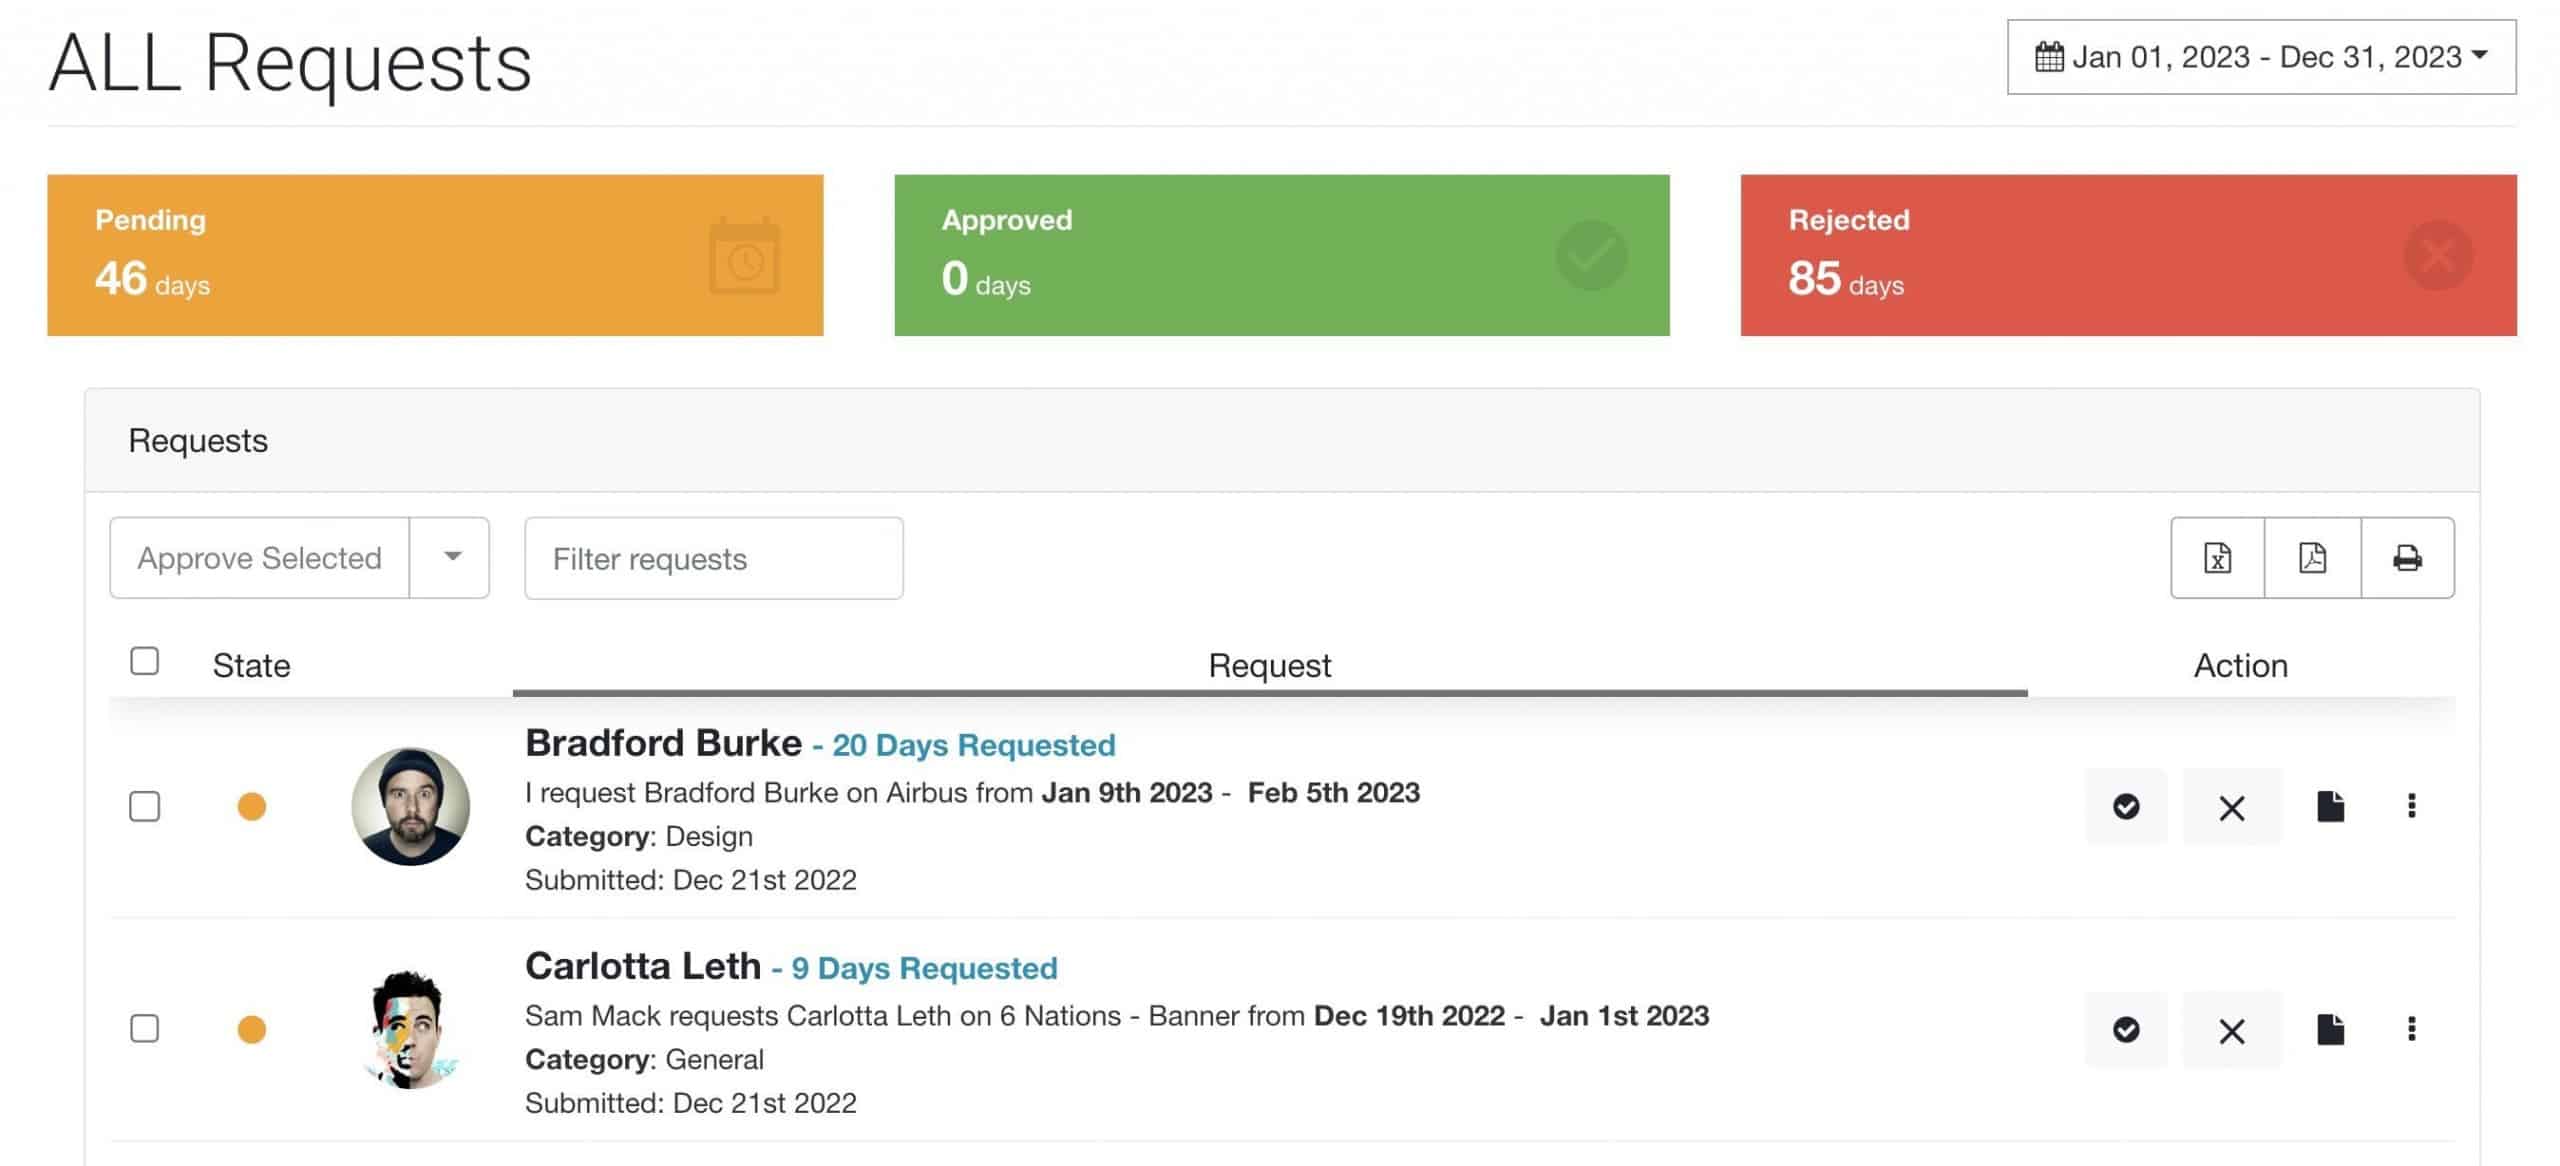
We have put in place some new enhancements to the Request & Approval Workflow to help with managing the resource allocation and project scheduling. The request table will now detail all elements of the request which include the following:
- Resource Requested

- Project Name
- Who requested the booking
- Booking Category
- Date Range of the booking
- Allocation

New enhancements to the Request & Approval Workflow
Are you familiar with our Resource Requesting and Approval workflow? It’s a great way of putting a more formal workflow to the scheduling process. Giving users some, but not all, free rein to schedule people on projects. The request and approval workflow feature allows teams to manage resource requests. For example, I really want Abbie to work on this project, she get’s on with the client super well. Another could be for the resources experience, seniority, location etc. Whatever the reasons may be, the workflow helps with the processing of the project scheduling and resource allocation.
Add Booking Categories to the Workflow
Next, are you familiar with Booking Categories? Booking categories are a super helpful way to tag what a resource is assigned to do on a project booking or task. Two main reasons for that. One, for visual transparency. You can color the booking categories so that when assigned to a booking, the color of the booking will change. Also the booking will detail the booking category text. Two, for analytics. Using this enhanced tagging data will help us pin point any trends that we see from the excellent reporting engine Hub Planner comes with. For example, I can see from the pipeline that we have a lot more Front End Development work required. Another example being, you can see that we seem to spend a lot more time and money on the Design UI for Client Projects? Is there a knowledge gap there, do we need to hire more contractors?

Combining the workflow and the booking categories feature provide for an enhanced resource mangement process. Here we can detail exactly where the time is required. Not just by the project, or resource but also by Booking Category. We can now visually see within the scheduler and within reports the the requested booking categories.
The request table below shows all the required details to make an informed decision. What’s more, all requests are visual within the scheduler.
Also incorporated into the workflow is required allocation amount. Now, in Hub Planner, we offer the user three variables. They can choose from either a percentage of the users time, a quantity of hours per day, or a total amount of hours over the booking requested. Some people, some projects may work better in percentages. Hours a day might work better for those unaware of the capacity of the resource. Hub Planner allows the customer to use all 3 variables when it comes to resource allocation. Everyone and every project is different.
The Resource Request and Approval Process
The Request
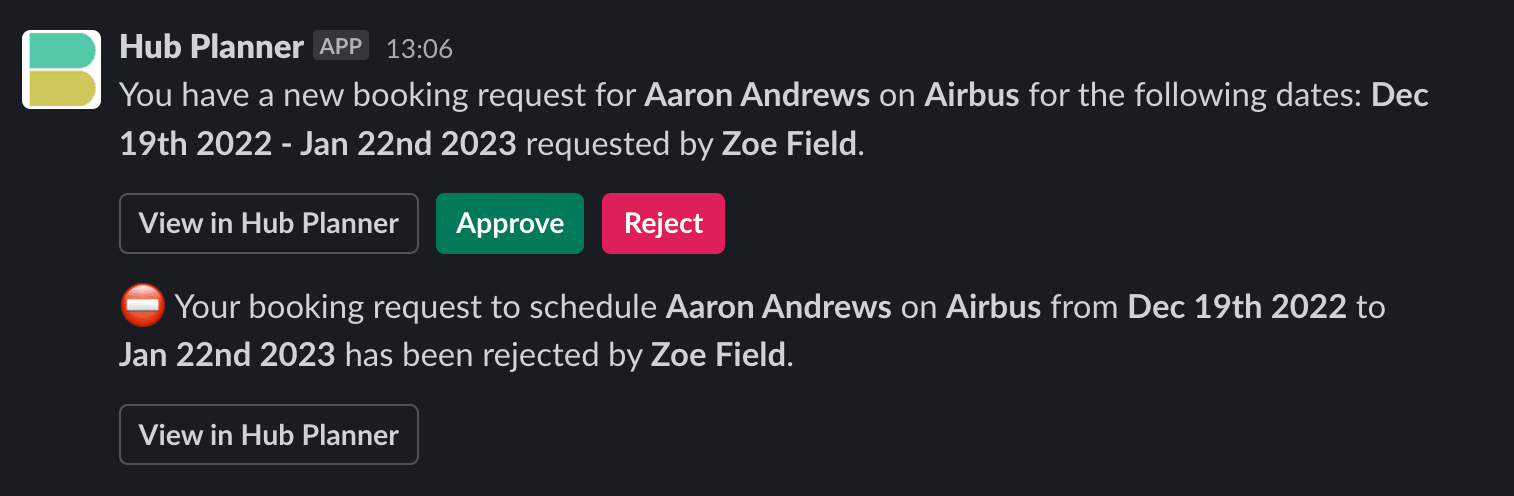
The resource request is created from the Request Dashboard, or directly from the Hub Planner Scheduler. Once the request is created, the appointed approves are notified. The approval request is received and visual within the Schedule, the Dashboard, via Email and Slack Notifications as well as the Request Table.
The Dashboard
You can view the Approval Requests within the charts and widgets of the dashboard as well as the listings within the Request Table. The request table will showcase all of the request details required.
- Resource Name – Resource being Requested
- Project Name – Name of the project requested.
- Booking Dates – When the request is for.
- Allocation – how much time the request is for
- Booking Category – the booking category assigned to the request
- Requestor Name – Who requested the resource.
- Request Date – Date in which the request was made.
The Schedule
The Resource Planner navigates to the Scheduler to evaluate the impact of the request booking on the schedule.
Manage
The Resource Planner will assess the capacity and utilization rates of resources. They will identify potential options to reallocate bookings to alternative dates or resources.
Decision
A decision is made by the Resource Planner on whether to approve or reject the booking request. They can action the decision direct from the scheduler, the email notification, slack notification or within the request table.
Completing the Request
When completing the request, you have a choice of two options. One, you can do so via the Request form within the Request Dashboard from the header toolbar. Alternatively, you can request to schedule a booking directly from the scheduler too.
Request Form
If completing the request via the request form, you will enter in the following data fields.
- Select which Resources you would like to request.
- Choose a Project or Event that you would like to request the Resource to be scheduled on.
- Select your Start and End dates of the project booking.
- Apply Repeat Booking options if required.
- The Request Approver – You can add another approver here too
- Add a request note if required.
- Enter the Requested Booking Allocation per resource.
- Choose Booking Category to be assigned to the requested booking.
Request from Scheduler
When requesting directly via the scheduler
- Highlight the booking on the scheduler
- Click Request
- Request Project
- Select Project
- Optional: Switch Booking Category if required to change from the default category.
- Optional: Alter allocation if needed.
- Click Request
Notifications
All approvers will be notified as per settings. You can approve directly from the slack notification or email message.
Manage the Request
There are a few ways in which you can manage the request. Either directly from the scheduler, from the request table within the request dashboard. Or as mentioned directly within the notification email or slack message.
- Approve
- Reject
- Approve with a note
- Reject with a note
- Delete Request
Read more about the Request & Approval workflow?
Want to read more about the request & approval workflow? What about Booking Categories and how they work?
Free Trial of the Request & Approval Workflow
Why not see if it will help your resource management process. Existing customers are welcome to trial out the Request & Approval workflow for free. New customers, why not try out Hub Planner with an all inclusive 30 Day Free Trial.