My Project and Resource Tags
Project and Resource tags are a popular feature for Hub Planner users. Now, we release a brand new addition that allows each user to set their own tags within their Hub Planner profile.
What are Tags and Why do I need them?
Project and Resource tags are words that help identify you. These could be your skill sets, your area of expertise, if you work full or part time for example. They might include where you are located, what languages you speak etc. It will help the resource planner to identify and match resources with the right skillset for the right project. A little similar to our Custom Fields feature.
Assign the role
As with most of Hub Planner’s features, there are settings permissions to allow or restrict users the ability to access and enter information. The same goes for adding ‘My Tags’.
Set permission for users to add or edit their own tags. You can also set up access for the various resource levels to add new tags.

How to Add, Edit or Delete My Project and Resource Tags?
You can set up your project and resource tags by navigating to Settings. Follow these below steps.
- Settings
- My Settings
- My Tags
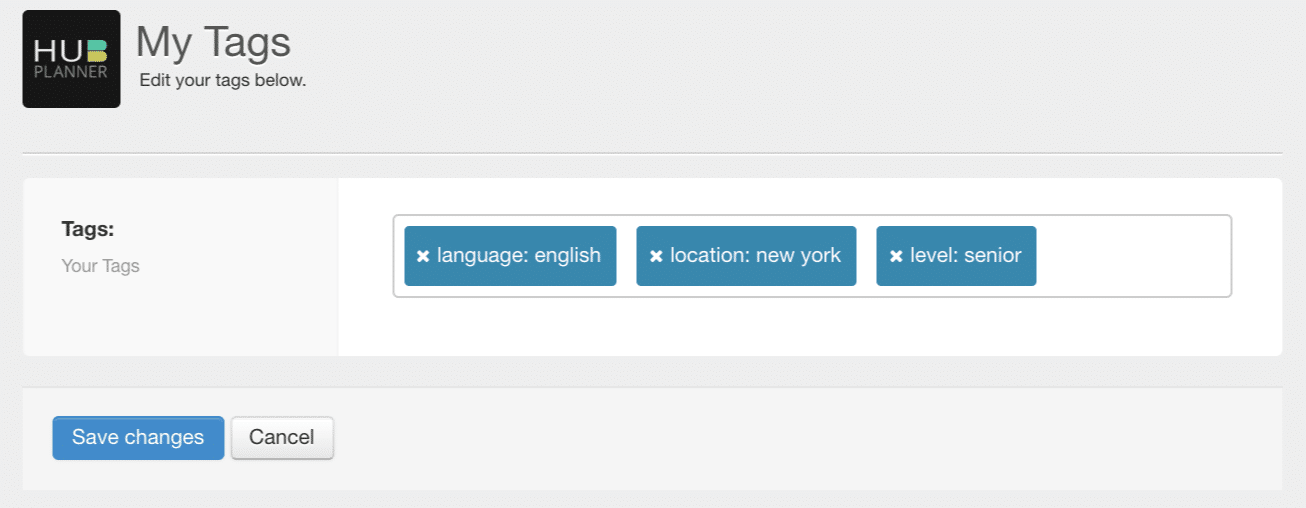
You can select existing tags from the drop down list. Existing tags are in alphabetical order. Scroll and select the tag you want to enter. You can also start to type the tag name and the list will begin filtering through the tags. Simply click the one you want. If you want to add a new tag that is not on the existing list. All you need to do is type the name and hit enter. The new tag will be added to the existing list now. You can add as many tags as you wish. You can also easily remove a tag by clicking the x by the tag name. Don’t forget to select ‘save changes’.
How to Manage Tags within Project or Resource Modal
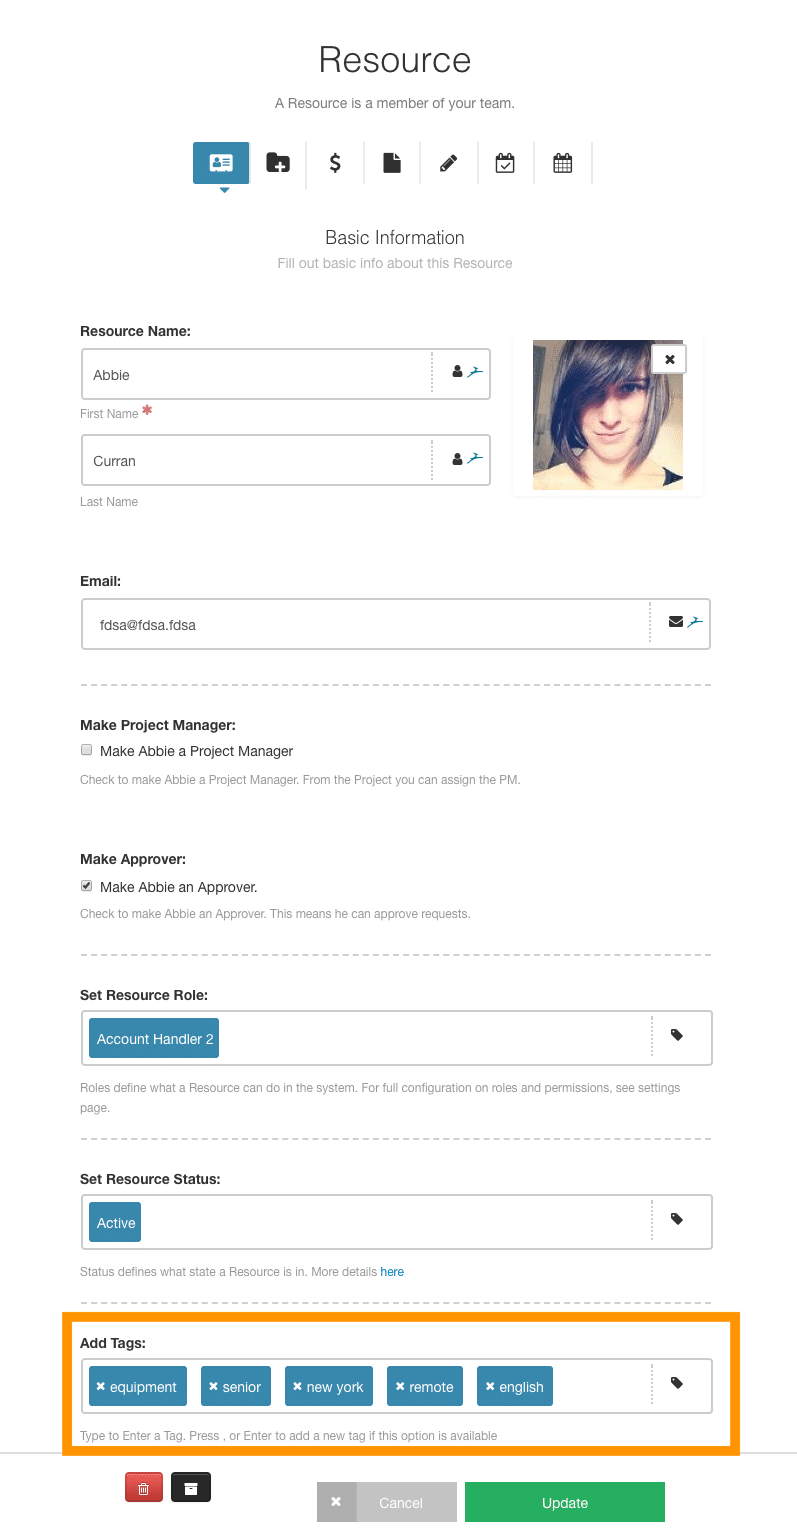
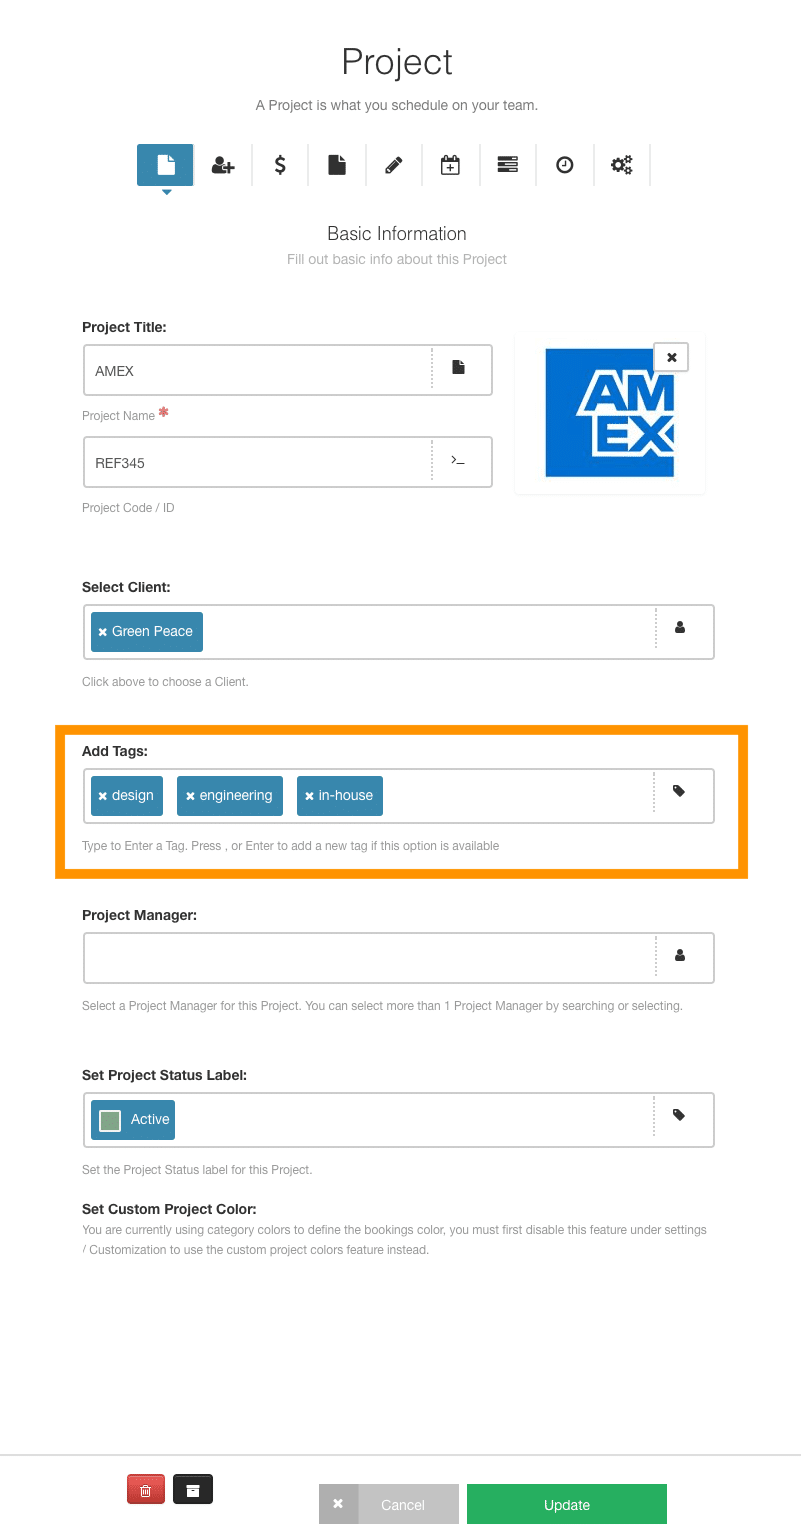
Tags are also visible within each Project and Resource modal. Here, You can also View, Add, Edit or Delete project and resource tags from the Project or Resource Modal. Located within the first tab of the modal, scroll towards the bottom where you will see Tags. Simply click, begin to type and enter to add a tag. To delete, all you need to do is ‘X’ the tag in question.
How to use Project and Resource Tags in Team Scheduling?
Within the resource scheduler, you can use the filter bar or the drop down filter column to search for resources based on the tags you enter.
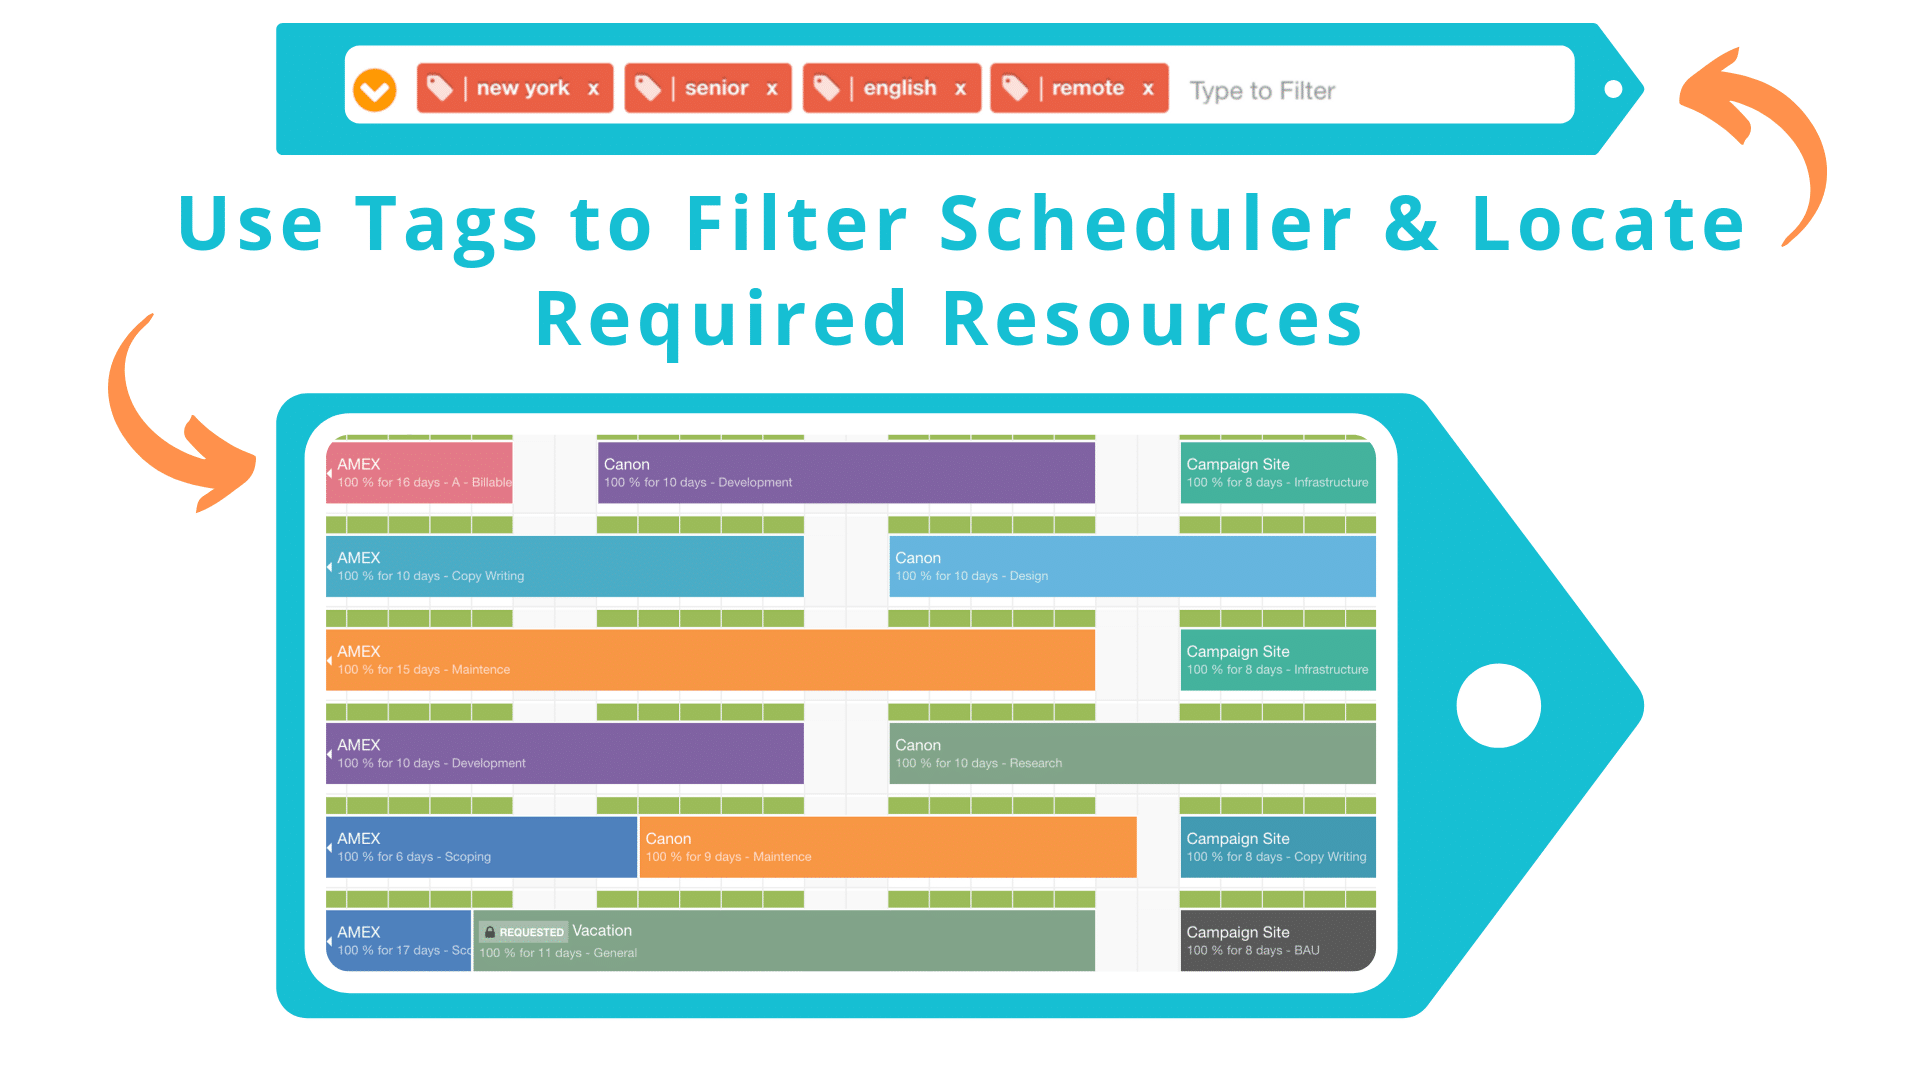
Within the search bar, begin to type the tags you require. The option to select the tags will appear. Simply select, and the tag will be added to the search bar. Feel free to add as many tags as you wish. Within the scheduler you will notice the amount of resources on display will begin to decrease the more tags you insert. Naturally resources with each tag will remain in the scheduler. Resources without the required tags will filter out of the scheduler view. For example, I’m searching for resources with the the following tags:
- New York
- English speaking
- Remote Working
- Senior level
You can see the search bar has stored my required tags. An alternative way of populating the search bar is by utilizing the drop down list of tag options. Simply click on the orange arrow and the dropdown menu will appear. From there, navigate to the tags and select as you require by clicking the checkboxes. The search bar will populate with the tags you select.
Add a Column of Project and Resource Tags in the Scheduler
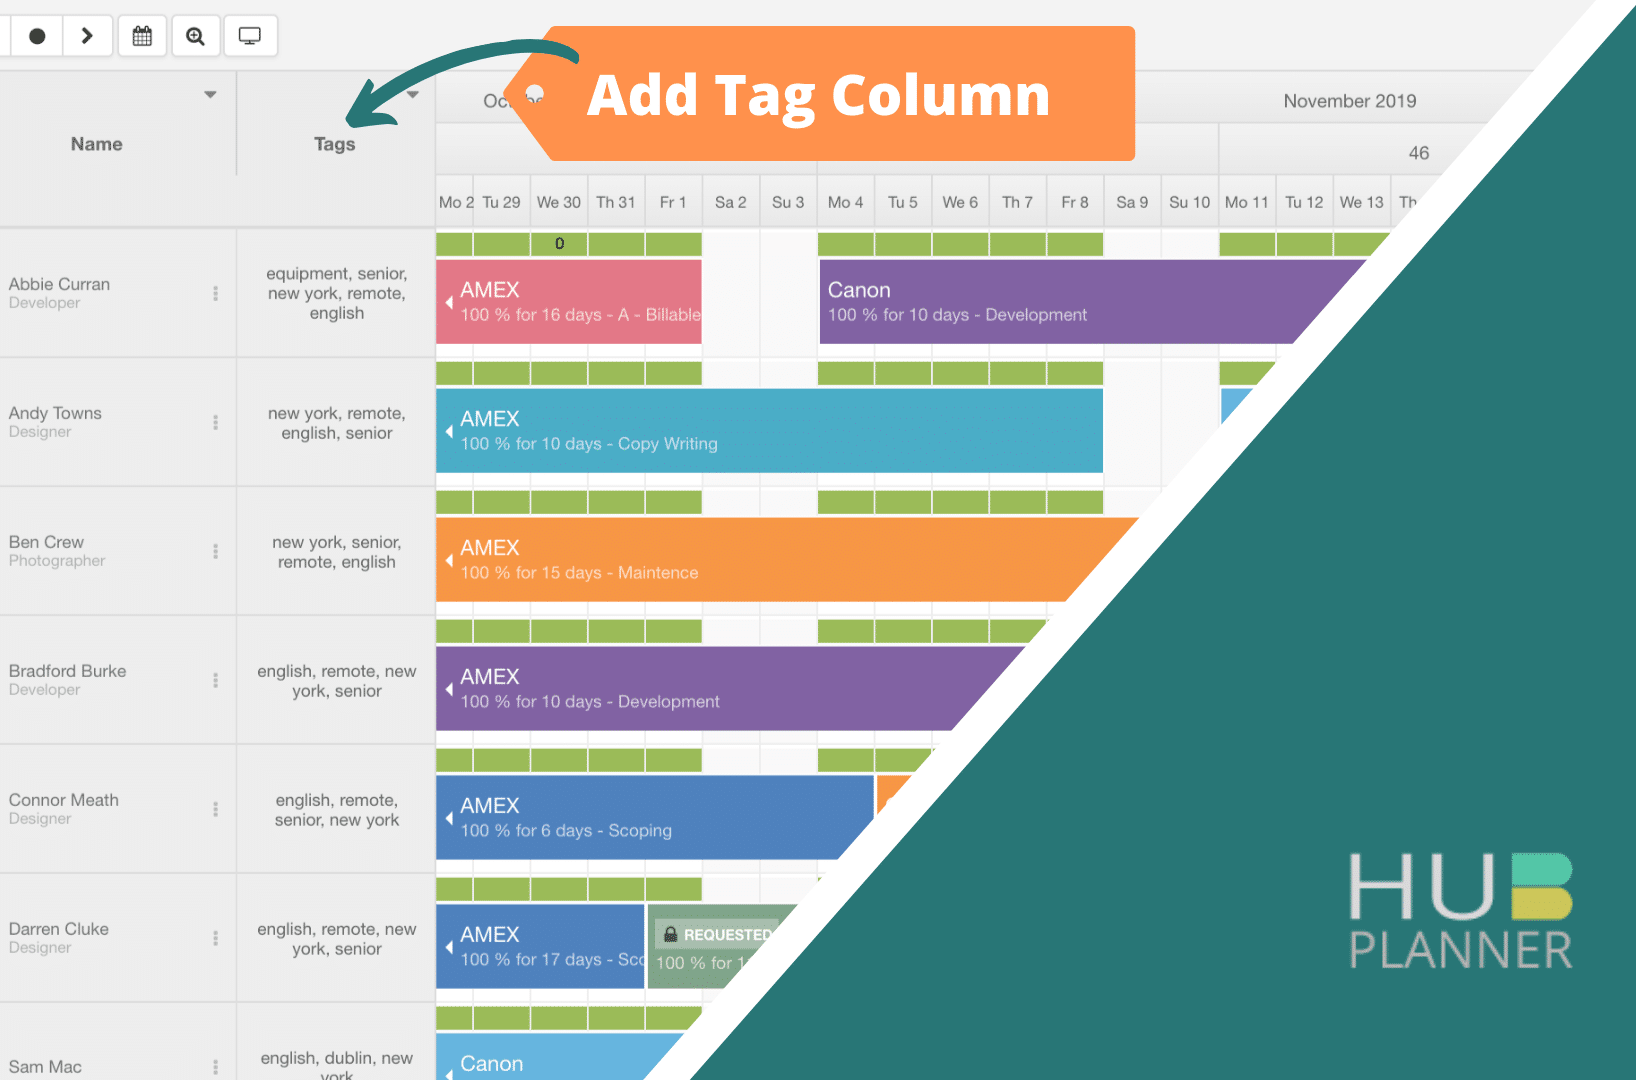
You can also add a tag column in alongside the resource name. By adding this column, you can view all resource tags within the column cel adjacent to the corresponding resource. So at a glance, you are able to quickly view resource tags prior to scheduling or filtering through tags. This helps with efficient project planning and resource management.
- To add a resources tag column. Simply follow these steps:
- Within the Scheduler, click on the drop down arrow beside the column header ‘Name’.
- A pop up will appear with options. Now, click ‘Add New Column’.
- Click on the drop down arrow beside the column header ‘New Column’.
- Another pop up will appear. Now, select “resource tags’.
- he scheduler will refresh with the resource tag column now visible.
Add Project and Resource Tags in Settings
You can set both Project and Resource tags in bulk by entering within the Account Settings of your Hub Planner. By doing so, you prevent duplication of resource tags happening. Should you enter in some project and resource tags by settings. This allows users to select from a drop down list which saves time as well as reducing any duplicates. Account owners can set the option for resources to add a custom tag other than the current listing. If unselected, resources must select from the existing drop down listing.
Following that, you can add or delete tags via the Project and Resource Modal.
To add Project Tags in Settings
Project Tags
- Navigate to Settings
- Scroll to Account Set Up
- Click Resource Tags
- Add Tags as required.
- Click ‘Save Changes’
Resource Tags
- Navigate to Settings
- Scroll to Account Set Up
- Click Resource Tags
- Add Tags as required.
- Click ‘Save Changes’
Setting Permission in Roles
To allow users to set their own tags, you need to assign permission within Settings. There are the five levels in which you can restrict or grant access to:
- Admin/Manager
- Account Handler 1
- Account Handler 2
- Team
- Contractor
By ticking the box on each level you are providing the user permission to create, edit, delete their own tags. If you have restricted access, they are still able to select the pre-defined tags that may have been pre set for them.
To define role permissions in Settings
Role Settings
- Navigate to Settings
- Scroll to System Settings
- Select Roles
- Scroll to Settings
- Tick as appropriate
Further Updates to Hub Planner
A further couple of new updates to Hub Planner which include Quick Switcher Search and Scheduling when in Grouped Rows mode.
Quick Switcher Search
You can now search for sub groups via the Quick Switcher within the Hub Planner Scheduler.
Scheduling when in Grouped Rows mode
There are three view modes within the Hub Planner scheduler. Grouped Rows, Single Rows (Project) and Single Rows (Project & Resource). Each mode alters what you see in the Scheduler. You can activate the various view modes by clicking on the TV icon at the top left of the scheduler. So what’s new? Users can now schedule themselves within the Grouped Rows view.

