How to create a Timesheet Manager?
We can set a role of a timesheet manager to oversee and create timesheets for projects and resources they have permission to. This can be everyone in the company or we can segregate which projects and resources the manager can access. Let’s show you how to set.
Role Rights Setting
First things first, let’s set the Resource Role. Whichever level of role you choose to assign. It’s important to have the Timesheets section set correctly.
- Settings
- System Settings
- Roles
- Timesheets
- Timesheets Manage & Approval Rights
- Tick the relevant role box
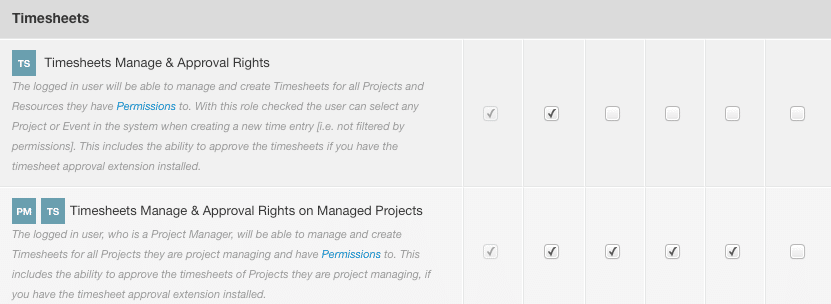
Timesheet Manager Role Right
The logged in user will be able to oversee and create Timesheets for all Projects and Resources they have Permissions to. With this role checked the user can select any Project or Event in the system when creating a new time entry [i.e. not filtered by permissions]. This includes the ability to approve the timesheets if you have the timesheet approval extension installed.
User Access Permission Settings – All Roles
Option 1 – timesheets for all Resources and Projects. We will set the user access permission at the Role Level.
- Settings
- System Settings
- Permissions
- Roles
- Admin – Click the Settings Cog to open the Permissions Modal
- Projects – Select all relevant Project Groups
- Events – Select all relevant Events
- Resources – Select all relevant Resource Groups
- Unassigned Work – Select all relevant Unassigned Work Categories
- Click Save
- Repeat the same steps for each Role Acc Handler 1, 2, Team & Contractor
- Save
- One complete, all columns will say ‘ALL’.

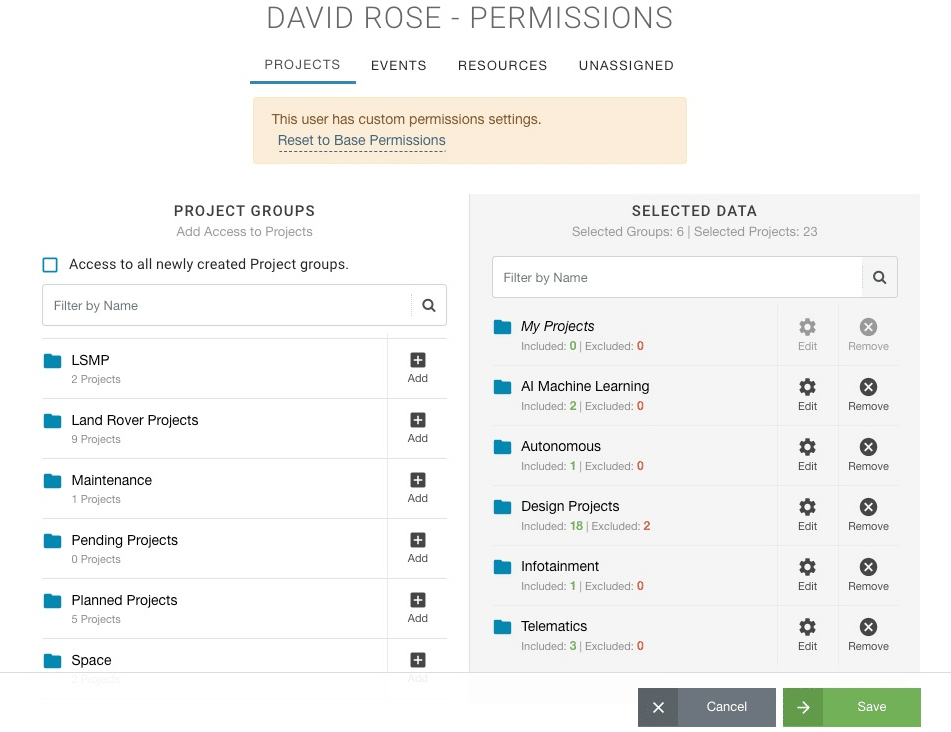
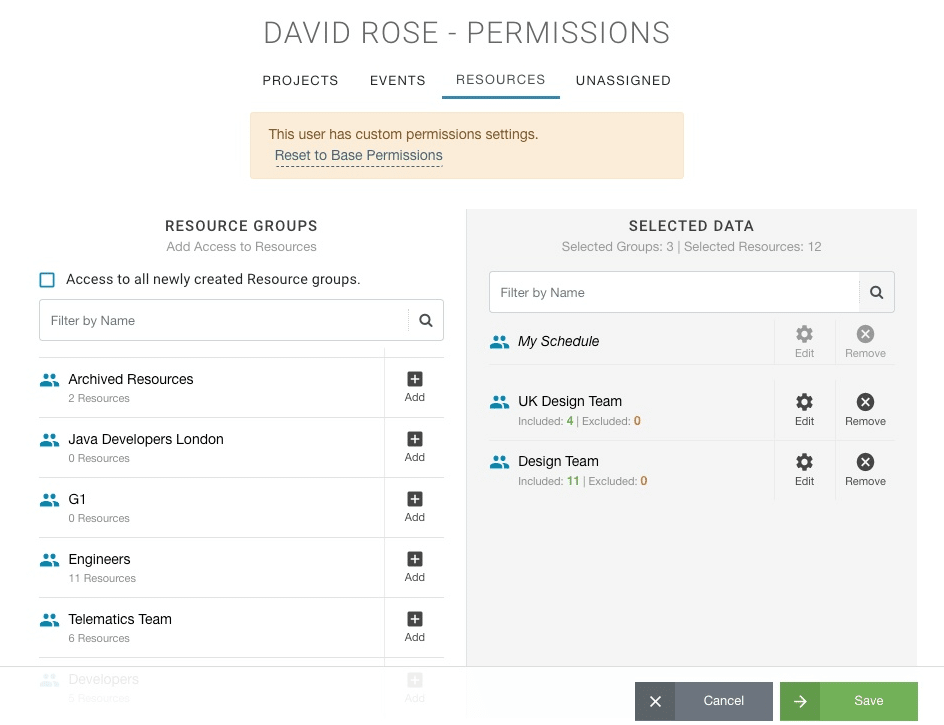
User Access Permission Settings – Selected Resources
Option 2 – timesheets for all selected Resources and Projects. We will set the user access permission at the resources tab. All we need to do is provide access of the resource groups, projects, events etc. to the Timesheet Manager.
- Settings
- System Settings
- Permissions
- Resources
- Locate Name of Timesheet Manager and click the settings cog
- Projects – Select required Project Groups
- Events – Select required Events
- Resources – Select required Resource Groups
- Unassigned Work – Select required Unassigned Work Categories
- Click Save
- Now Rob Lopez is able to manage and create timesheets for the selected groups.
Does it matter what Role the Timesheet Manager is?
Not necessarily. As long as the role you set, has the right to manage the timesheet. They can be a team user, contractor, admin, etc. It just depends on what other levels of role rights you want them to have.
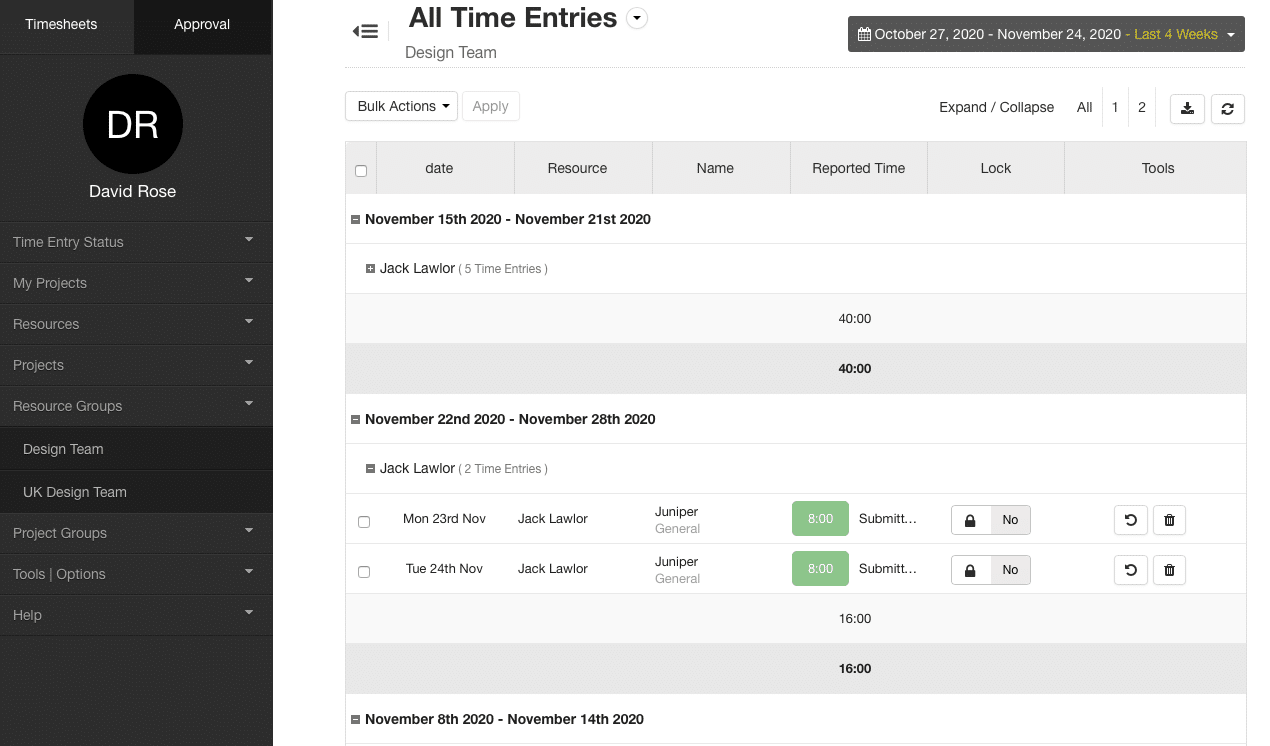
What will the Timesheet Manager’s Timesheet look like?
See user David Rose below, they have access to approve the Design Team and UK Design Team timesheets. The Approver tab becomes available for the user to click. Approver rights have been granted to the user. The user can opt to view by resource or by resource group. There are options to select pre formatted dates, or by time entry status.