Efficiently managing timesheets is crucial for businesses of all sizes. However, the process of approving timesheets can often be time-consuming and prone to errors. To overcome these challenges, Hub Planner has adopted the option to apply a two-step timesheet approval process. In this blog post, we will explore how you can streamline your workflow and maximize productivity by mastering the two-step timesheet approval process.
How does the two step timesheet approval process work?
A two-step timesheet approval process typically involves two levels of review and approval before a timesheet is considered finalized. Here’s an example of how it works in Hub Planner:
1. Employee submission:
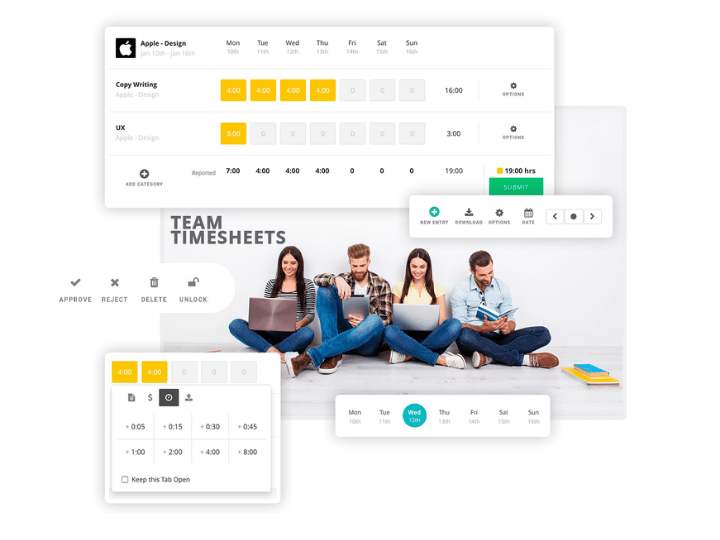
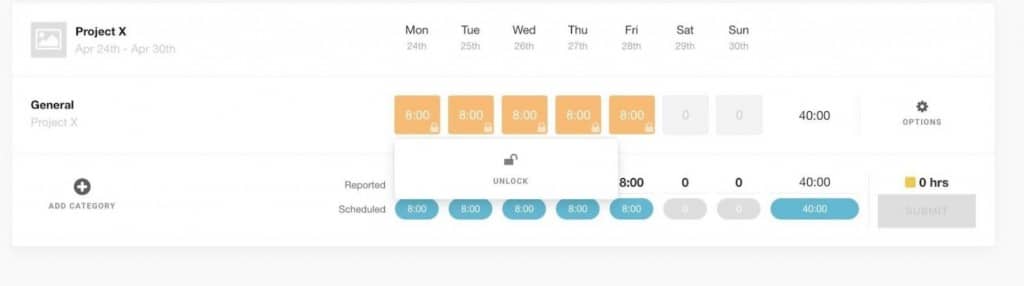
The resource reports their timesheet confirming the hours worked against the scheduled time. They can also mark the time entry as billable or non billable, and add any other relevant information by note. They then simply submit the timesheet for approval.
2. First-level approval lock:
The timesheet is first reviewed and approved by a gatekeeper, perhaps a supervisor or team leader. They ensure that the timesheet submitted is accurate, the hours worked align with the assigned tasks, and any necessary adjustments or corrections are made. If the timesheet is accurate and meets the required criteria, the supervisor locks the timesheet entry. And it moves onto the next and final step.
3. Second-level approval:
After the first-level approval, the timesheet moves to the second level, which is usually a higher-level resource manager or department head. This resource conducts a final review of the timesheet, ensuring compliance with company policies, project budgets, and any other relevant factors. Once the resource manager has reviewed the timesheet, they made a decision to approve or reject the timesheet entry.
Why add a two-step approval process?
A two-step approval process adds an additional layer of review and oversight, which can help catch errors, ensure accuracy, and maintain compliance with company policies. It also helps distribute the workload of approvals among different levels of management, reducing the burden on a single resource.
Implementing a second level timesheet approval process can be beneficial for teams that require a higher level of scrutiny or have specific compliance or financial requirements.
How to ensure the two step approval process works?
In order to reap the benefits of a two step approval process, we suggest the following:
Establish clear guidelines and deadlines.
Suggest to clearly communicate expectations, such as the deadline for entering hours. Making sure to use the correct project codes, booking categories and ensure the time entry bill ability is marked correctly. This minimizes confusion and ensures consistency across your company.
Empower managers with decision-making tools.
Provide approvers with access to Hub Planner tools such as the Dashboard Pro and Reports to help analyze timesheet data. With these, they can also identify patterns, track project progress, and identify potential bottlenecks or issues that require attention.
Enhancing communication and collaboration:
Open lines of communication between resources and approvers is vital for a smooth timesheet approval process. Encourage resources to promptly communicate any changes or issues related to their timesheets, such as project updates, overtime, or vacation time. This helps avoid delays and ensures accurate approval.
Continuous Evaluation and Process Improvement:
Regularly evaluate the effectiveness of your two-step timesheet approval process and identify areas for improvement. Is it working? Is it creating a bottleneck or a more efficient workflow? Seek feedback from the team to understand any pain points or challenges they encounter. Use this feedback to make necessary adjustments and optimize the process over time.
New timesheet approval setting for second approval.
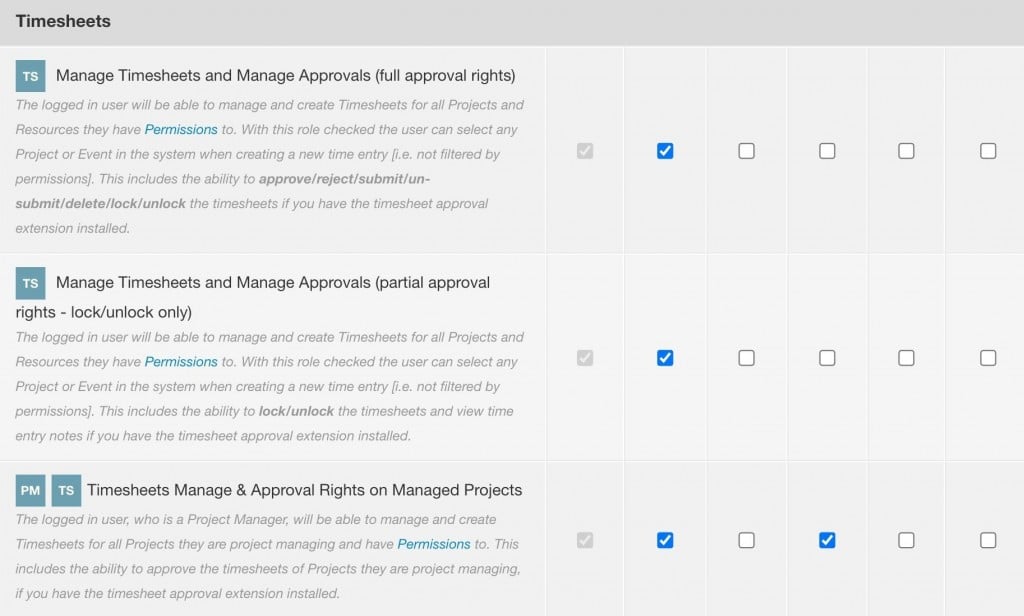
You can now activate the role right that allows you to include a two step approval process. An initial approval if you will. Using the lock feature, the resource will be able to partially approve time entries. A new role right setting has been added for timesheet approval. You can select the new role right (see below) and apply to the varying role types. For example, Admin, Account Handler 2 and team members. Note that the role right is subject to the resources permissions. The text of the new role right settings is as follows:
Manage Timesheets and Manage Approvals (partial approval rights – lock/unlock only) The logged in user will be able to manage and create Timesheets for all Projects and Resources they have Permissions to. With this role checked the user can select any Project or Event in the system when creating a new time entry [i.e. not filtered by permissions]. This includes the ability to lock/unlock the timesheets and view time entry notes if you have the timesheet approval extension installed.
How to activate second level timesheet approval in Hub Planner?
Firstly, let’s ensure we have the below requirements checked.
- Timesheet extension installed.
- Timesheet Approval extension installed.
- Approval process activated.
- Auto lock of time entry status turned off/unchecked.
- Partial timesheet approval role right checked.
- Permissions are set accordingly (optional)
Once the above requirements are set, you can now enable the dual, two-step timesheet approval process. We have a full knowledge base, ready to take you through the process, step by step.
First level approval
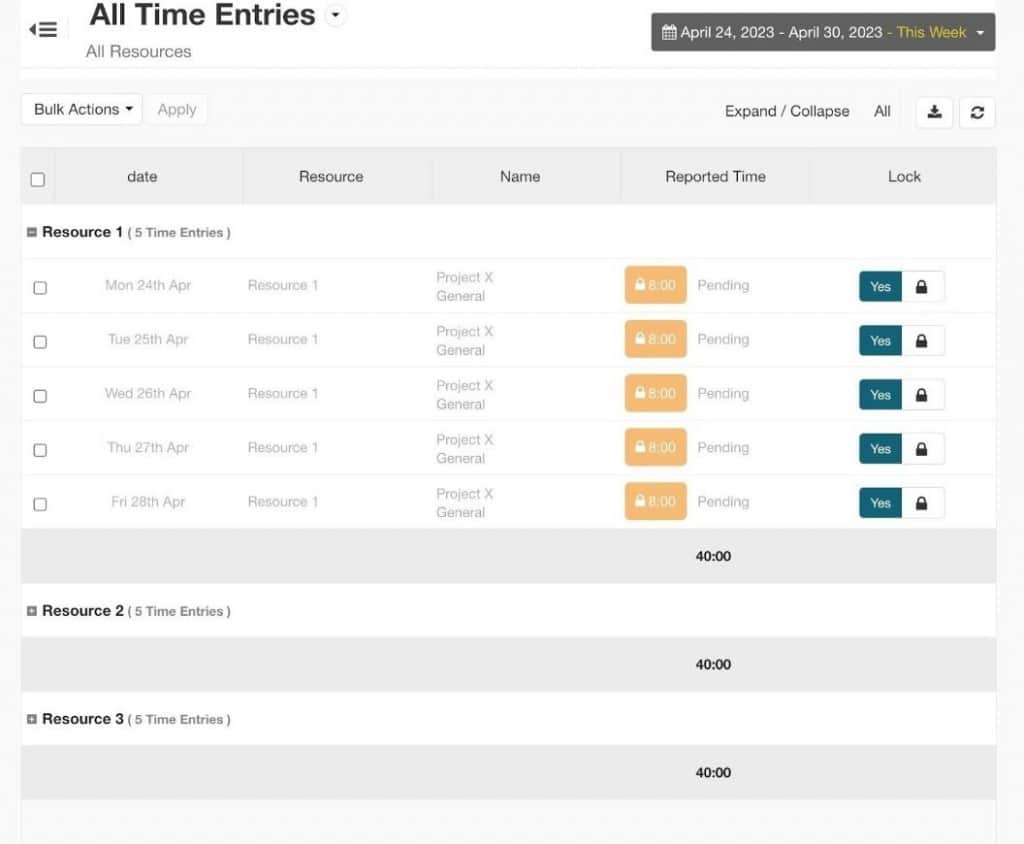
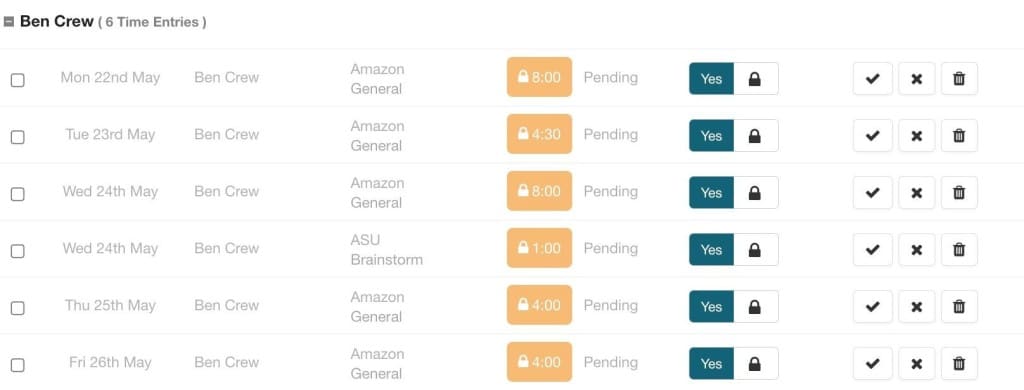
Timesheet entry is submitted and is ready for approval. The initial approver or gatekeeper, will review the time entry and action when ready. Once the approver is satisfied with the time entry, the approver simply locks the time entry. Now the time entry is ready the next and final step. The initial approver can also unlock a time entry as well as access to review the notes submitted alongside the time entry.
Action options for the first level of approval are as follows:
- Lock the timesheet entry ready for the final
- Unlock the timesheet entry
- Review notes of the timesheet entry
Once ready to proceed, the Approver will then complete the final step in the approval process.
Second level approval / final step
The Timesheet is submitted and the initial approval has been actioned. Now the time entry is ready for the second and final step to the two-step approval process. The final approver will now review and action each time entry.
Ready to approve, the simply click the approve button. The time entry is now complete. Like the first level approver, the second level approver will also have the option to lock and unlock the time entry. But they also have the option to approve, reject or delete the time entry. In addition, they can review the notes and check the billable status of the time entry too. If the final approver is not satisfied the time entry, they can opt to reject the time entry back to the resource. They will not lock the time entry so that the resource can alter their timesheet and resubmit.
Action options for the second level of approval are as follows:
- Approve timesheet entry
- Reject timesheet entry
- Delete timesheet entry
- Lock timesheet entry
- Unlock timesheet entry
- Review notes of the timesheet entry
- Check if the time entry is billable or non-billable
Want to try out Hub Planner Timesheets?
Start your 30 day free trial today. Also, why not schedule a call with one of our experts for an interactive tour of Hub Planner timesheets.